 |
|||
|
|
|||
|
|
|||
| ||||||||||
|
|
 TM 9-2990-206-34&P
INSPECTION-Continued.
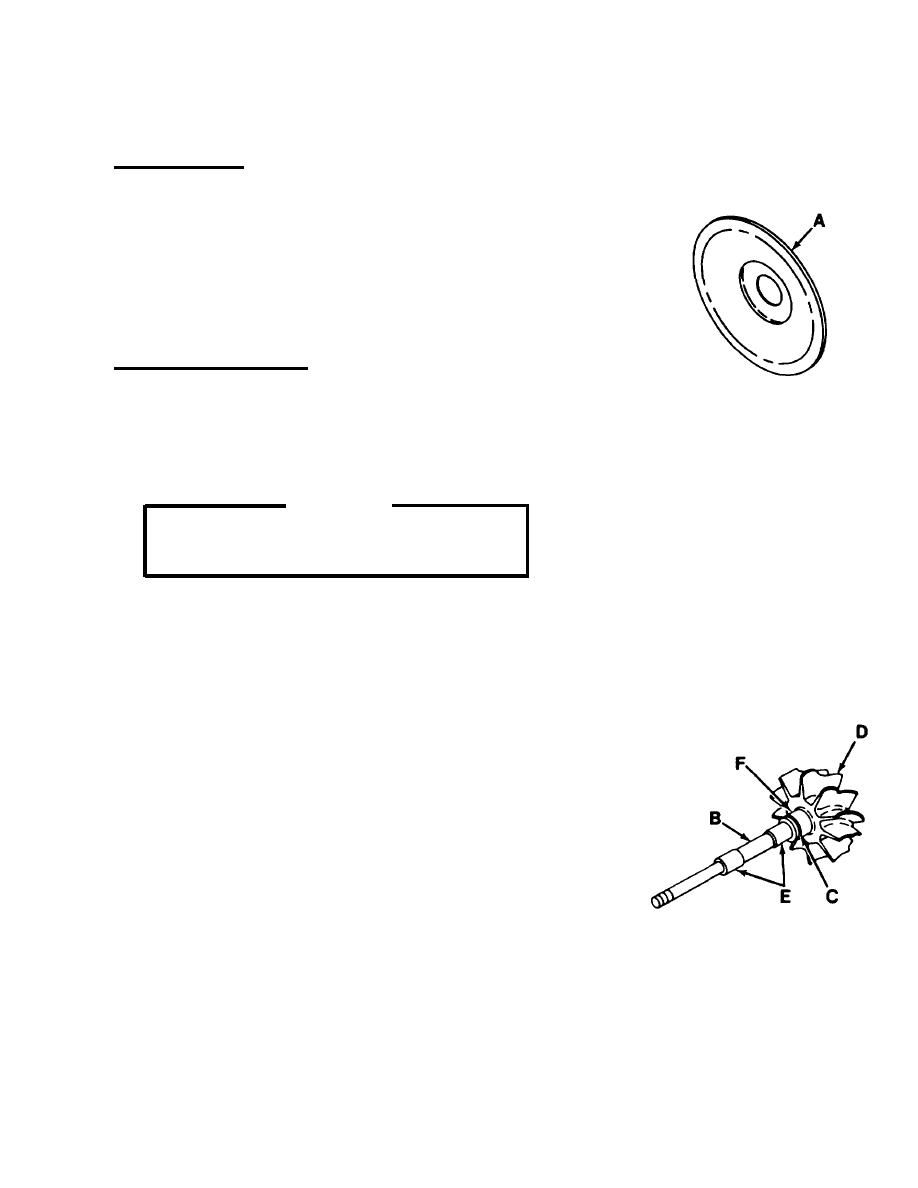
INSPECT SHROUD
Inspect shroud (A) for cracks, nicks, and
1.
raised metal.
2. Inspect mating flange for distortion. Inspect flat
face of shroud for evidence of rubbing or scoring
from the turbine wheel.
3. Replace damaged shroud.
INSPECT TURBINE WHEEL
TOOLS:
0.00 to 1.00 inch micrometer
0.0015 to O.025 inch blade thickness gage (feeler)
Vernier calipers
CAUTION
Cracked turbine wheel blades will break
during operation and cause failure.
Inspect turbine wheel (B) for cracked, broken, bent,
1.
eroded, or missing blades. Inspect shaft for cracks,
scratches, or scoring. Inspect bearing journals and
threads for damage. Inspect rear surface of turbine
wheel for evidence of wear or scoring. Inspect
seal ring groove (C) for wear.
2.
Inspect blade tips for feather-edge or tears.
Measure blade tips (D) with micrometer. Replace
3.
turbine wheel if damaged, or if blade thickness is
less than 0.025 inch (0.635 mm).
4.
Measure seal ring groove (C) width and diameter
using thickness gage and vernier calipers. Replace
turbine wheel if groove width exceeds 0.0685 inch
(1.7399mm) or groove diameter is less than 0.8600
inch (21.84 mm).
5.
Measure shaft bearing journals (E) using micrometer.
Replace turbine wheel if diameters are less than
0.6250 inch (15.875 mm).
Measure shaft hub diameter (F) using micrometer.
6.
Replace turbine wheel if diameter is less than
0.9950 inch (25.273 mm).
TA097821
3-15
|
|
Privacy Statement - Press Release - Copyright Information. - Contact Us |