 |
|||
|
|
|||
|
Page Title:
Disassembly of Commutator End Plate Assembly. |
|
||
| ||||||||||
|
|
 TM 9- 2920- 232- 34&P / TO 38X14- 2- 32
-
-
-
- -
DISASSEMBLY OF THE STARTER ASSEMBLY - CONTINUED
-
0008 00
j.
Inspect the housing for burs, scratches, and nicks on machined surfaces. Replace if defects cannot be
repaired.
k.
Inspect threads in tapped holes in housing for damaged threads. Replace housing if the threads are stripped.
l.
Check inside diameter of sleeve bearing. Replace bearing if it exceeds 0.624 to 0.627 inch.
m. Inspect sleeve bearing for rough spots, score marks, scratches, and nicks. Replace if defective.
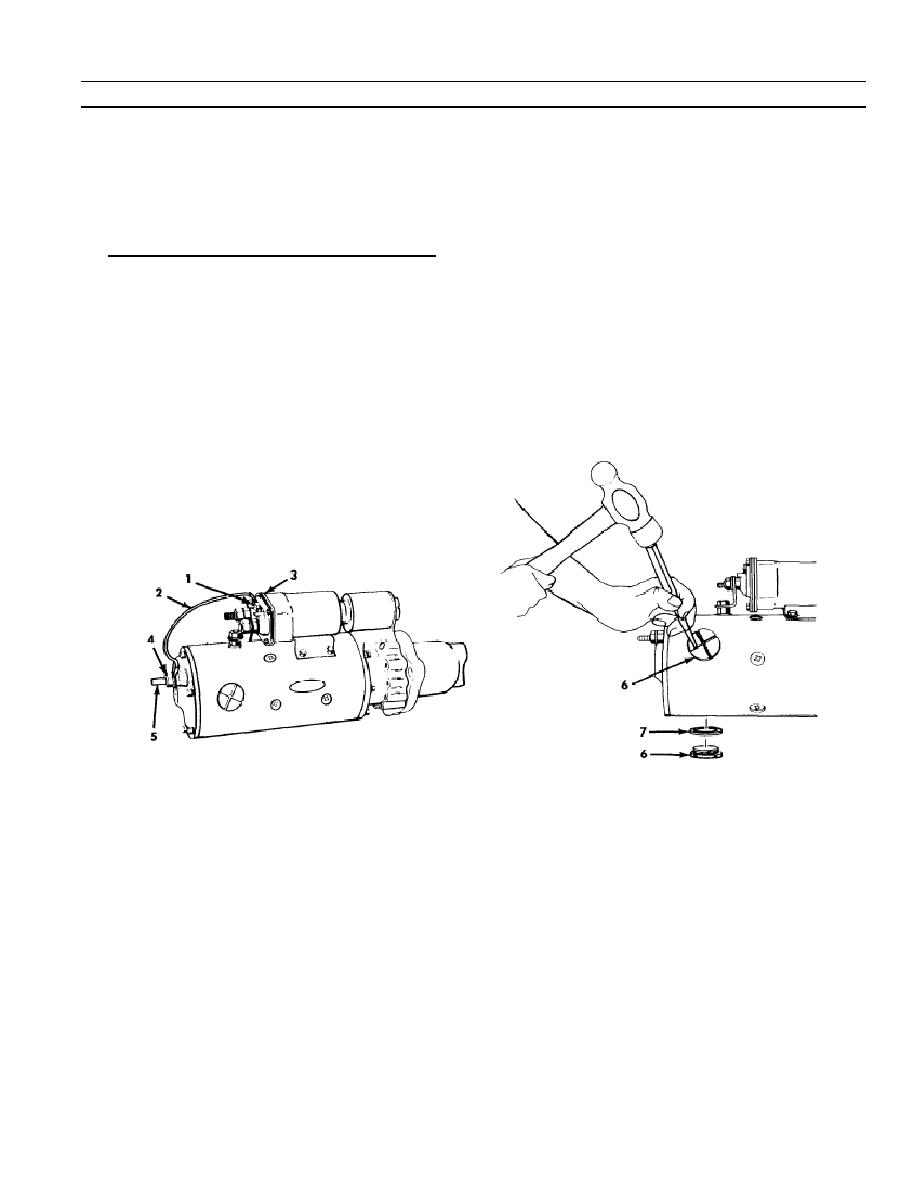
2. Disassembly of Commutator End Plate Assembly.
NOTE
There are two solenoid assemblies 1119872 (early) and 1115563 (late).
a. Remove washer nut (1) and electrical lead assembly (2) from terminal G of solenoid assembly (3). On early
model solenoid assembly, remove lower right nut and electrical lead assembly from terminal plate.
b. Remove washer nut (4) and electrical lead assembly from ground terminal stud (5).
c.
Use a drive pin punch and hammer to tap loose four machine thread plugs (6). Remove plugs and gaskets
(7). Discard gaskets.
0008 00- 3
-
|
|
Privacy Statement - Press Release - Copyright Information. - Contact Us |