 |
|||
|
|
|||
|
Page Title:
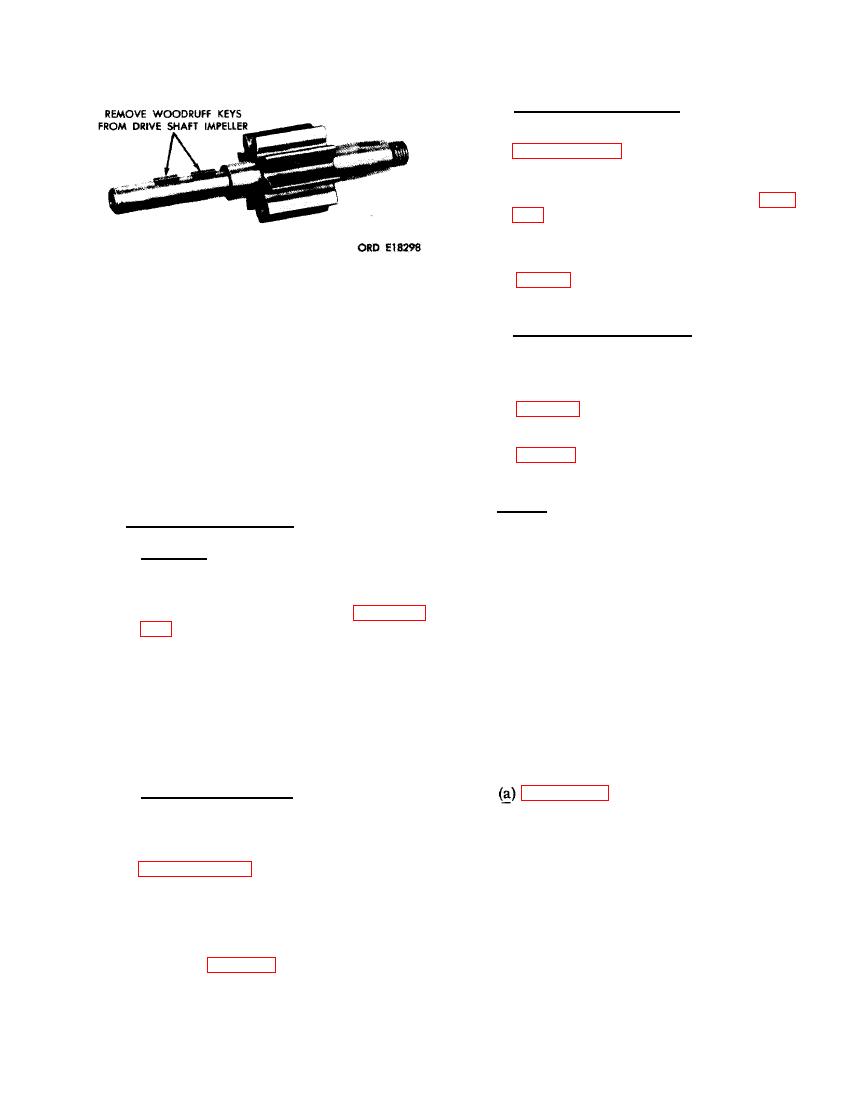
FIGURE 370. REMOVING OR INSTALLING DRIVE SHAFT IMPELLER WOODRUFF KEYS. |
|
||
| ||||||||||
|
|
 (3) Inspection of Impeller. Inspect all oil
pump drive and driven impellers (AA-3,
AA-5 AA- 9 and AA- 11) as directed in
paragraph 153e. Check the drive shaft
impeller (AA-3) and driven impeller
shaft (AA- 10) against limits specified
in repair and rebuild standards (par.
293). Check bushing-type bearings (AA-
9-a and AA- n-a) for burs, out-of-
round condition and against limits speci-
fied in repair and rebuild standards
serviceable parts.
DRIVE SHAFT IMPELLER WOODRUFF
(4) Inspection of relief valve. Inspect relief
KEYS.
valve cap (AA- 15) for damaged threads
and cracks. Inspect spring (AA- 13) for
cracks and wear and against limits spec-
ified in repair and rebuild standards
cracks, burs, and against limits spec-
ified in repair and rebuild standards
c. Repair.
b. Cleaning and Inspection.
(1) The only recommended repairs to oil
(1) Cleaning. Clean pressure oil pump hous-
pump components are the replacement
ing assembly (AA- 1), scavenger oil
of bushing-type bearings in the oil pump
pump housing assembly (AA-4), and
housing assembly (AA- 1), scavenger oil
scavenger oil pump housing cover as-
pump housing assembly (AA-4), pres-
sembly (AA- 6) as directed in paragraph
sure oil pump driven impeller assembly
(AA-11), pump housing cover assembly
impeller (AA-3), scavenger oil pump
(AA- 6), and oil pump driven impeller
drive impeller (AA- 5), scavenger oil
assembly (AA- 9). Minor nicks or raised
pump driven impeller (AA- 9), pressure
metal on wearing parts can be removed
oil pump driven impeller (AA- 11), relief
using a fine mill file.
valve plunger (AA- 12), spring (AA- 13),
and cap (AA- 15) in dry-cleaning solvent
(2) Replace bushing type bearings as fol-
or mineral spirits paint thinner. Dry all
lows.
parts with compressed air.
(2) Inspection of housing. Inspect pressure
oil pump housing assembly (AA- 1),
pump housing on press plates as shown.
scavenger oil pump housing assembly
(B) Position a new bushing-type bear-
(AA-4), and scavenger oil pump housing
ing against, and in alinement with, old
cover assembly (AA- 6) as directed in
bushing-type bearing in housing. (C)
Using a suitable pressing arbor, press
check all housIng and cover mating sur-
the new bushing-type bearing into
faces for warpage. Check diameter of
pressure oil pump housing while pres-
bushing-type bearings (AA-1-a, AA-4-
sing worn bushing-type bearing out of
a, AA-6-b) in housings and cover against
housing. The old bearing will act as a
limits specified in repair and rebuild
guide and prevent new bearing from
standards (par. 293).
becoming cocked and distorted.
229
|
|
Privacy Statement - Press Release - Copyright Information. - Contact Us |