 |
|||
|
|
|||
|
Page Title:
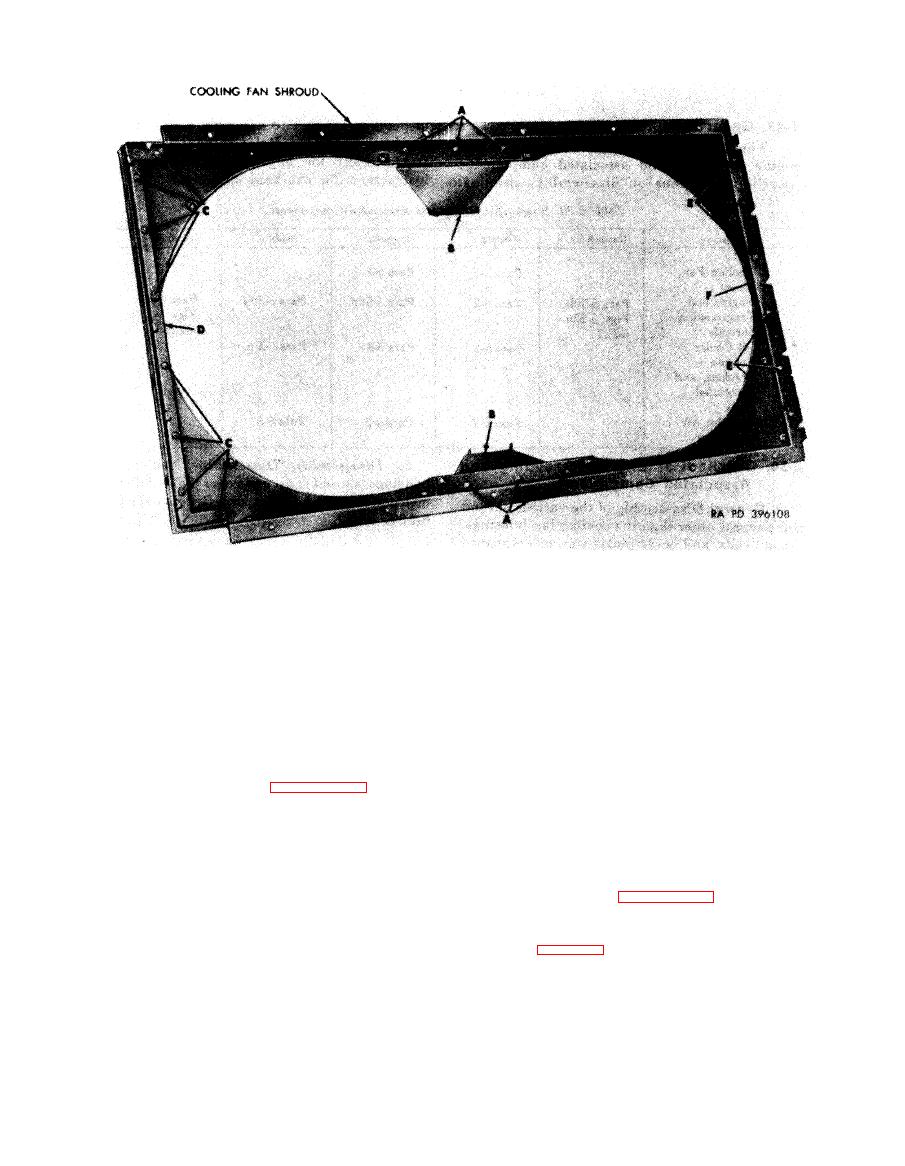
Figure 6-227. Removing or installing cooling fan shroud rails and cover |
|
||
| ||||||||||
|
|
 Install
Remove
1. Position front cooling fan shroud rail (F) on cooling
1. Remove
six-self-locking nuts (A) and bolts.
fan shroud.
2. Remove
two cover plates (B).
3. Remove
eight self-locking nuts (C) and bolts.
2. Install six self-locking nuts (E) and bolts.
3 . Position rear cooling fan shroud rail (D) on fan
4. Remove
rear cooling fan shroud rail (D).
shroud.
5. Remove
six self-locking nuts (E) and bolts.
4. Install eight self-locking nuts (C) and bolts.
6. Remove
front cooling fan shroud rail (F).
5. Position two cover plates (B) on fan shroud.
6. Install six self-locking nuts (A) and bolts.
plates.
inner shroud (21, fig. B-22). left outer shroud
c. Cleaning. Refer to paragraph 6-2.
d. Inspection and Repair. Refer to paragraphs
plate (22), turbosupercharger end shroud (24),
6-3 and 6-4, and (1) and (2), below.
right outer plate (29), and right inner shroud
plate (31) require painting with a high tem-
(1) In the event of complete reconditioning
of
the engine and transmission shrouds, the
perature
heat
resisting
paint
MIL-P-14276,
rubber seals found on some shrouds must be
FSN
8010-815-2692,
or
equivalent.
removed and discarded. All paint must be
stripped off to the bare metal before repainting.
Remaining shroud components not assembled at
After painting install new rubber seals on
this
point
will
be
assembled
during
engine
shrouds as required.
assembly,
(2)
Due
to
the
high
temperatures
en-
countered
near
the
turbosupercharger
the
left
6-192
|
|
Privacy Statement - Press Release - Copyright Information. - Contact Us |