 |
|||
|
|
|||
|
Page Title:
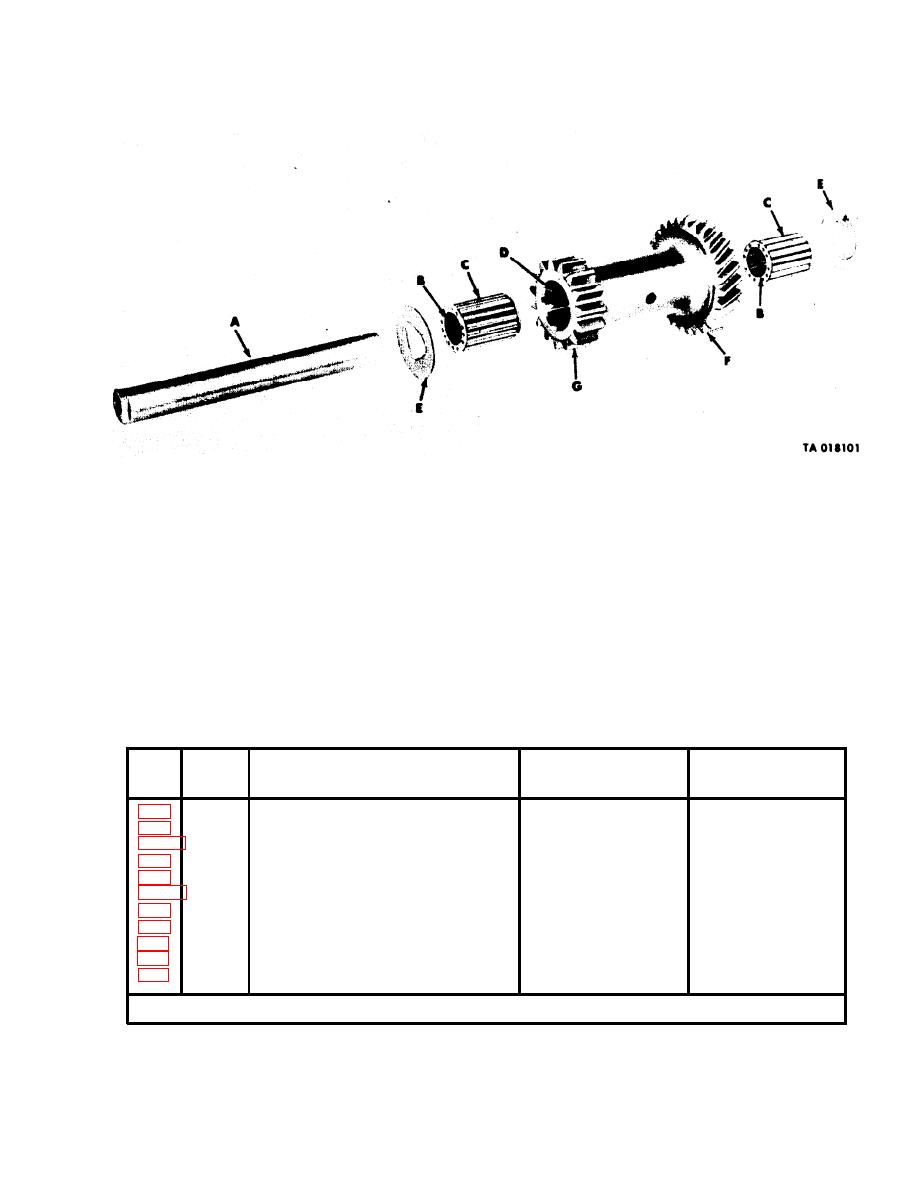
Figure 3-50. Repair and Replacement Standard Points of Measurement for Transmission Reverse Idler Gear and Shaft Assembly |
|
||
| ||||||||||
|
|
 TM 9-2520-246-34
Figure 3-50. Repair and Replacement Standard Points of Measurement for
Transmission Reverse Idler Gear and Shaft Assembly
Table 3-4. Repair and Replacement Standard Points of Measurement for
Transmission Reverse Idler Gear and Shaft Assembly
Ref
Size and Fit
Fig.
Point of Measurement
Wear Limits
Letter
No.
of New Parts
Outside diameter of shaft
A
1.010-1.015
.0015
Inside diameter of bearing
B
1.0155
(*)
Fit of bearing on shaft
A-B
.0005L-.0015L
(*)
Outside diameter of bearing
1.5000
C
(*)
Inside diameter of gear
1.5005-1.5015
D
.007
Fit of bearing in gear
C-D
.0005L-0.0015L
.010
Thickness of thrust washer
E
0.091-0.093
#
Reverse idler gear to countershaft
F
second-reverse gear (backlash)
F
0.006-0.012L
.016
Reverse idler gear to mainshaft
G
first-reverse gear (backlash)
T
0.008L-0.014L
.019
# Replace when bronze is partially or completely worn off.
3-25 (3-26 blank)
|
|
Privacy Statement - Press Release - Copyright Information. - Contact Us |