 |
|||
|
|
|||
|
Page Title:
REPLACE LEFT-HAND OUTPUT HOUSING |
|
||
| ||||||||||
|
|
 TM 9-2520-270-34
REPLACE LEFT-HAND OUTPUT HOUSING
DESCRIPTION
This task covers: Remove (page 4-314). Install (page 4-319).
INITIAL SETUP
Tools:
Materials/Parts:
Crowfoot attachment -- (Item 20, App C)
Cleaning Solvent
(Item 1, App B)
Crowfoot attachment (Item 21, App C)
Petrolatum -- (Item
7, App B)
Fixture removal assembly --
Wiping rag -- (Item
13, App B)
(Item 29, App C)
Wood blocks (2) --
(Item 4, App D)
Flat washer -- (Item 30, App C)
Gasket
General mechanic's tool kit:
Gasket
automotive -- (Item 33, App C)
Lock washer (10)
Hex-head cap screw -- (Item 36, App C)
Lock washer (28)
Lever arm -- (Item 43, App C)
Output housing installer --
Personnel Required:
(Item 57, App C)
Track Veh Rep 63H10
Self-locking nut (Item 67, App C)
Helper (H)
Socket wrench adapter (Item 75, App C)
Socket wrench set -- (Item 89, App C)
Equipment Conditions:
Torque wrench -- (Item 99, App C)
Torque wrench (Item 100, App C)
Transmission mounted on tip-over stand.
Lifting device with lift capability
See page 2-144.
of at least 3000 Ibs (1361 kg)
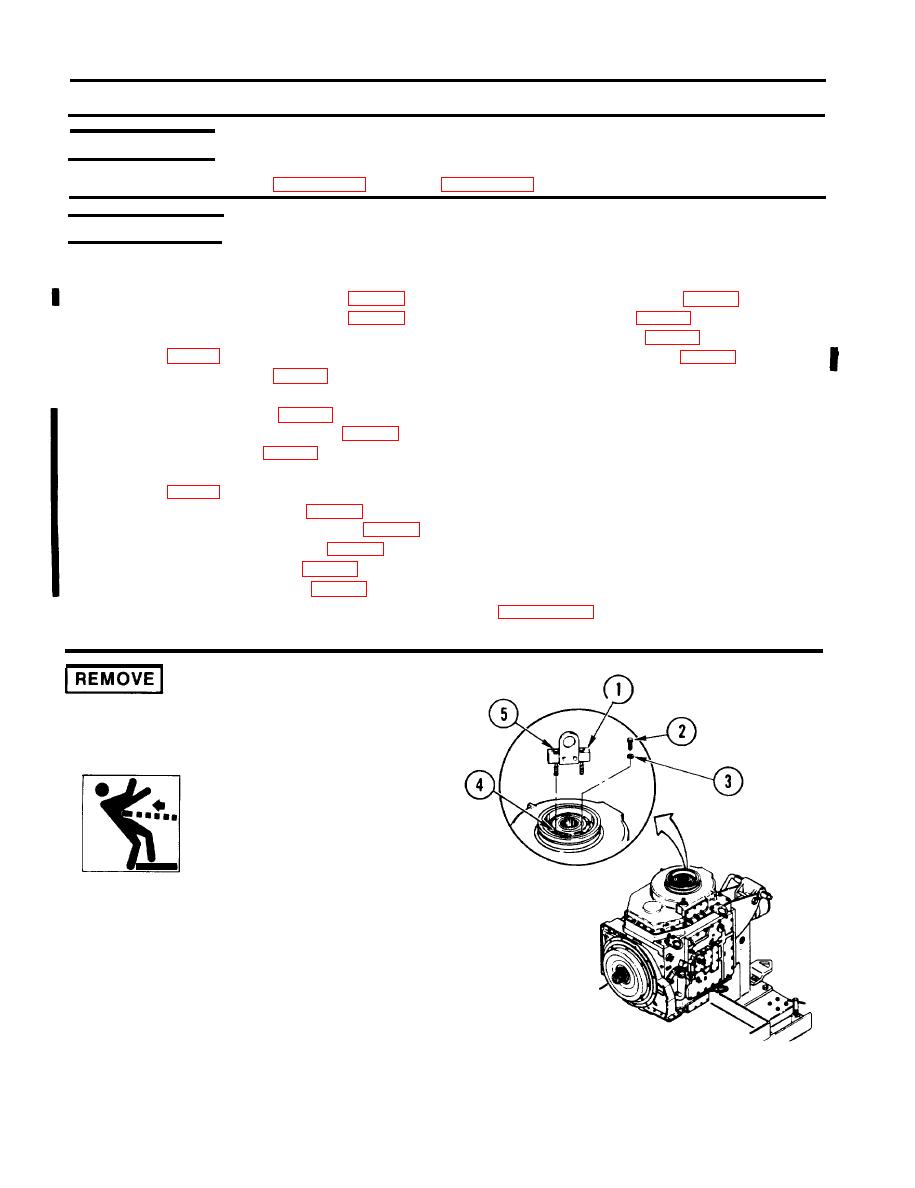
WARNING
Fixture removal assembly must
be installed in position shown.
Output housing is heavy. Im-
proper installation of removal
assembly can cause an uneven
lift and injury to personnel.
1. INSTALL FIXTURE REMOVAL
ASSEMBLY (1).
a. Remove two screws (2) and lock
washers (3).
b. Put removal assembly (1) on output
carrier (4).
c. Tighten two screws (5).
Change 1
4-314
|
|
Privacy Statement - Press Release - Copyright Information. - Contact Us |
