 |
|||
|
|
|||
|
Page Title:
REMOVE NO. 5 SEAL AND DIAPHRAGM ASSEMBLY |
|
||
| ||||||||||
|
|
 TM 9-2835-255-34
NO. 5 SEAL AND DIAPHRAGM ASSEMBLY REPLACEMENT (Sheet 3 of 7)
CAUTION
Remove No. 5 seal and diaphragm assembly (1) only
by using jackscrews. Otherwise, damage to seal will
occur.
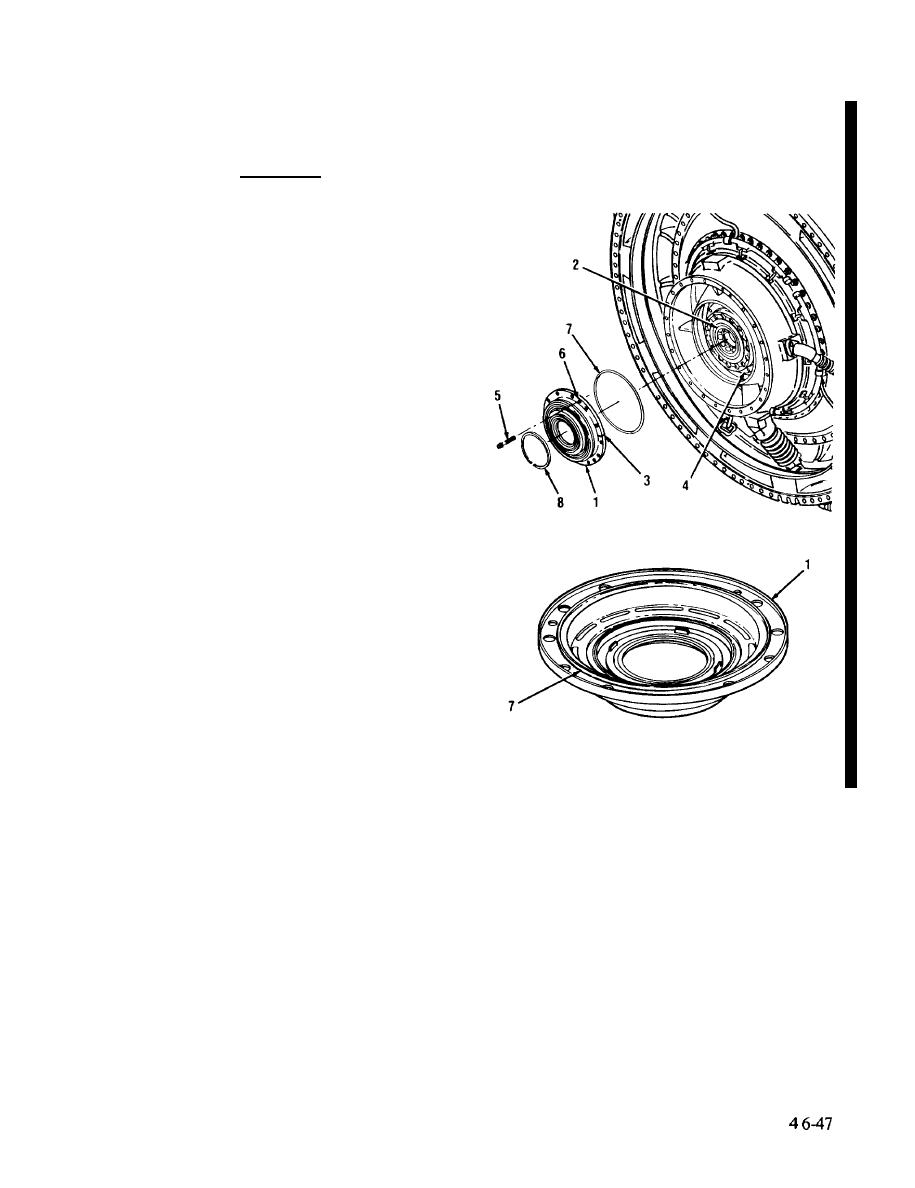
REMOVE NO. 5 SEAL AND DIAPHRAGM
7.
ASSEMBLY (1) FROM NO. 5 BEARING
HOUSING ASSEMBLY (2).
a. Using marker place a line (3) on dia-
phragm assembly (1) and power turbine
housing (4).
NOTE
Tighten three jackscrews (5) evenly opposite each
ottier.
b. Using three bolts (5) as jackscrews, in-
stall bolts into three threaded holes (6).
Tighten evenly until diaphragm assembly
(1) is away from bearing housing (2).
c. Remove diaphragm assembly (1) from
bearing housing assembly (2).
d. Remove special seal (7) from diaphragm
assembly (l).
e. Remove retaining ring (8) from diaphragm
assembly (l).
8.
INSPECT DIAPHRAGM ASSEMBLY (1)
FOR CRACKS. IF CRACKED, DO STEP 10.
IF DIAPHRAGM ASSEMBLY(1) IS NOT
CRACKED, DO STEP 9.
Go on to Sheet 4
Change
|
|
Privacy Statement - Press Release - Copyright Information. - Contact Us |