 |
|||
|
|
|||
|
|
|||
| ||||||||||
|
|
 TM 9-2835-255-34
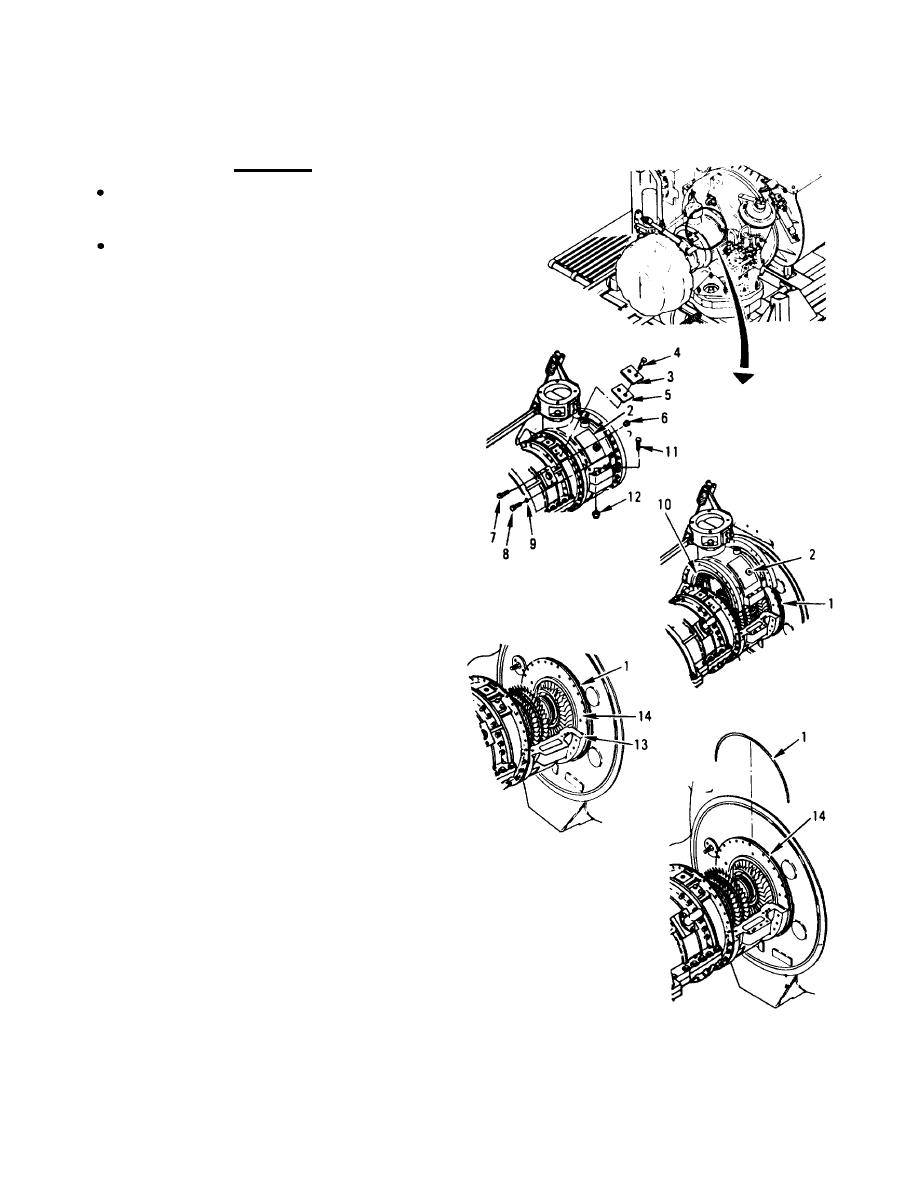
TURBINE AXIAL COMPRESSOR (HIGH PRESSURE) HOUSING (TOP HALF)
R E P L A C E M E N T (Sheet 3 of 5)
CAUTION
Be careful not to damage air seal (1) when
removing housing (2).
When working on internal parts of engine, make
sure dirt or any objects do not get in engine.
2. REMOVE TWO COVERS (3) AND
HOUSING (2).
a. Remove two bolts (4), covers (3), and
gaskets (5).
b. Remove 14 self-locking nuts (6) and bolts
(7). Remove 16 bolts (8) and
lockwashers (9).
NOTE
I f anv vane assemblies (10) come loose, set them
aside.
c. Remove 14 bolts (11) and self-locking nuts
(12). Remove housing (2).
3. INSPECT SEAL (1) FOR DAMAGE. IF
DAMAGED, CUT SEAL (1) EVEN WITH
FLANGE (13) ON BOTH SIDES OF
ENGINE. REMOVE SEAL (1) AND WIPE
SPACER HALF (14). USE RAG.
4. INSPECT ALL OTHER PARTS FOR
DAMAGE. REPLACE AS REQUIRED.
INSTALLATION:
NOTE
If seal (1) was removed, do step 1.
1. INSTALL NEW SEAL (1).
a. Cut seal (1) even with flange (13) on both
sides of engine. Remove seal (1) and wipe
spacer half (14). Use rag.
b. Apply shortening to seal (1) and install
on spacer half (14).
Go on to Sheet 4
5-3
|
|
Privacy Statement - Press Release - Copyright Information. - Contact Us |
