 |
|||
|
|
|||
|
|
|||
| ||||||||||
|
|
 C 1, TM 9-2815-213-34
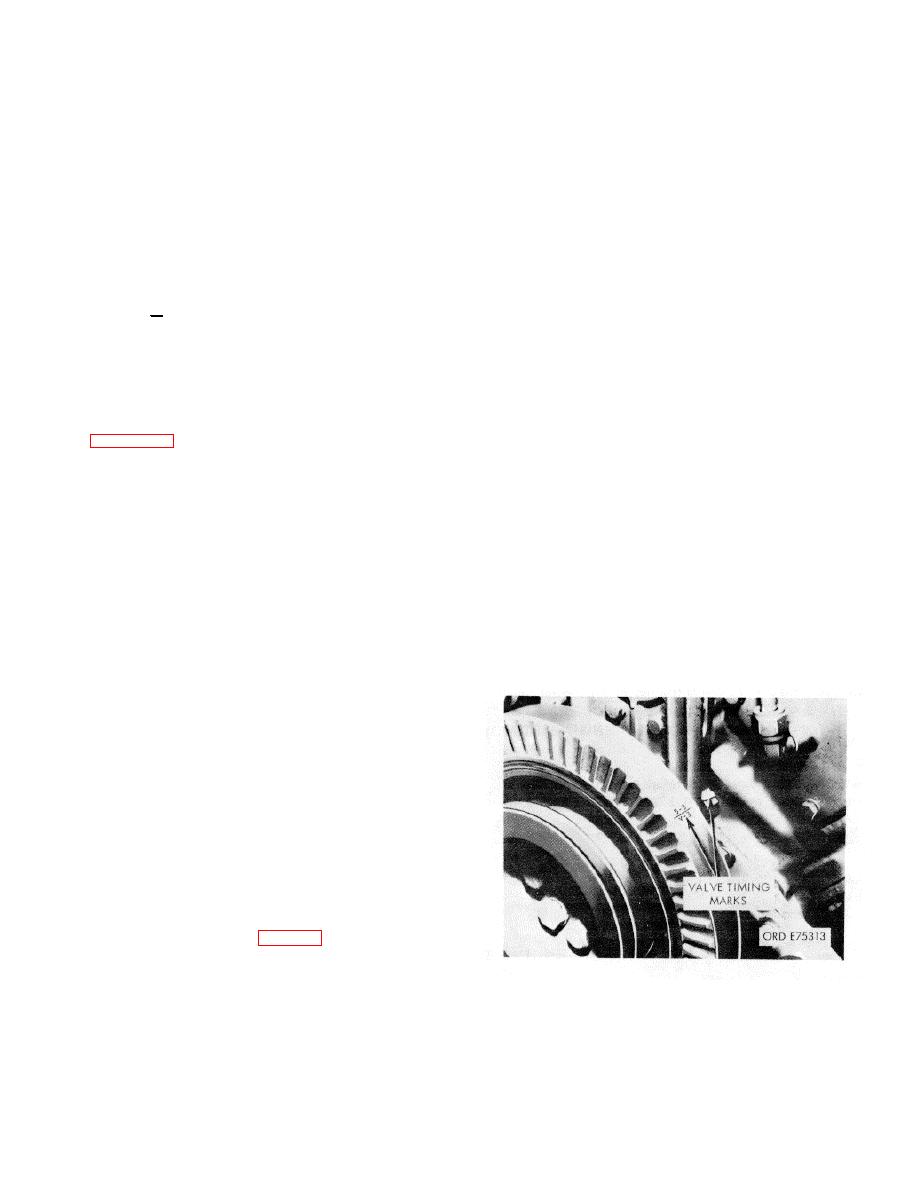
(3) Valve timing marks are located on the
(4) Advance adjusting screw slightly, then
vibration damper at the front of the engine (95).
loosen. Retighten adjusting screw until valve contact is
made.
(5) Tighten 7/16 inch high locknut 60 to 70 foot-
CAUTION
pounds torque.
Check that index marks on outer ring an
(6) Check clearance between crosshead and
hub of vibration damper aline. If no
valve spring retainer with a wire gage. There must be a
replace vibration damper.
minimum of 0.025 inch clearance at this point.
d. Value Clearance.
(4) To aline the timing marks rotate engine
manually in a counterclockwise rotation (left-hand as
viewed from flywheel low towards the fan) until one of the
NOTE
47
is in line with the "A" arrow head on the
sets of marks
The same engine position used in
vs.
In this position, both intake exhaust
front cover.
setting the injectors is used for setting
valves will be closed for one of the cylinders indicated.
the intake and exhaust valves.
Make adjustments or cylinder.
(5) Adjust injector plunger, then cross] and
(1) Loosen the locknut and back-off the
valves of each cylinder as explains succeeding
adjusting screw. Insert feeler gage between rocker lever
paragraphs. Turn crankshaft wise to the next VS mark
and top of crosshead; turn screw down until lever just
corresponding to order of the engine which is 1-5-4-8-6-
touches the gage. Lock adjusting screw in position with
3-7-2 figure 3-96 for complete sequence of adjusts
locknut.
(6) After injectors,
crossheads and v are
(2) Always make final valve adjustment after
adjusted for this cylinder, rotate crankshaft in direction of
injectors and crossheads are adjusted and with the
rotation (right-hand the next VS mark corresponding to
engine at operating temperature (140 degrees
the order of the engine and repeat the adjust
Fahrenheit). Valve clearances are as follows: Intake
procedures.
Valves: 0.016 inch at 70 degrees Fahrenheit, 0.014 inch
at 140 degrees Fahrenheit. Exhaust Valves: 0.029 inch
NOTE
at 70 degrees Fahrenheit, 0.027 inch at 140 degrees
Two complete revolutions (720 degrees)
Fahrenheit.
the crankshaft are needed to set all
(3) Position valve covers to heads with new
injector plungers,
crossheads and
gaskets. Secure with flatwashers, lockwashers, and
valve: Injectors, crossheads and valves
cap screws.
can E adjusted for only one cylinder at
any or VS setting.
3-168. Starting and Testing
b. Injector Plungers.
Engine break-in and testing are accomplished together.
(1) Turn adjusting screw down until plunger just
Break-in on a new or rebuilt engine is
contacts cup, then advance an addition degrees to
squeeze oil from cup.
(2) Loosen adjusting screw one turn.
(3) With a torque wrench calibrated in pounds
and a screwdriver adapter, tighter adjusting screw for a
cold setting (70 de Fahrenheit) at 50 inch-pounds torque.
setting 140 degrees Fahrenheit 50 inch-pounds.
c. Valve Crossheads.
(1) Loosen valve crosshead adjusting locknut
and back off screw one turn.
(2) Use light finger pressure at "A" to
crosshead in contact with valve stem at point "B" (fig 3-
97).
(3) Turn adjusting screw down until contacts its
mating valve stem at point "C' (fig. 3-97).
Figure 3-95. Valve timing marks.
3-58
|
|
Privacy Statement - Press Release - Copyright Information. - Contact Us |