 |
|||
|
|
|||
|
Page Title:
REPAIR CONTROLLER ASSEMBLY ENCASED SEALS |
|
||
| ||||||||||
|
|
 TM 9-2520-270-34
REPAIR CONTROLLER ASSEMBLY ENCASED SEALS
DESCRIPTION
The controller assembly has five shaft plain encased seals. This task is shown for one seal. It can be
used for all five seals. This task covers: Disassemble (page 3-44). Assemble (page 3-45).
INITIAL SETUP
Materials/Parts: (cont)
Tools:
General mechanic's tool kit:
Plain encased seal (5)
automotive -- (Item 33, App C)
Retaining ring (5)
Retaining-ring pliers (Item 60, App C)
Personnel
Required:
Shaft-seal driver (Item 68, App C)
Track Veh Rep 63H10
Materials/Parts:
E q u i p m e n t Conditions:
C l e a n i n g solvent(Item 1, App B)
T r a n s m i s s i o n oil(Item 12, App B)
T r a n s m i s s i o n mounted on tip-over stand.
Wiping rag(Item 13, App B)
See page 2-144.
WARNING
Solvent fumes can burn and
could poison you. Read warn-
ing in the front of this
manual.
CAUTION
Loose dirt on and around shaft can fall into
transmission when encased seal is removed.
Dirt inside transmission will cause damage.
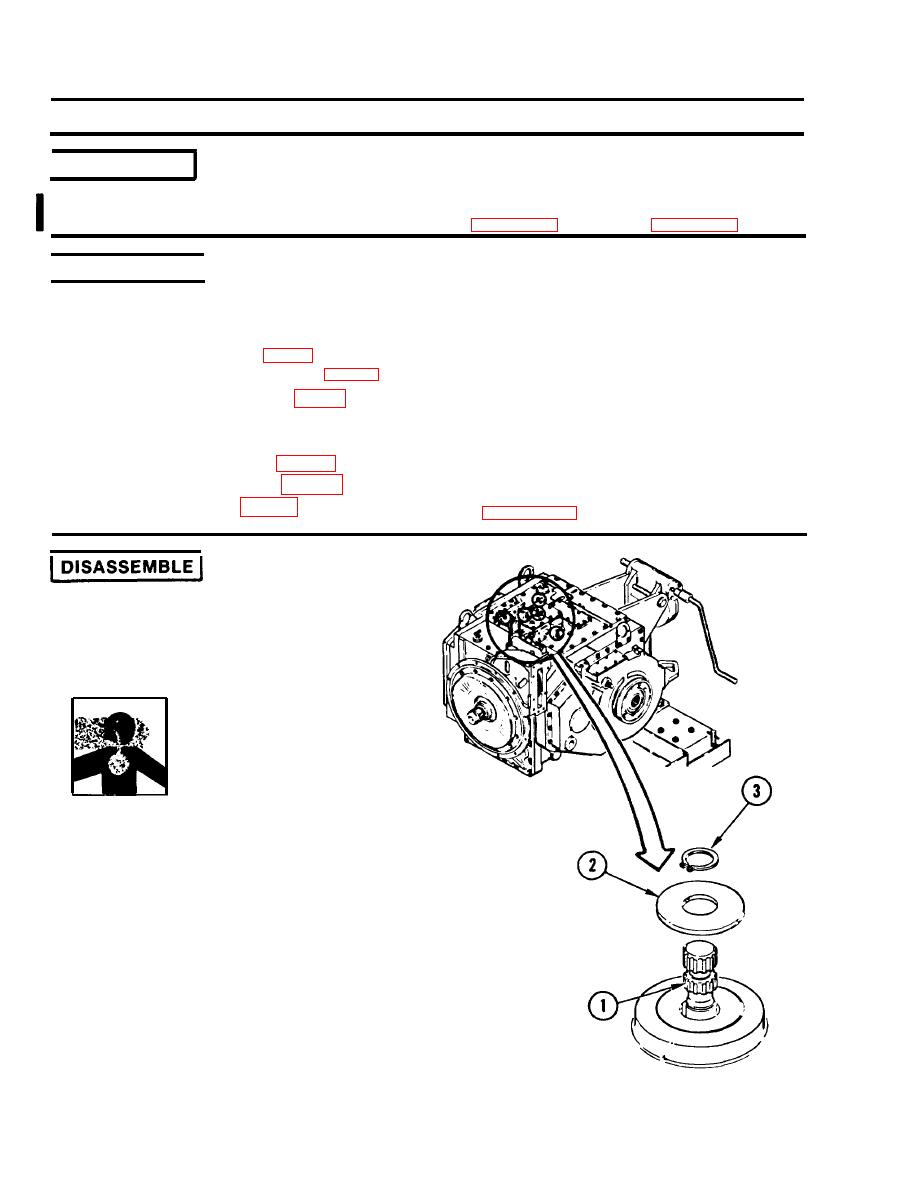
1. CLEAN AREA AROUND SHAFT(S) (1).
a. Use wiping rag dampened with
cleaning solvent.
2. REMOVE WASHER (2).
a . Using retaining-ring pliers, remove
and discard retaining ring (3).
b. Take off washer (2).
Change 2
3-44
|
|
Privacy Statement - Press Release - Copyright Information. - Contact Us |