 |
|||
|
|
|||
|
|
|||
| ||||||||||
|
|
 TM 55-1740-203-13&P
3-20. LEFT AND RIGHT SHOCK ABSORBING SPRING
A S S E M B L I E S - Continued.
(Refer to Figures 3-25, 3-26, and 3-27).
Reassembly.
f.
(1)
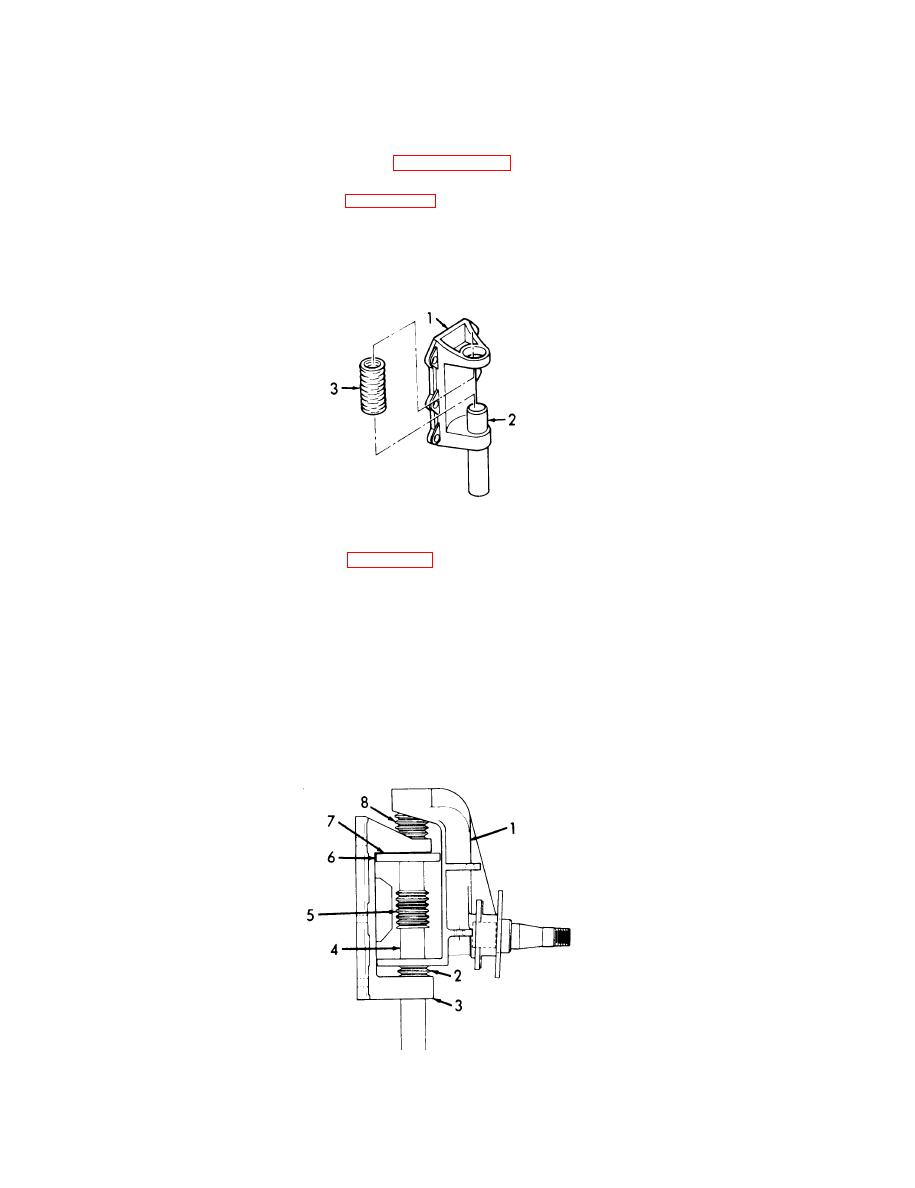
Install kingpin (2, Figure 3-25) through bottom hole of bracket (1) so that one inch
of kingpin extends from top of hole.
Install one dust cover (3) on part of k i n g p i n (2) extending
into
(2)
Compress dust cover.
bracket (1).
Kingpin, Installation.
Figure
3-25.
(3)
Position knuckle (1, Figure 3-26) over installed dust cover (2) and kingpin (4).
Push kingpin (4) up through bottom hole of knuckle (1). Posi-
(4)
tion dust cover (5) over kingpin.
(5)
Continue pushing kingpin (4) up through spring support
assembly (6).
(6)
I n s t a l l washer (7) between top of spring support assembly (6)
and bracket (3).
(7)
Push knuckle (1) toward top of bracket (3) and install dust
cover (8).
Spring
Support,
Installation.
Figure 3-26.
GO TO NEXT PAGE
3-58
|
|
Privacy Statement - Press Release - Copyright Information. - Contact Us |
