 |
|||
|
|
|||
|
|
|||
| ||||||||||
|
|
 TM 9-6685-202-14
6085. Do not apply oil directly to the surface since even
water and then in distilled or demineralized water.
a small amount will catch dust.
h. Dry all parts with clean chamois skin MP/N KK-
4-14. Assembly
C-300.
In general the reassembly of the individual
subassemblies of the barometer will follow the reverse
NOTE
order of disassembly shown in figures 4-3 through 4-8.
A new (previously unused) chamois
Individual operations that require particular care are
skin should be washed several times
presented below.
in detergent to remove tanning oils
and rinsed thoroughly in clear water.
a. Platform Assembly. If either level has been
removed, chip out all the old plaster from the level well
i. Blow off excess water droplets with clean
in the platform and set the new level temporarily in
compressed air or rinse in high-grade acetone, if
blocks of oily clay. Adjust the replaced bubble level
available.
against a master indicator and when a level indication is
j. Using a brush and cleaning compound, clean
obtained, set the level permanently in plaster of paris.
glass cistern in the same manner as described for metal
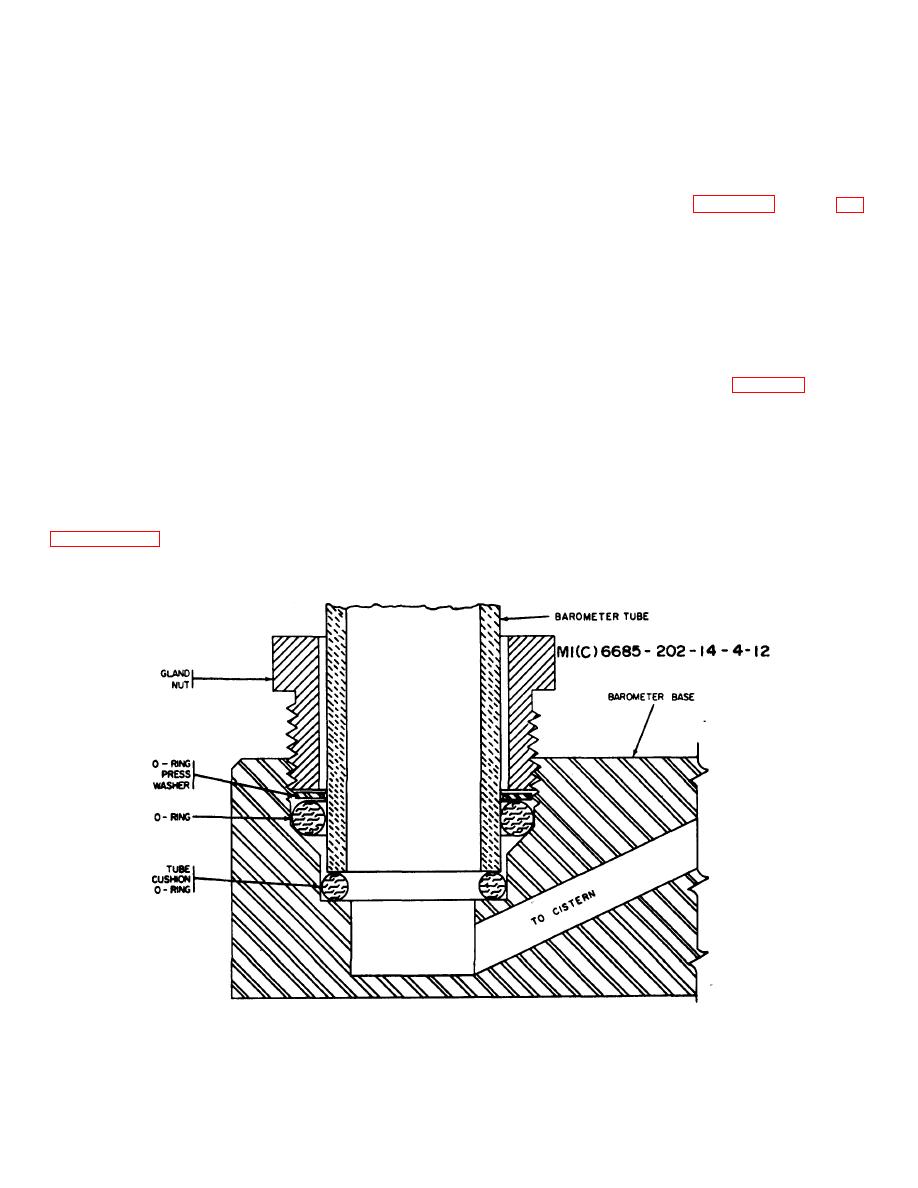
b. Cistern and Base Assembly (Fig. 4-12). Install
parts.
a new tube cushion O-ring packing and large O-ring
k. Using cleaning rod 7913102andapiece of
hydraulic packing. Press the O-ring press washer into
cheesecloth FSN 8305-205-3496 or clean rag, scrub the
the gland nut well in the barometer base. Apply a small
barometer tube thoroughly.
quantity of sealant grease (Fisher Scientific Company,
l. Rinse glass parts thoroughly with hot water and
Part Number 14-637 or equal) to the lower two or three
finally with distilled water. Blow clean, dry air through
threads of the gland nut, being careful not to
tube until dry.
contaminate the other items. Screw the gland nut into
m. Reassemble the barometer in accordance with
the barometer base, but do not tighten until the
barometer tube is installed.
n. Wipe the scale and thermometer rods with a
soft cloth containing a few drops of instrument oil MIL-L-
Figure 4-12. Installation of gland nut.
4-29
|
|
Privacy Statement - Press Release - Copyright Information. - Contact Us |
