 |
|||
|
|
|||
|
|
|||
| ||||||||||
|
|
 TM 9-4940-544-14&P
5. Flip Selector Switch to "SOCKET ON" position
8. Push on Vise Carriage to start socket on
nipple.
Note: To disassemble socket from hose move
9. Release Foot Switch when socket starts to
S e l e c t o r Switch to "SOCKET OFF"
cross thread undercut and allow socket to
position.
coast up to nipple hex (Fig. 6).
6. Step on Foot Switch (Fig. 1).
Important: Never bottom socket against nip-
ple hex with power on.
Important: Never reverse Selector Switch and
step on Foot Switch until chuck has
completely stopped to prevent dam-
age to Motor.
7. Push on Vise Carriage (Fig. 4) to start hose
into socket.
8. Release Foot Switch when hose is assembled
to socket.
9. Loosen Vise and Chuck and remove socket
with hose.
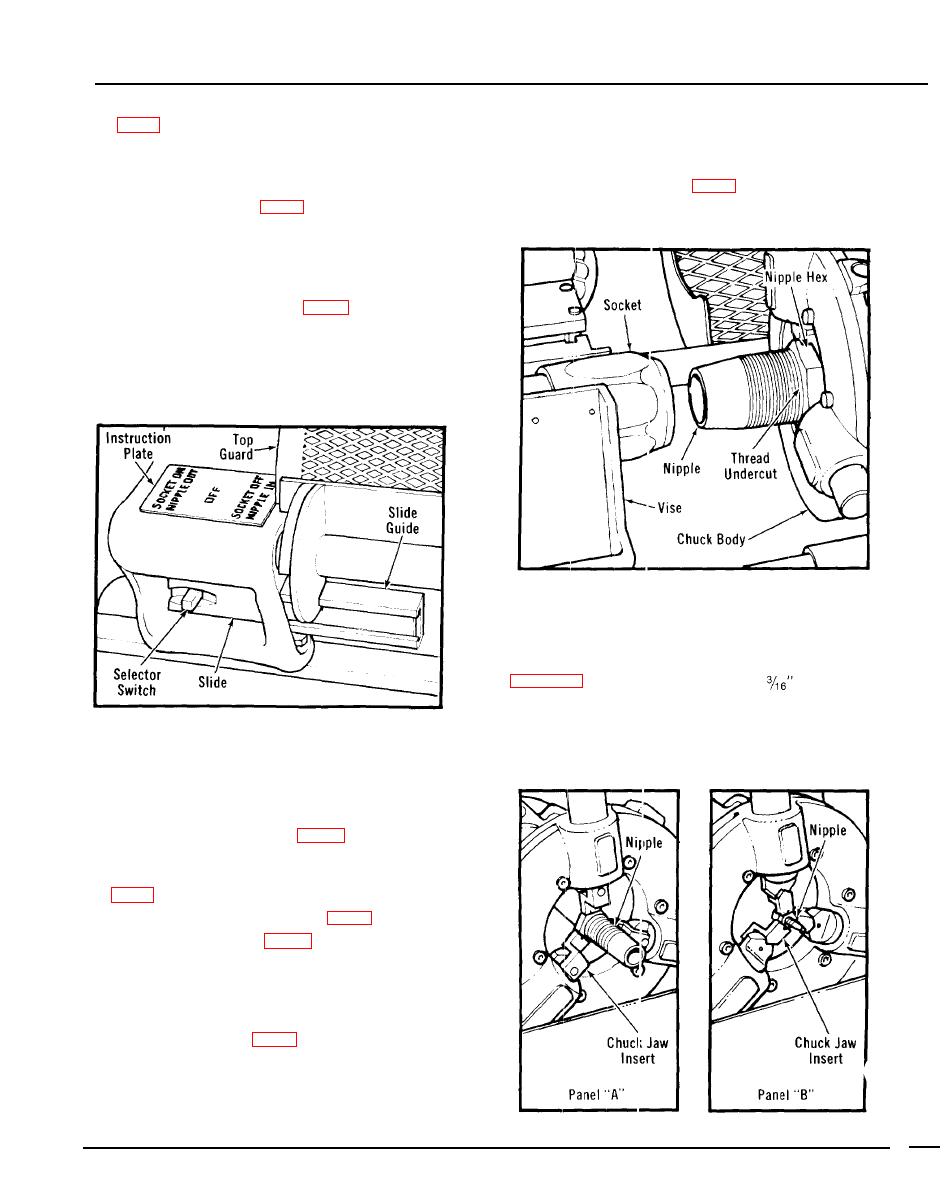
Chuck Jaw Inserts
Position Chuck Jaw Inserts as shown in Panel "B",
through 1".
For smaller size bent tube nipples position Chuck
Jaw Inserts as shown in "A" or "B" as required.
Larger bent tube ends do not require use of Chuck
Plate.
Jaw Inserts.
Assembling Nipple to Socket
1. Apply lube to end of nipple and inside of hose.
2. Install Chuck Jaw Inserts, if required.
3. Clamp nipple in chuck (Fig. 6) using Chuck
Wrench.
4. Remove Chuck Wrench and close Top Guard
5. Clamp socket with hose in vise (Fig. 6).
6. Flip Selector Switch (Fig. 5) to "NIPPLE IN"
position.
Note: To disassemble nipple from socket flip
Selector Switch to "NIPPLE OUT"
position.
7. Step on Foot Switch (Fig. 1).
Important: Never reverse Selector Switch and
step on Foot Switch until chuck has
completely stopped to prevent dam-
age to motor.
9
4
|
|
Privacy Statement - Press Release - Copyright Information. - Contact Us |
