 |
|||
|
|
|||
|
|
|||
| ||||||||||
|
|
 TM 9-2815-224-34&P
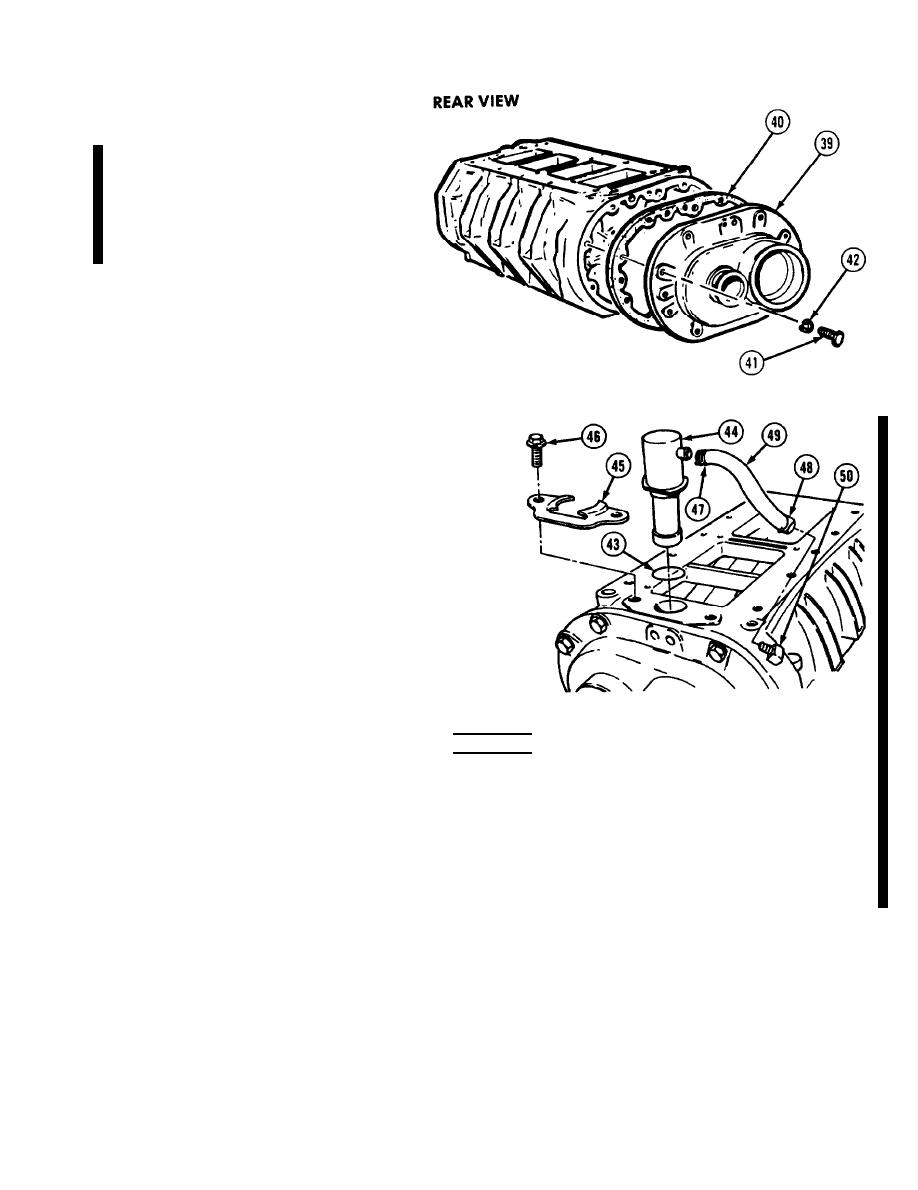
Blower Maintenance Instructions (Cont)
Install rear end plate
(72)
cover (39) with gasket (40).
NOTE
Some blowers have ten screws and
lockwashers. Others have nine screws and
lockwashers.
Install nine or ten screws (41)
(73)
and lockwashers (42).
Tighten screws (41) evenly to
(74)
15 lb-ft (20 Nm).
NOTE
Some engines are equipped with a bypass valve on
the blower. If equipped with bypass valve, do
steps (75) through (83). If not, go to Follow-on
Maintenance.
Install preformed packing (43) on
(75)
bypass valve (44).
Install bypass valve (44) until fully
(76)
seated.
Install pressure clamp (45) on bypass
(77)
valve (44).
Install two screws (46) in pressure
(78)
clamp (45). Tighten screws 23 to 26
lb-ft (31 to 35 Nm).
Install two clamps (47 and 48) on
(79)
hose (49).
WARNING
Adhesives solvents, and
sealing compounds can burn easily, can give off harmful
vapors, and are harmful
to skin and clothing. To avoid injury or death, keep away
from open fire and use
in well-ventilated area. If adhesive, solvent, or sealing
compound gets on skin
or clothing, wash immediately with soap and water.
Apply sealing compound on threads of hose fitting (50).
(80)
Install hose fitting (50) securely in position as noted during disassembly.
(81)
Install hose (49) on bypass valve (44) and hose fitting (50).
(82)
Position clamps (47 and 48) over hose (49) on bypass valve (44) and hose fitting (50).
(83)
d. Follow-on Maintenance. None.
END OF TASK
Change 2
|
|
Privacy Statement - Press Release - Copyright Information. - Contact Us |
