 |
|||
|
|
|||
|
|
|||
| ||||||||||
|
|
 TM 9-2815-213-34
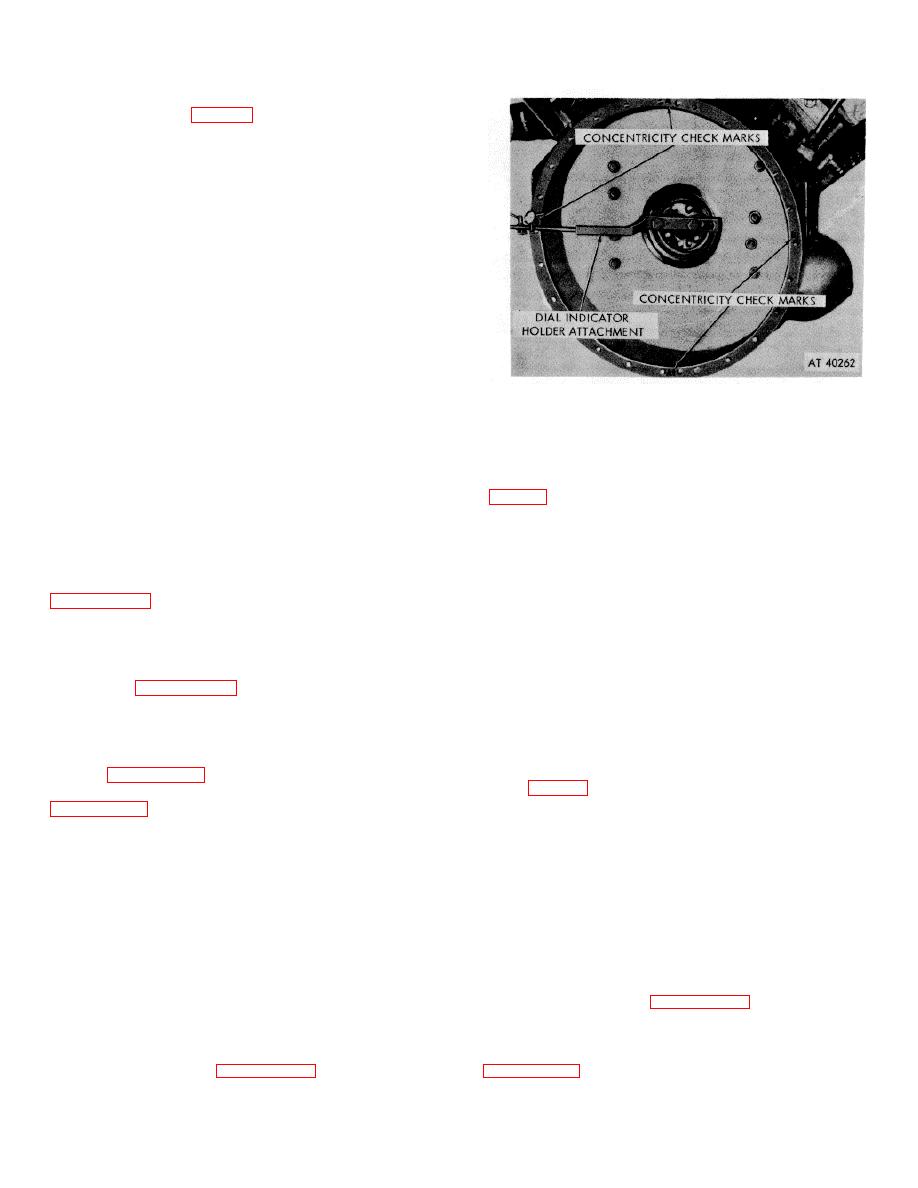
(3) Turn crankshaft and check at points A, A', B,
and B' housing face (fig. 3-21).
NOTE
Take up crankshaft end clearance in
the same direction each time a
measurement is taken.
(4) Total flywheel housing face run-out must not exceed
0.008 inch.
(5) If necessary, to correct housing face run-out,
after the bore has been alined, remove housing and
recheck mating surfaces. Then install housing on
housing dowels and install capscrews. Tighten
capscrews to 35 foot-pounds torque.
Figure 3-21. Flywheel housing concentricity check.
Section X. Repair of Oil Pan
3-46. Disassembly
3-51. Installation
Remove drain and pipe plugs.
a. Shellac new single-piece gasket (9) to pan.
b. Aline pan to block and install 12 capscrews,
lockwashers, and flat washers (25, 3, and 24), finger
3-47. Cleaning
tighten capscrews.
c. Reach inside inspection opening on right side of
Clean oil pan in accordance with instructions contained in
pan and install two capscrews and lockwashers (10 and
11) securing suction and scavenger tubes (13 and 20) to
sump.
3-48. Inspection
d. Shellac new single-piece gasket (7) to inspection
plate (6).
Inspect pan and plugs in accordance with instructions
e. Install plate with six capscrews and lockwashers
contained in paragraph 2-6.
(5 and 3).
f. Aline oil pan to flywheel housing and install two
3-49. Repair
capscrews (12), lockwashers (3) and flat washers (24),
finger tighten. Install six capscrews, lockwashers, and flat
a. Repair damaged threaded holes by tapping.
washers (16, 10, and
Refer to paragraph 2-7 for instructions.
9. fig. B-4). Tighten all oil pan securing capscrews.
b. Repair small cracks by welding. Refer to
CAUTION
Do not weld finished surfaces.
3-50. Assembly
Install all pipe plugs and drain plugs.
Section XI. Repair of Flywheel
3-52. Disassembly
3-54. Inspection
Using blunt chisel and mallet drive the ring gear from the
Inspect flywheel and ring gear in accordance with
flywheel. Apply pressure, during removal, at various
instructions contained in paragraph 2-6.
positions around ring gear to prevent distortion.
3-53. Cleaning
3-55. Repair
Clean flywheel and ring gear in accordance with
No repair procedures beyond those specified in
instructions contained in paragraph 2-5.
3-13
|
|
Privacy Statement - Press Release - Copyright Information. - Contact Us |
