 |
|||
|
|
|||
|
Page Title:
Figure 6-208. Removing or installing camshaft drive adapter and associated parts |
|
||
| ||||||||||
|
|
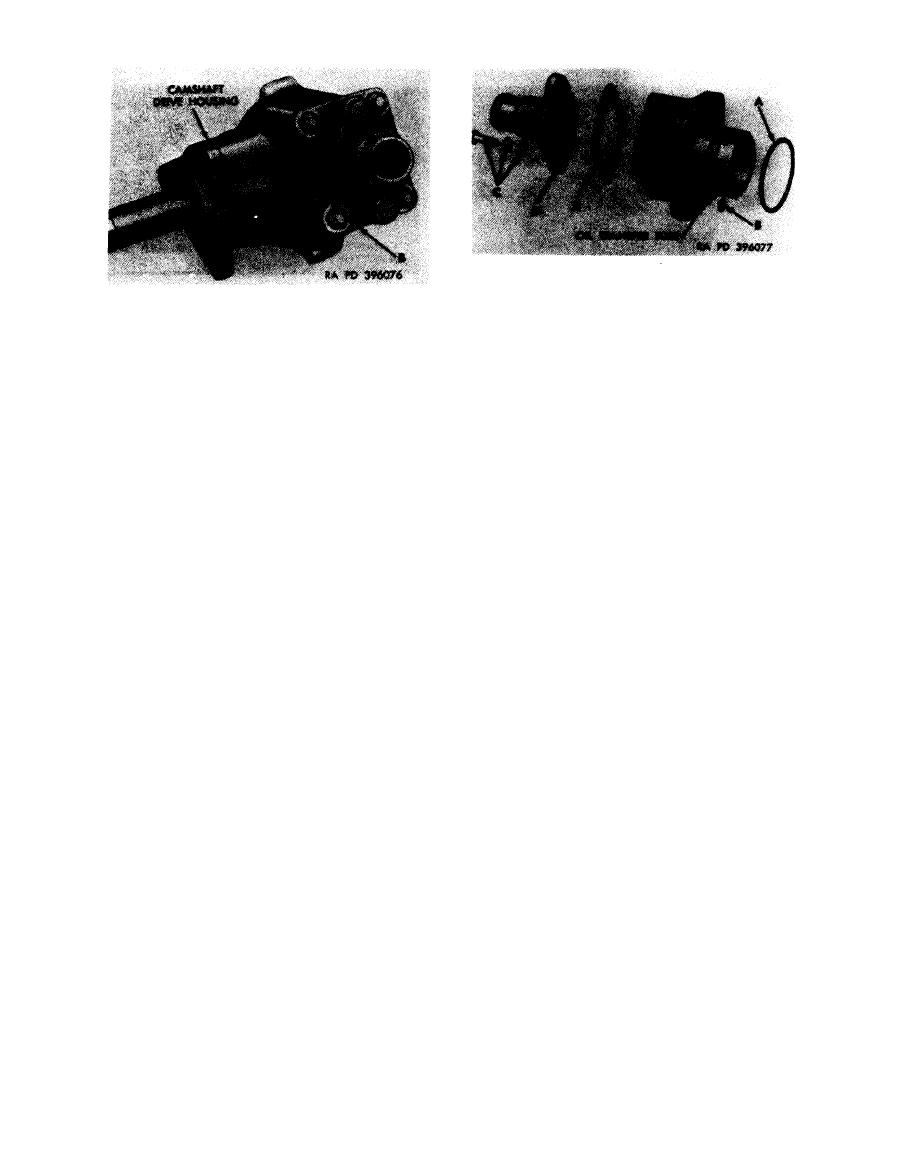 Disassemble
1. Remove preformed packing (A) from drive adapter
and discard packing.
Remove
2. Remove preformed packing (B) from oil transfer tube
1. Remove four self-locking nuts (A) and flat washers.
in drive adapter and discard packing.
2. Remove camshaft drive adapter (B) and associated
3. Remove two bolts (C), lock washers, and flat washers.
parts as a unit from camshaft drive housing.
4. Remove camshaft drive shaft flange (D).
Install
5 . Remove and discard camshaft drive shaft flange
1. Position camshaft drive adapter (B) and associated
gasket (E).
parts as a unit on camshaft drive housing.
Assembly
2. Install four self-locking nuts (A) and flat washers.
1. Position a new camshaft drive shaft flange gasket (E)
on camshaft drive adapter.
Figure 6-208.
Removing or installing
2 . Position camshaft drive shaft flange (D) on drive
camshaft
drive adapter and
adapter.
associated
parts.
3. Install two bolts (C), lock washers, and flat washers.
4. Position a new preformed packing (B) on oil transfer
tube in drive adapter.
5 . Position a new preformed packing (A) on drive
adapter.
Figure
6-209.
Disassembling
or
assembling
camshaft
drive
adapter
and
associated
parts.
6-175
|
|
Privacy Statement - Press Release - Copyright Information. - Contact Us |
