 |
|||
|
|
|||
|
Page Title:
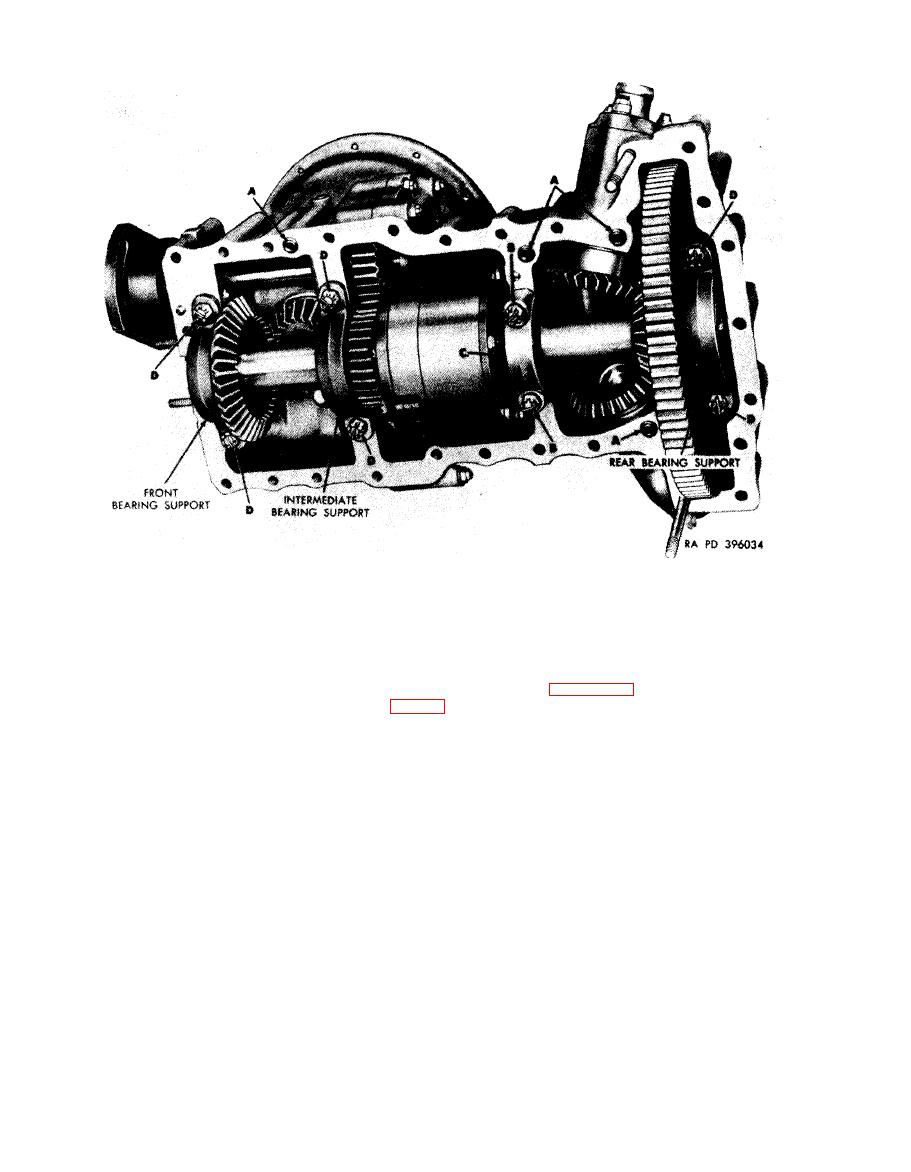
Figure 6-157. Removing or installing bearing cap and bearing support attaching parts. |
|
||
| ||||||||||
|
|
 Remove
4. Remove six cotter pins, slotted nuts (D), and flat
1. Remove and discard four preformed packings (A)
washers attaching front, intermediate, and rear bearing
from oil transfer tubes.
supports.
2. Remove two cotter pins, slotted nuts (B), and flat
Install
washers attaching injection advance bearing cap.
1. Install six cotter pine, dotted nuts (D), and flat
3. Remove injection advance bearing cap (C).
washers securing front, intermediate, and rear bearing
supports.
Note. Bearing cap and accessory drive housing
2. Refer to figure 6-206 and install injection advance
bearing cap (C) in appropriate position.
a r e stamped with corresponding numbers (fig. 6-
3. Install two cotter pins, slotted nuts (B), and flat
2 0 6 ) to prevent mismating of parts. Cap should
washers securing injection advance bearing cap.
be loosely attached on housing after advance
4. Install four new preformed packings (A) in oil transfer
assembly is removed.
tubes.
support attaching parts.
6-136
|
|
Privacy Statement - Press Release - Copyright Information. - Contact Us |