 |
|||
|
|
|||
|
|
|||
| ||||||||||
|
|
 TM 9-2520-270-34
17.1 DELETED.
17.2 DELETED.
CAUTION
CAUTION
Use care when installing linkage. Attaching
Do not let any hoses rub against link. Damage
parts are small and may fall into transmission
to equipment can occur.
during installation. Damage to equipment can
occur.
18. INSPECT LINK (1).
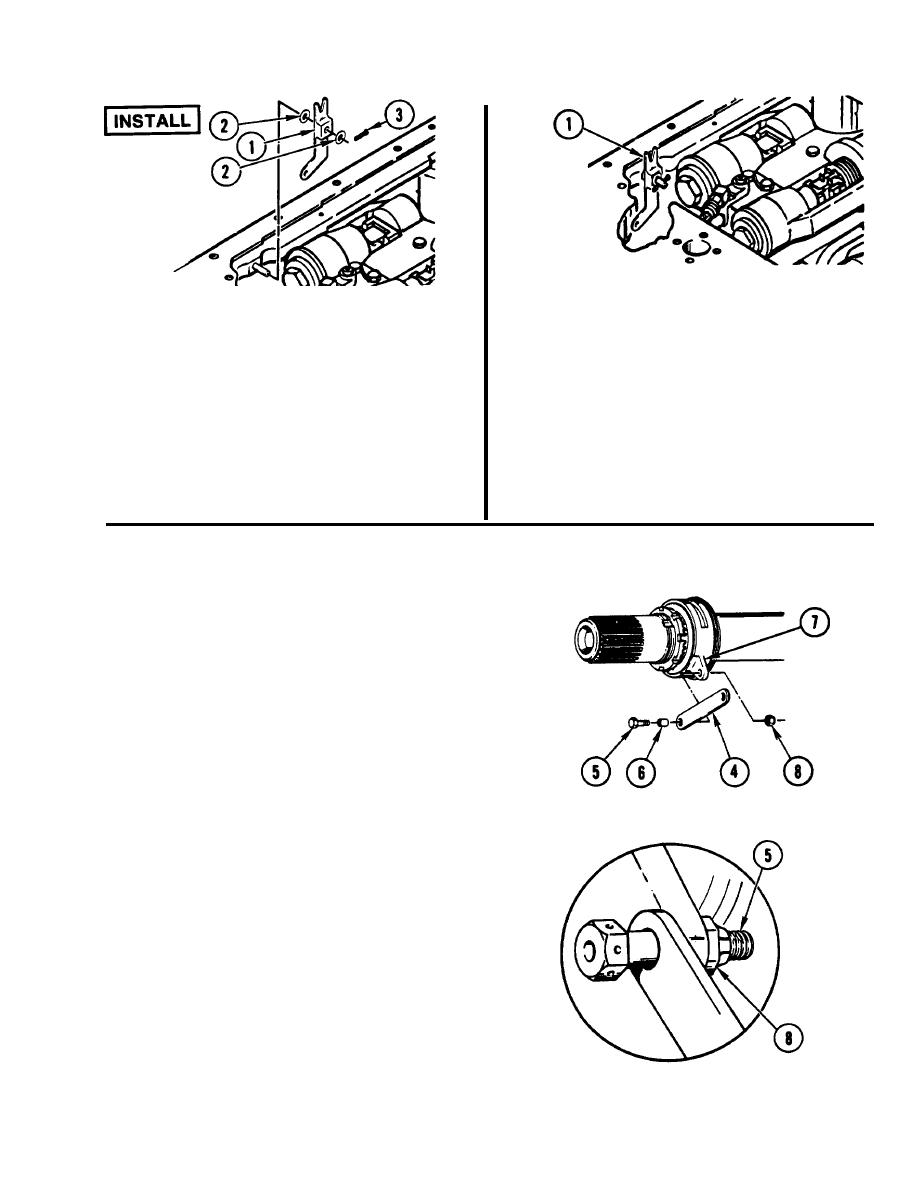
17. INSTALL LINK (1).
a. inspect link (1) for free movement.
a. Install washer (2) link (1), and second
b. If link (1) does not move freely go to
washer (2).
step 13. if link moves freely, go to
step 18.1.
b. Install new cotter pin (3).
18.1 INSTALL LINK (4).
a. Install longer bolt (5), longer sleeve
bushing (6), and link (4) on
housing (7).
b. Install new self-locking nut (8).
19. USING 3/8-INCH DRIVE TORQUE
WRENCH AND 3/8-INCH SOCKET,
TORQUE NUT (8) TO 45-50 in-lb
(52-58cmkg).
CAUTION
Do not contact nut when distorting threads
with wirecutter pliers. Damage to equipment
can occur.
19.1 DISTORT THREADS OF BOLT (5).
a. Using wirecutter. pliers close to nut (8),
distort two threads on two sides of
bolt (5).
20. INSPECT LINK (4).
inspect link (4) for free movement.
a.
If link (4) does not move freely, go to
b.
step 21. if link moves freely, go to
step 23.
GO TO NEXT PAGE
4-461
Change 3
|
|
Privacy Statement - Press Release - Copyright Information. - Contact Us |
