 |
|||
|
|
|||
|
|
|||
| ||||||||||
|
|
 TM 9-2520-270-34
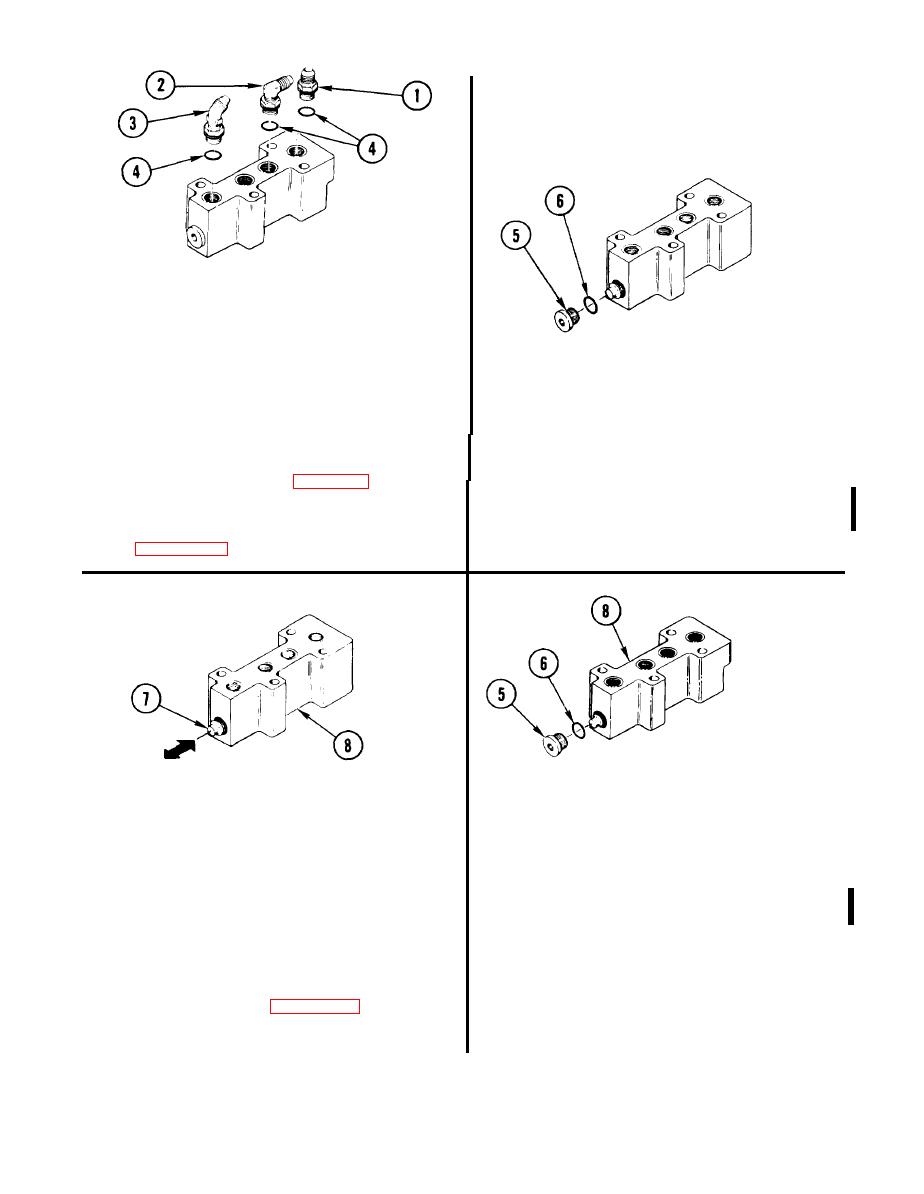
10. REMOVE SECOND ADAPTER (1) AND
ELBOWS (2), AND (3).
a. Remove second adapter (1).
b. Remove 90-degree elbow (2).
c. Remove 45-degree elbow (3).
d. Remove and discard three preformed
packings (4).
11. INSPECT MAIN HOUSING INSERTS.
12. REMOVE PLUG (5).
a. Inspect inserts. See page 2-5.
a. Using 3/8-inch drive ratchet handle
b. Repair inserts if damaged, See task
and 1/4-inch socket wrench
R E P A I R MAIN HOUSING INSERTS,
attachment, remove plug (5) and pre-
formed packing (6). Discard packing.
1 3 . CHECK THAT DIRECTIONAL CONTROL
SLIDE (7) MOVES FREELY IN
16. INSTALL PLUG (5) IN HOUSING (8).
HOUSING (8).
a. Coat new preformed packing (6) with
a. Push slide (7) in and out of housing (8)
transmission oil. Install on plug (5).
several times.
b. Using 3/8 inch drive ratchet handle
b. If slide (7) does not move freely in
and 1/4-inch socket wrench
housing (8), go to step 14. If slide does
attachment, install plug (5).
move freely in housing, go to step 16.
17. USING 1/2-lNCH DRIVE TORQUE
14. REPAIR SECOND RANGE RELAY
WRENCH WITH ADAPTER AND
VALVE ASSEMBLY, page 4-521.
1/4-lNCH SOCKET WRENCH
ATTACHMENT, TORQUE PLUG (5)
15. GO TO STEP 18.
TO 20-25 ft-lb (3 mkg).
4-516
Change 1
|
|
Privacy Statement - Press Release - Copyright Information. - Contact Us |