 |
|||
|
|
|||
|
|
|||
| ||||||||||
|
|
 TM 9-2520-270-34
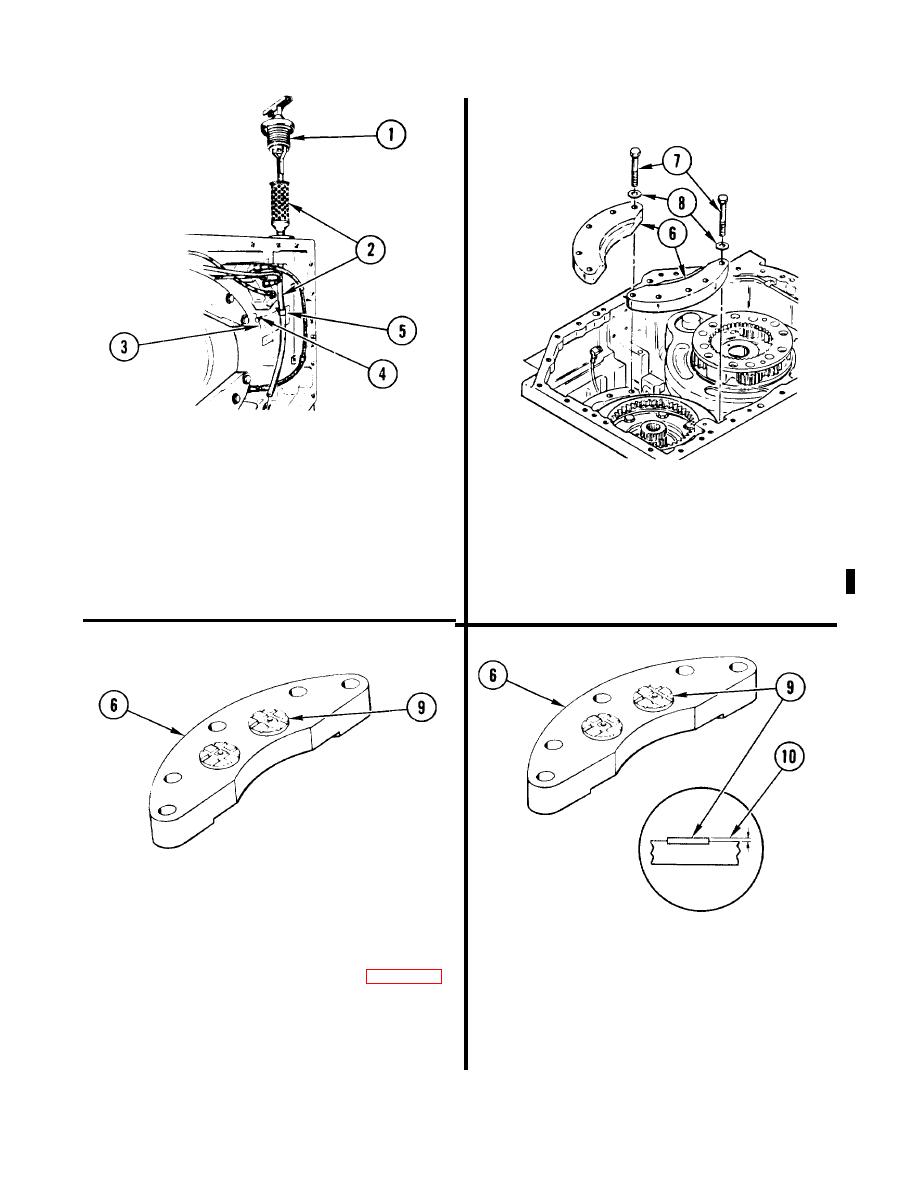
12. REMOVE DIPSTICK (1) AND DIPSTICK
TUBE ASSEMBLY (2).
a. Using wire-twister pliers, remove and
discard Iockwire (3).
13. REMOVE TWO SECOND RANGE BRAKE
b. Using 3/8-inch drive ratchet handle
ASSEMBLIES (6).
with extension and 7/16-inch
socket, remove screw (4).
a. Remove 10 self-locking bolts (7)
and washers (8). Discard bolts.
c, Remove dipstick (1) and dipstick
tube assembly (2) with clamp (5).
b. Remove two brake assemblies (6).
14. INSPECT TWO PADS (9) ON
EACH BRAKE ASSEMBLY (6).
15. CHECK TWO BRAKE ASSEMBLIES (6).
Inspect two pads (9) on each brake
a.
a. Using depth gage, measure
assembly (6) for damage, See page 2-5.
height (10) of two pads (9) on
each brake assembly (6).
If no brake pads (9) are damaged, go
b.
to step 15. If any brake pad is
b. Replace two brake assemblies (6) if
damaged, replace two brake assem-
any measurement is less than
blies (6) and go to step 16.
0.100 inch (2.54 mm).
4-434
Change 1
|
|
Privacy Statement - Press Release - Copyright Information. - Contact Us |
