 |
|||
|
|
|||
|
|
|||
| ||||||||||
|
|
 TM 9-2520-270-34
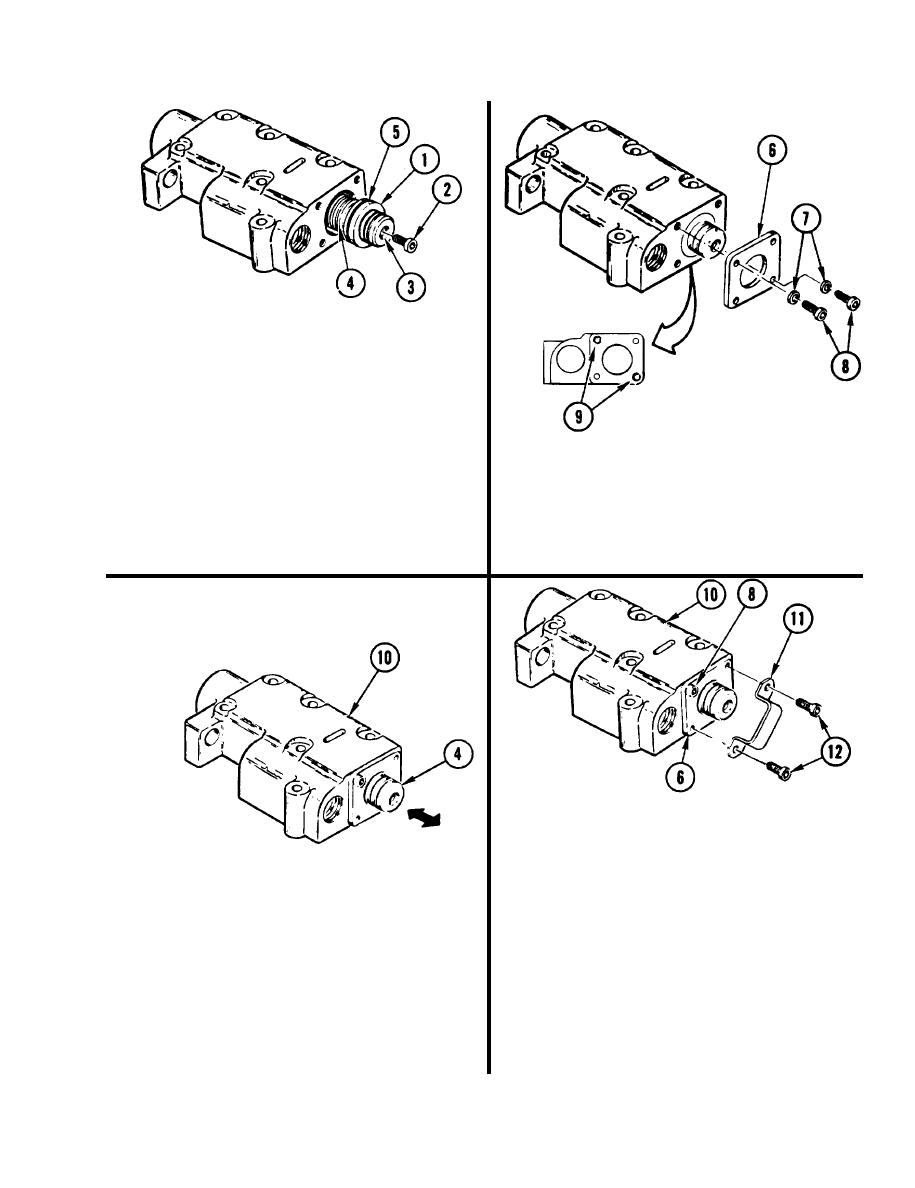
24. REMOVE RING (1).
a. Install screw (2) from step 5 in
threaded hole (3) in directional
control slide (4).
b. Pull out slide (4) and ring (1) far
enough to remove ring. Remove and
discard preformed packing (5).
27. INSTALL COVER (6).
c. Remove screw (2) from slide (4).
a. Using 3/8-inch drive ratchet handle
and 5/32-inch socket wrench attach-
25, PUSH SLIDE (4) BACK IN PLACE.
ment, install two washers (7) and
screws (8) in threaded holes (9).
26. GO TO STEP 21.
29. INSTALL STRAP (11).
a. Insert two screws (12) through
strap (11) and cover (6).
b. Apply hand pressure to strap (11).
Thread screws (12) into housing (10)
until screw threads catch.
28. CHECK THAT SLIDE (4) MOVES
c. Hand tighten screws (12).
FREELY IN HOUSING (10).
Push in slide (4) and release.
a.
30. USING 3/8-lNCH DRIVE TORQUE
Slide should snap back.
WRENCH AND 5/32 INCH SOCKET
Repeat step 28a several times.
b.
W R E N C H ATTACHMENT, TORQUE TWO
SCREWS (8) AND TWO SCREWS (12)
If slide (4) moves freely in housing (10),
c.
TO 35-45 in-lb (40-52 cmkg).
go to step 29. If not, go to step 5.
GO TO NEXT PAGE
4-413
|
|
Privacy Statement - Press Release - Copyright Information. - Contact Us |