 |
|||
|
|
|||
|
Page Title:
REPLACE INPUT BEVEL ASSEMBLY SHAFT SEALS |
|
||
| ||||||||||
|
|
 TM 9-2520-270-34
REPLACE INPUT BEVEL ASSEMBLY SHAFT SEALS
This task covers: Remove (Page 4-122). Install (Page 4-124).
Tools:
Materials/Parts:
Arbor press (Item 3, App C)
Cleaning solvent -- (Item 1, App B)
Petrolatum -- (Item 7, App B)
General mechanic's tool kit:
Wiping rag (Item 13, App B)
automotive -- (Item 33, App C)
Wood block -- (Item 1, App D)
Industrial goggles -- (Item 39, App C)
Retaining ring
Inserted hammer face holder --
(Item 39A, App C)
Inserted hammer face (Item 39B, App C) Personnel Required:
Inserted hammer face (Item 39C, App C)
Track Veh Rep 63H10
Inside/outside indicator caliper --
(Item 41, App C)
E q u i p m e n t Conditions:
Micrometer caliper set -- (Item 52, App C)
Retaining-ring pliers -- (Item 59, App C)
Transmission mounted on tip-over stand.
Snap-ring guide fixture -- (Item 73, App C)
See page 2-144,
T o r q u e wrench (Item 100, App C)
1.
R E M O V E DISCONNECT CLUTCH.
See task REPLACE DISCONNECT
CLUTCH, page 4-52.
R E M O V E DISCONNECT CLUTCH
2.
ASSEMBLY. See task REPLACE
D I S C O N N E C T CLUTCH ASSEMBLY,
CAUTION
Do not spread seals more than needed. Seals
are brittle and easily broken.
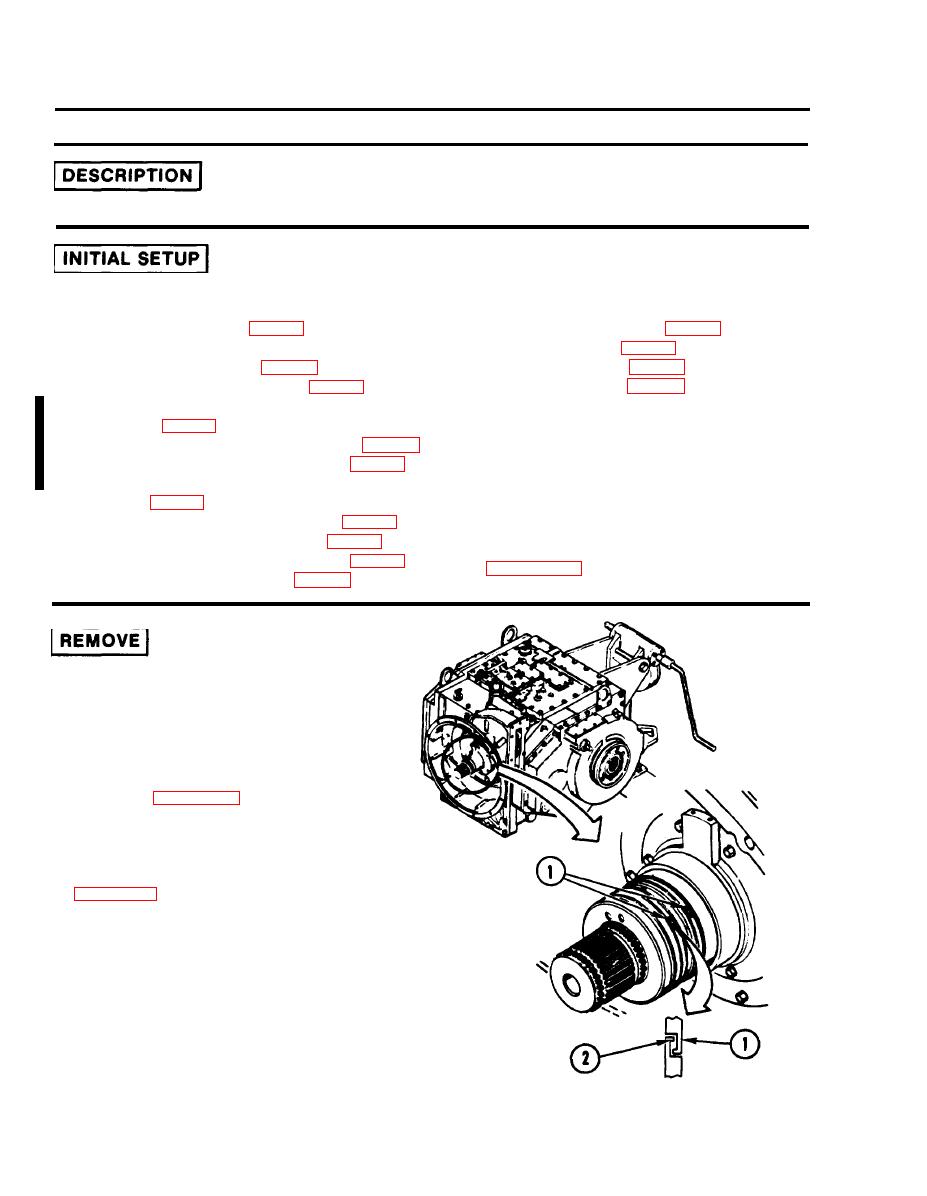
3. REMOVE TWO SHAFT SEALS (1).
a. Squeeze each seal (1) with fingers
until hooks (2) release.
b. Spread open and remove each seal (1).
Change 2
4-122
|
|
Privacy Statement - Press Release - Copyright Information. - Contact Us |