 |
|||
|
|
|||
|
Page Title:
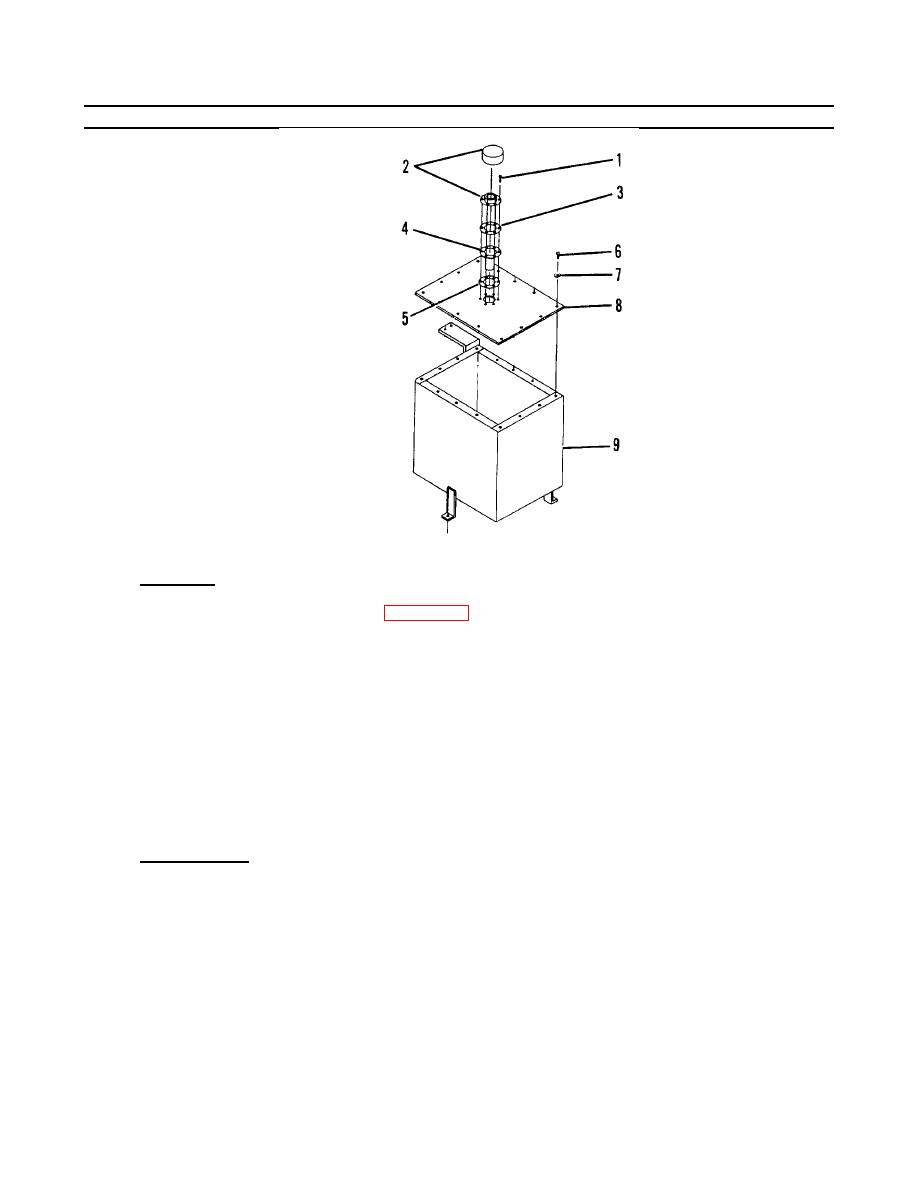
Figure 4-15. Hydraulic Reservoir (Sheet 2 of 2) . |
|
||
| ||||||||||
|
|
 TM55-1730-228-13&P
4-13.
HYDRAULIC RESERVOIR - REPAIR (Continued)
4-13
Figure 4-15 .
Hydraulic Reservoir (Sheet 2 of 2) .
a. REMOVAL:
(1) Remove six retaining screws (1, Figure 4-15) from filler neck (2).
(2) Remove cap and filler neck (2) from cover (8).
(3) Remove gasket (3) and discard.
(4) Remove strainer (4) from cover (8).
(5) Remove gasket (5) and discard.
(6) Remove fourteen capscrews (6) and washers (7).
(7) Remove cover (8) from tank (9).
b. INSTALLATION:
(1) Thoroughly clean inside surface of top (8) and top surfac of tank (9) with cleaning solvent and
e
rags. Apply a continuous bead of silicone sealer to top surface of tank staying inside bolt holes.
(2) Carefully position cover (8) on tank (9). Be sure to align holes.
(3) Install fourteen capscrews (6) and washers (7). Tighten capscrews securely.
GO ON TO NEXT PAGE
4-48
|
|
Privacy Statement - Press Release - Copyright Information. - Contact Us |