 |
|||
|
|
|||
|
|
|||
| ||||||||||
|
|
 TM 9- 2920- 232- 34&P / TO 38X14- 2- 32
-
-
-
- -
DISASSEMBLY OF THE STARTER ASSEMBLY - CONTINUED
-
0008 00
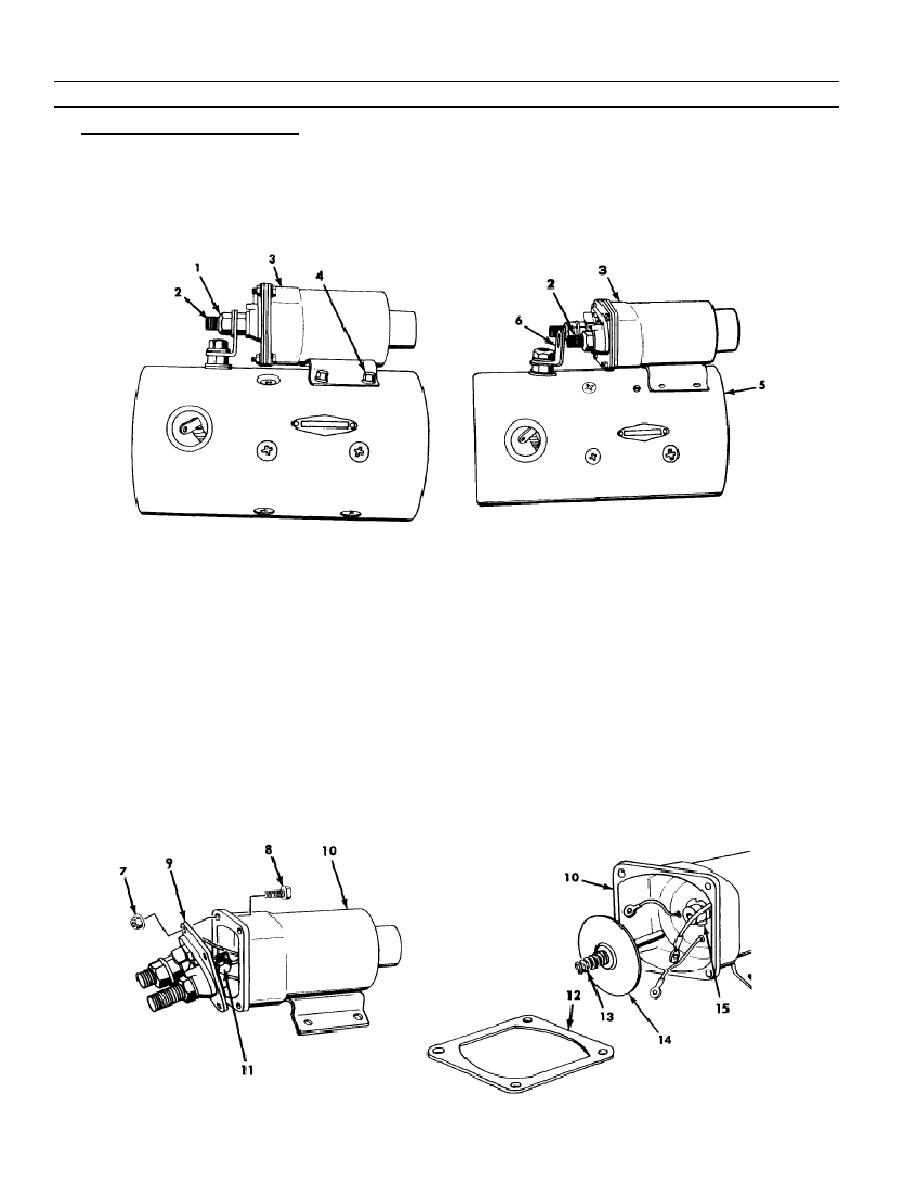
7. Disassembly Solenoid Assembly.
a. Remove washer nut (1) from MTR terminal stud (2) on solenoid assembly (3).
b. Remove four washer screws (4).
c.
Slide solenoid assembly (3) along starter frame (5) and away from connector (6) until terminal stud (2) is out
of hole in connector (6).
d. Remove four washer nuts (7) and screws (8).
e. Pull terminal plate assembly (9) away from case and coil assembly (10) just enough for access to three
screws (11), which connect coil leads to terminals. Early model solenoid has one screw.
f.
Remove three screws (11) and terminal plate assembly (9).
g. Remove gasket (12) from case and coil assembly (10). Discard gasket.
h. Remove spring (13) and contact assembly (14).
i.
Remove nylon bushing (15).
j.
Inspect windings for shorts or grounds with a pair of test probes. Replace if defective.
k.
Inspect case and coil assembly for cracked or broken condition. If defective, replace solenoid assembly.
l.
Inspect contacts on terminal studs for burning or pitting. Replace studs if contacts are defective.
m. Inspect contact assembly for cracks, warp age, or pitting. Replace if defective.
(LATE MODEL SHOWN)
0008 00- 16
-
|
|
Privacy Statement - Press Release - Copyright Information. - Contact Us |
