 |
|||
|
|
|||
|
|
|||
| ||||||||||
|
|
 TM 9-2835-255-34
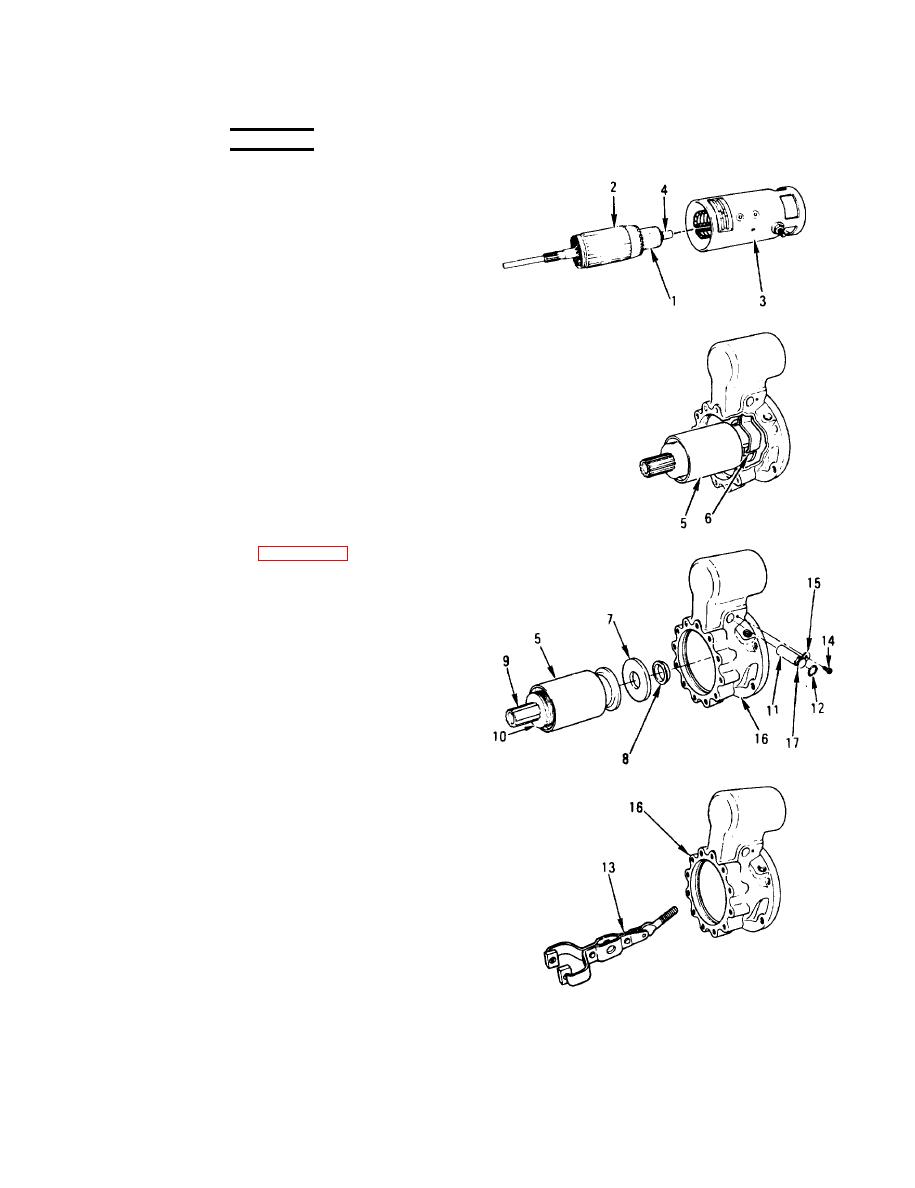
STARTER MOTOR REPAIR (Sheet 7 of 11)
WARNING
Z Compressed air used for cleaning purposes will
not exceed 30 psi. Use only effective chip-
guarding and personal protective equipment
(goggles/faceshield, gloves, etc.).
Do not wrap sandpaper around commutator (1)
while turning armature (2). Injury to hand or
wrist may result.
9.
CLEAN ARMATURE (2) AND CHECK
DIAMETER OF COMMUTATOR (1).
a. Blow off loose copper and mica particles
from commutator (1) with low pressure
air.
b. Turn lathe on. Polish commutator (1)
with sandpaper. Turn lathe off.
c. Check diameter of commutator (1). If
diameter is less than 2.0625 inches
(5.239 cm), skip step 10.
10. SLIDE ARMATURE (2) IN RING (3) WITH
COMMUTATOR END SHAFT (4) AT
WINDOW END OF RING (3). ASSEMBLE
STARTER MOTOR (PAGE 9-59) AND
REPLACE.
11. SLIDE ARMATURE (2) IN RING (3) WITH
SHAFT (4) AT WINDOW END OF RING
(3).
12. SLIDE DRIVE ASSEMBLY (5) OUT FROM
BETWEEN TWO SHHW LEVER
ASSEMBLY CAMS (6) AND TAKE OUT
DRIVE (5), WASHER (7), AND SEAL (8).
13. INSPECT SLOT (9) ON DRIVE (5) FOR
DAMAGE. TRY TO TURN AND PUSH IN
PINION (10). IF PINION (10) TURNS IN
BOTH DIRECTIONS OR DOES NOT MOVE
IN OR OUT FREELY, REPLACE DRIVE (5).
14. REMOVE SHIFT LEVER SHAFT (11),
PREFORMED PACKING (12), AND SHIFT
LEVER ARM AND LINK ASSEMBLY (13).
a. Remove screw (14) and washer (15). Lift
shaft (11) from housing (16) by prying up
on slot (17). Remove packing (12) from
Go on to Sheet 8
9-57
|
|
Privacy Statement - Press Release - Copyright Information. - Contact Us |
