 |
|||
|
|
|||
|
|
|||
| ||||||||||
|
|
 TM 9-2835-255-34
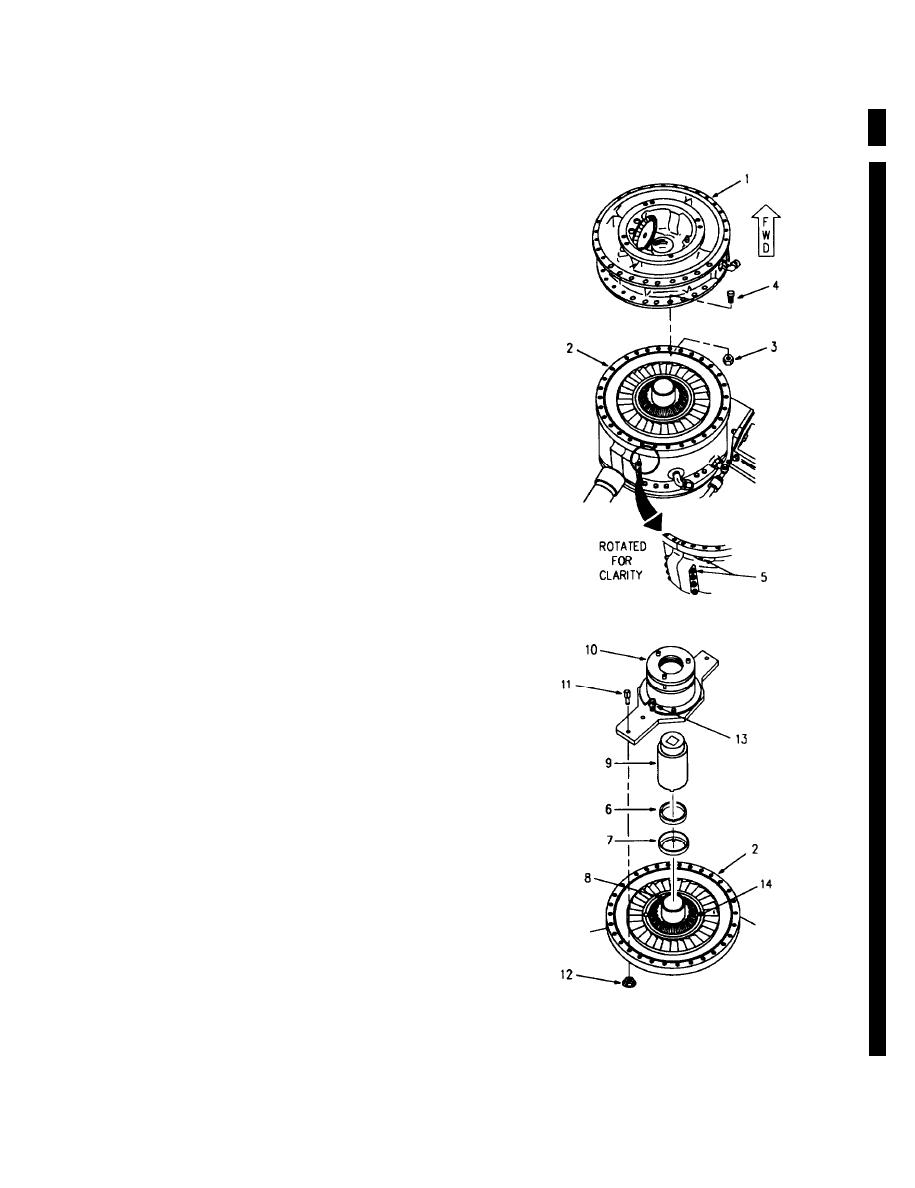
NO. 2 AND 3 BEARING SEAL/PACKING RETAINER REPLACEMENT (INCLUDING INTERSHAFT SEAL)
(Sheet 21 of 49)
21. REMOVE INTERMEDIATE HOUSING (1) FROM
AXIAL COMPRESSOR HOUSING (2).
a.
Remove 28 self-locking nuts (3) and bolts (4).
b.
Loosen but do not remove two upper bolts (5)
on each side of axial compressor housing (2).
c.
Using a soft head mallet, tap on intermediate
housing (1) to dislodge it from axial compres-
sor housing (2). Carefully lift intermediate
housing (1) and place on work surface.
22. REMOVE PLAIN ROUND NUT (6) AND LOCKING
CUP (7) FROM AXIAL COMPRESSOR ROTOR SHAFT
(8).
a.
Uncrimp locking cup (7) from plain round nut
(6) using suitable tool.
b.
Install spanner wrench (9) with adapter over
axial compressor rotor shaft (6) to engage
plain round nut (6).
Install and adjust holding fixture (10) until it is
c.
flush with compressor housing flange. Secure
holding fixture (10) to axial compressor hous-
ing (2) with two bolts (11) and nuts (12). En-
sure locking bolts (13) are engaged with cut-
outs (14) on high pressure rotor (8).
Using spanner wrench (9) with adapter, loosen
d.
plain round nut (6).
Remove holding fixture (10), spanner wrench
e.
(9) with adapter, plain round nut (6) and lock-
ing cup (7) from rotor shaft (8). Discard lock-
ing cup (7).
LE5567
Go on to Sheet 22
5-95
Change 6
|
|
Privacy Statement - Press Release - Copyright Information. - Contact Us |
