 |
|||
|
|
|||
|
Page Title:
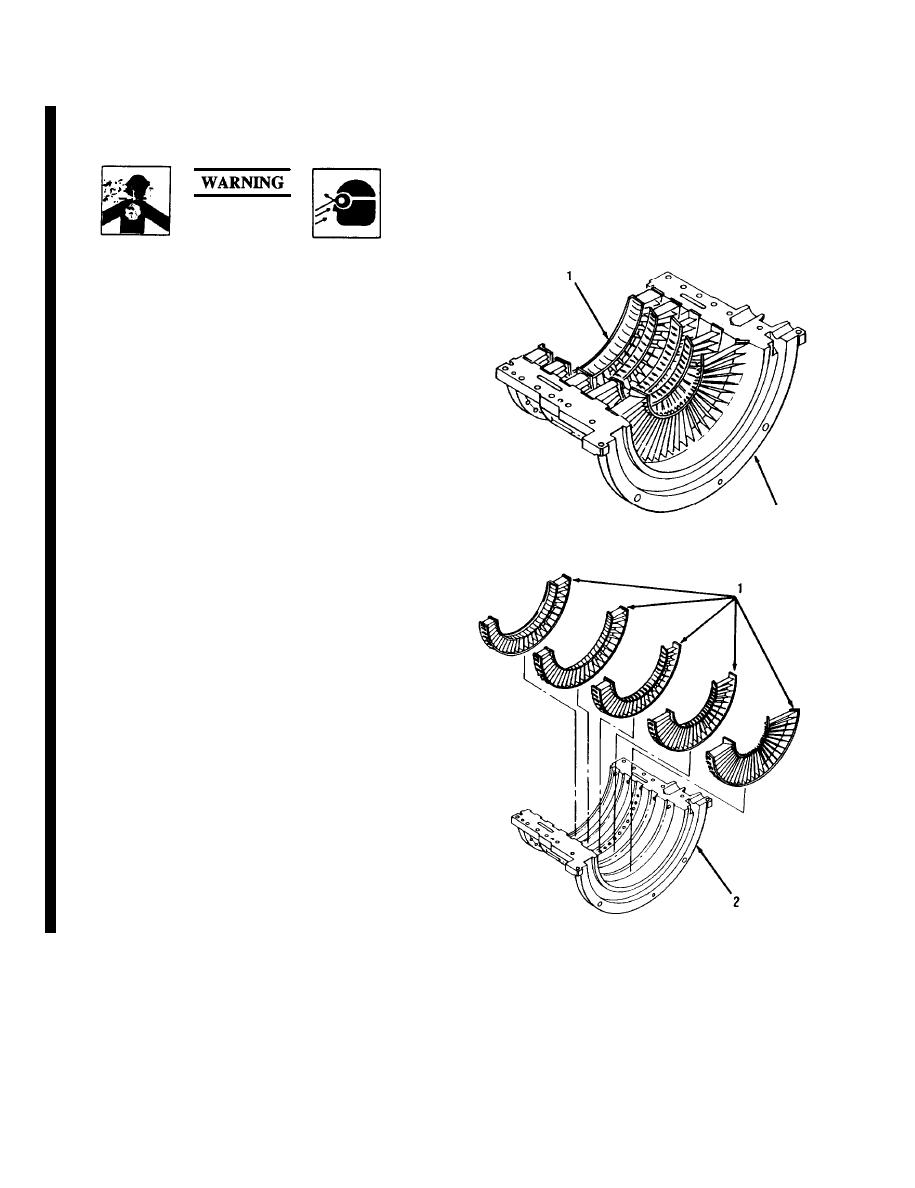
REMOVE AND CLEAN VANE ASSEMBLIES |
|
||
| ||||||||||
|
|
 TM 9-2835-255-34
LOW PRESSURE ROTOR AND HOUSING ASSEMBLY (COMPRESSOR) AND HIGH PRESSURE
AXIAL COMPRESSOR AND ROTOR CLEANING (Sheet 3 of 21)
NOTE
The cleaning procedure in steps 3 through 7 is the
same for all case and stator assembly halves. The
low pressure case and stator (top half is shown
being cleaned.
PREPARE CLEANING SOLUTION BY
3.
MIXING ONE PART OF ALKALINE DE-
SCALER COMPOUND TO FOUR PARTS
OF FRESH HOT WATER.
2
NOTE
When removing vanes (l), ensure vanes are kept in
order of disassembly.
4.
REMOVE AND CLEAN VANE ASSEM-
BLIES (1) OF LOW PRESSURE CASE AND
STATOR (TOP HALF) (2) W1TH TOOTH-
BRUSH AND PREMIXED CLEANING
SOLUTION.
a. Remove each vane assembly (1) from case
(2).
b. Clean vane assemblies (1) with toothbrush
and premixed cleaning solution.
c. Check to see if vane assemblies (1) have
been cleaned. If not clean, soak vane
assemblies in the premixed solution for 30
minutes, then scrub with tooth brush.
d. Recheck to see if vane assemblies are
clean. If clean, go to step 6. If not clean, go
to step 5.
Go on to Sheet 4
5-36 Change 4
|
|
Privacy Statement - Press Release - Copyright Information. - Contact Us |
