 |
|||
|
|
|||
|
Page Title:
SCREEN ASSEMBLY REPAIR (Sheet 1 of 1) |
|
||
| ||||||||||
|
|
 TM 9-2835-255-34
FORWARD ENGINE MODULE (GEARBOX MODULE ATTACHED) REMOVAL
AND INSTALLATION (Sheet 7 of 7)
22. INSTALL POWER TURBINE STATOR FEEDBACK CONTROL ASSEMBLY (TM 20-1).
23. INSTALL POWER TURBINE STATOR CYLINDER ASSEMBLY (TM 20-1).
24. INSTALL THERMOCOUPLE BRANCHED WIRING HARNESS 3W106 (TM 20-1).
25. INSTALL LUBRICATING OIL TANK ASSEMBLY (TM 20-1).
26. FILL OIL TANK AND GEARBOX MODULE (LO -12)
End of Task
SCREEN ASSEMBLY REPAIR (Sheet 1 of 1)
TOOLS: Rubber mallet (Item 26, Appendix D)
Torch outfit (Item 25, Appendix D)
SUPPLIES: Brazing alloy (Item 4, Appendix B)
Brazing alloy (Item 5, Appendix B)
Flux (Item 8, Appendix B)
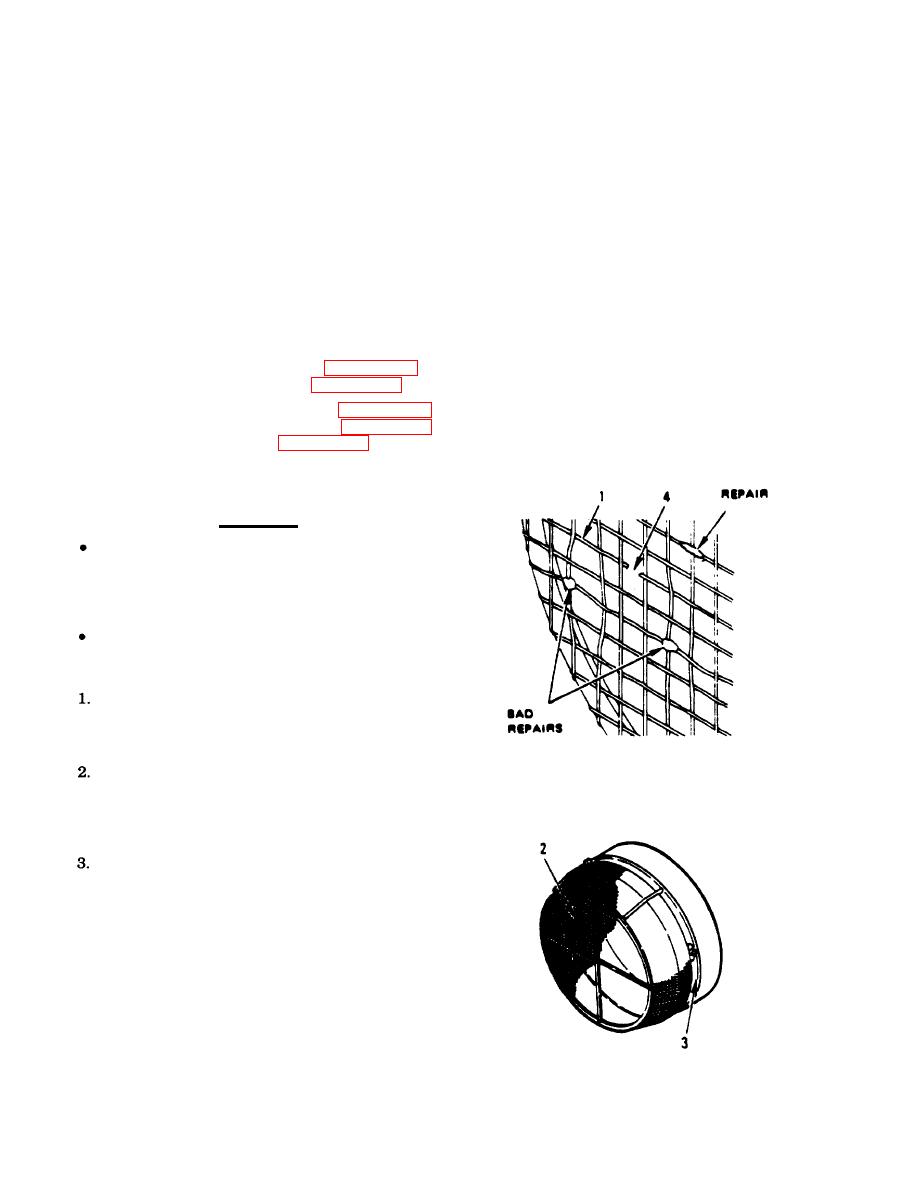
GOOD
REPAIR:
CAUTION
Do not bend wire (1) more than 90 when making
repairs. Sharp bending of wire (1) may cause it to
become weak or crack, If wire (1) is sucked into
engine, it will cause compressor damage.
Do not allow large amounts of filler metal to
form. They could break off and be sucked into
engine, causing compressor damage.
REPAIR DEFORMED SCREEN (2) BY
PLACING IT AGAINST SOMETHING
HARD. GENTLY TAP UNTIL SHAPE IS
RESTORED.
TORCH SILVER BRAZE BROKEN OR
SEPARATED WIRES (1) AT THE
Attachment BAND (3). USE BRAZING
ALLOY (ITEM 5, APPENDIX B) AND
FLUX.
LOOK AT ALL OTHER WIRES (1) FOR
BREAKS. IF GAP (4) IS GREATER THAN
0.030-INCH (0.762 MM), REPLACE SCREEN
(2). OTHERWISE TORCH SILVER BRAZE
BROKEN WIRE (l). USE BRAZING ALLOY
(ITEM 4 OR 5 APPENDIX B) AND FLUX.
End of Task
5-31
|
|
Privacy Statement - Press Release - Copyright Information. - Contact Us |
