 |
|||
|
|
|||
|
|
|||
| ||||||||||
|
|
 TM 9-2815-224-34&P
Fuel Injector Maintenance Instructions (Cont)
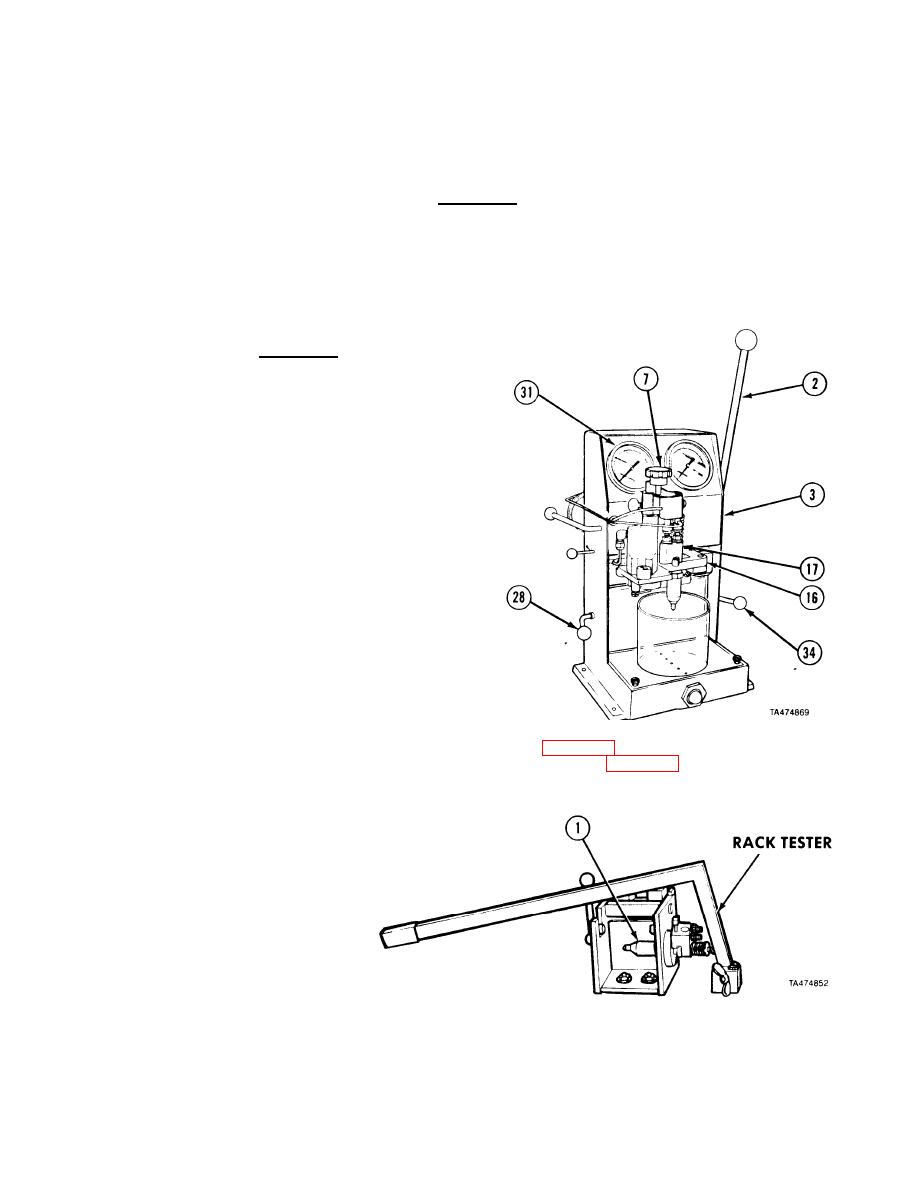
(33) Position pump lever (2) so it points straight up.
(34) Move rocker arm engagement lever (27) to rear.
CAUTION
Do not over tighten control valve or nylon bushing may be damaged.
(35) Close control valve (7).
(36) Pull pump lever (2) forward several times to slowly build up to 1600 to 2000 psi (11032 to
13790 kPa) on left gage (31).
(37) Check for leaks at injector caps (25), body plugs (32), rack (29), and injector nut (33).
(38) Open control valve (7).
CAUTION
Do not over tighten control valve or nylon
bushing may be damaged.
(39) Close control valve (7).
(40) Pull pump lever (2) forward several times
until pressure builds up to 500 psi
(3447.5 kPa) on left gage (31).
(41) Move valve lever (28) so it points forward,
(42) If it takes less than 15 seconds for pressure to
drop from 450 to. 250 psi (3102 to 1723 kPa)
on left gage (31), disassemble injector clean
and reassemble.
(43) Open control valve (7).
(4-4) Move clamp release lever (34) down.
(45) Remove injector (17) and adapter plate (16)
from injector test kit (3).
Testing.
b.
(1) Injectors which pass all tests can be installed (refer to para 12-2).
(2) Injectors which fail one or more tests will be repaired (refer to para 12-3). Perform all injector
tests before repairing injectors.
NOTE
To test injector control rack do
steps (3) through (10).
(3) Install fuel injector (1) in
rack freeness tester.
12-27
|
|
Privacy Statement - Press Release - Copyright Information. - Contact Us |
