 |
|||
|
|
|||
|
|
|||
| ||||||||||
|
|
 TM 9-2815-224-34&P
Fuel Injector Maintenance Instructions (Cont)
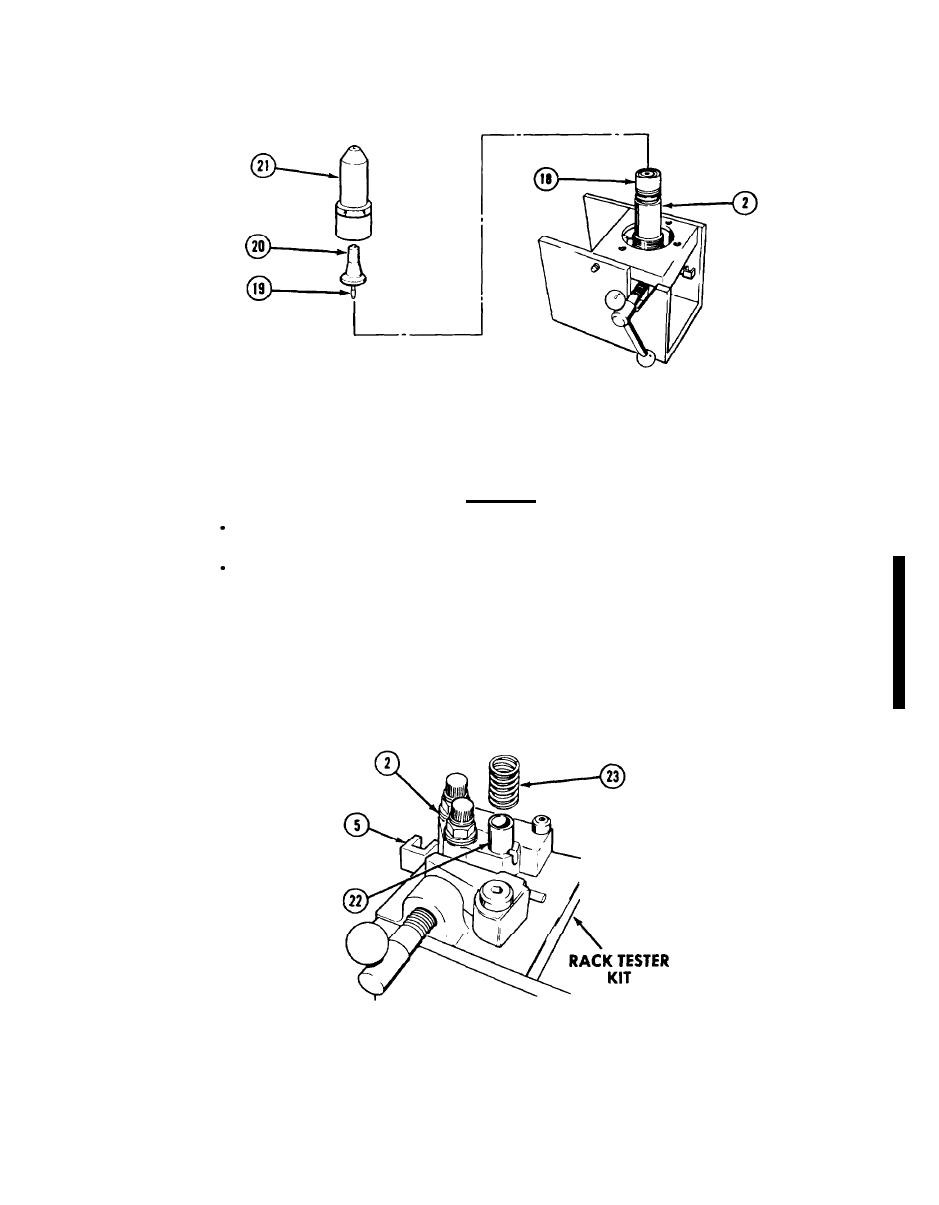
Put spray tip (20) and needle valve (19) on spring cage (18) with end of needle valve in hole in
(22)
spring cage.
Apply fuel injector test oil on injector nut (21) threads. Install injector nut carefully on injector
(23)
body (2).
Tighten injector valve nut (21) as tightly as possible by hand.
(24)
CAUTION
Do not exceed specified torque or injector nut may stretch and result in improper
sealing of lapped surfaces.
Some injector nuts (21) and injector bodies (2) could have a blued or non-blued finish.
These parts are fully interchangeable, however. To avoid parts damage due to
overtightening, the correct torque values listed below must be used.
(a) Torque a non-blued injector nut (21) on a non-blued injector body (2) to 50 lb-ft
(68 Nm).
(b)
Torque a blued injector nut (21) on a blued injector body (2) to 80 lb-ft (108 Nm).
(c)
Torque a non-blued injector nut (21) on a blued injector body (2) or a blued injector
nut (21) on a non-blued injector body (2) to 65 lb-ft (88 Nm).
Tighten injector valve nut (21) using injector nut socket.
(25)
Turn injector assembly (22) over in rack tester kit and push injector rack (5) all the way in.
(26)
Place follower spring (23) on injector body (2).
(27)
12-19
Change 2
|
|
Privacy Statement - Press Release - Copyright Information. - Contact Us |