 |
|||
|
|
|||
|
Page Title:
FIGURE 424. REMOVING OR INSTALLING FIELD MAGNETS. |
|
||
| ||||||||||
|
|
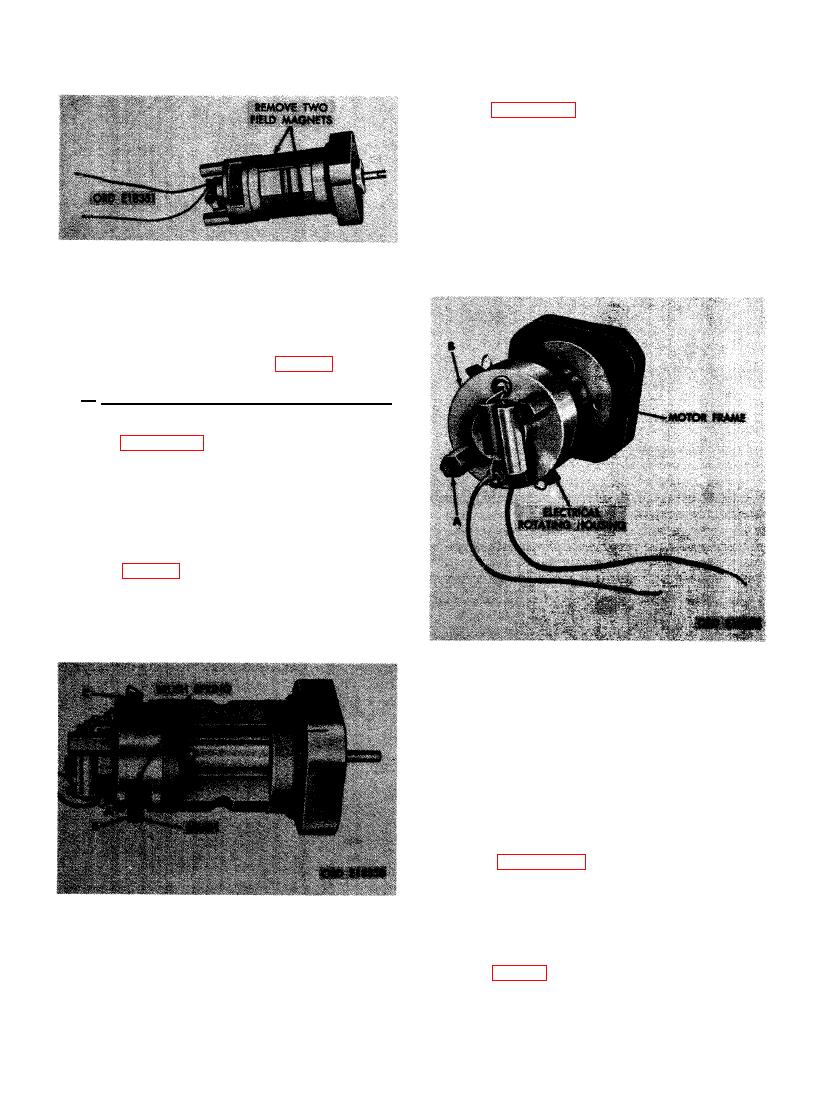 (2) Figure 426. (A) Remove two mounting
studs securing electrical rotating hous-
ing to motor frame. (B) Remove electri-
cal rotating housing and associated
parts from motor frame.
FIELD MAGNETS.
(4) Remove field magnets (fig. 424).
d. Remove Electrical Housing and Armature.
Remove housing and armature as follows.
(1) Figure 425. (A) Pull back on the brush
spring. (B) Roll the brush out just far
enough to clear the commutator. Hold
brushes in raised position with spring
resting against brush. Holding brushes
with spring will prevent brushes from
striking ball bearing on end of commuta-
tor during electrical housing removal
to remove the remaining brush.
ROTATING HOUSING AND ASSOCIATED
PARTS FROM MOTOR FRAME.
(3) Figure 427. (A) Remove magnetized
spring washer from ball bearing. (B)
Remove shims from electrical rotating
housing. Count number of shims used
and save for assembly.
(4) Remove armature from motor frame
BRUSH HOLDERS.
270
|
|
Privacy Statement - Press Release - Copyright Information. - Contact Us |
