 |
|||
|
|
|||
|
Page Title:
FIGURE 202. REMOVING OR INSTALLING CRANKSHAFT DAMPER AND PULLEY RETAINING BOLT AND PLATE |
|
||
| ||||||||||
|
|
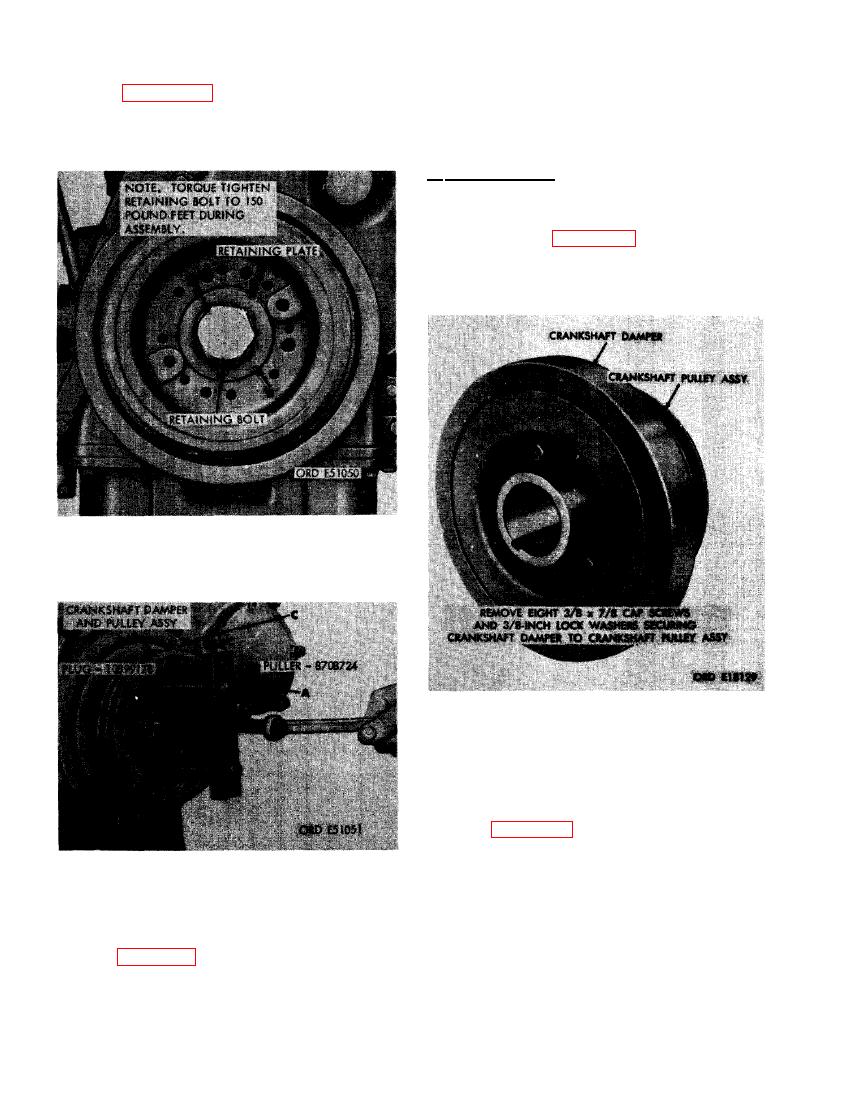 (5) Figure 202. (A) Remove crankshaft
10899178 in end of crankshaft and run
damper pulley retaining bolt. (B) Re-
puller screw tight against plug to hold
move crankshaft damper pulley re-
it in position. (C) Remove crankshaft
taining plate.
damper and pulley assembly.
c. Disassembly. Disassemble and inspect
crankshaft damper and pulley assembly as
follows.
(1) Refer to figure 204 and remove eight
cap screws securing crankshaft damper.
CRANKSHAFT DAMPER AND PULLEY
RETAINING BOLT AND PLATE
CAP SCREWS AND LOCK WASHERS
SECURING CRANKSHAFT DAM-
PER TO CRANKSHAFT
PULLEY ASSEMBLY.
(2) Figure 205. (A) Separate the crankshaft
damper from the crankshaft pulley as-
sembly. (B) Inspect locating dowel pins
and mating holes for damage. Replace
DAMPER AND PULLEY ASSEMBLY US-
damaged pins. (C) Inspect oil seal con-
ING MECHANICAL PULLER -8708724
tact surface for nicks or burs which
may damage oil seal. Remove minor
AND PLUG -10899178.
damage with crocus cloth soaked in
(6) Figure 203. (A) Install mechanical pul-
dry- cleaning solvent or mineral spirits
paint thinner. (D) Check keyway for burs
ler -8708724 on hub of pulley as shown.
or damage.
(B) Install small end of puller plug-
134
|
|
Privacy Statement - Press Release - Copyright Information. - Contact Us |
