 |
|||
|
|
|||
|
|
|||
| ||||||||||
|
|
 c.
Crankshaft.
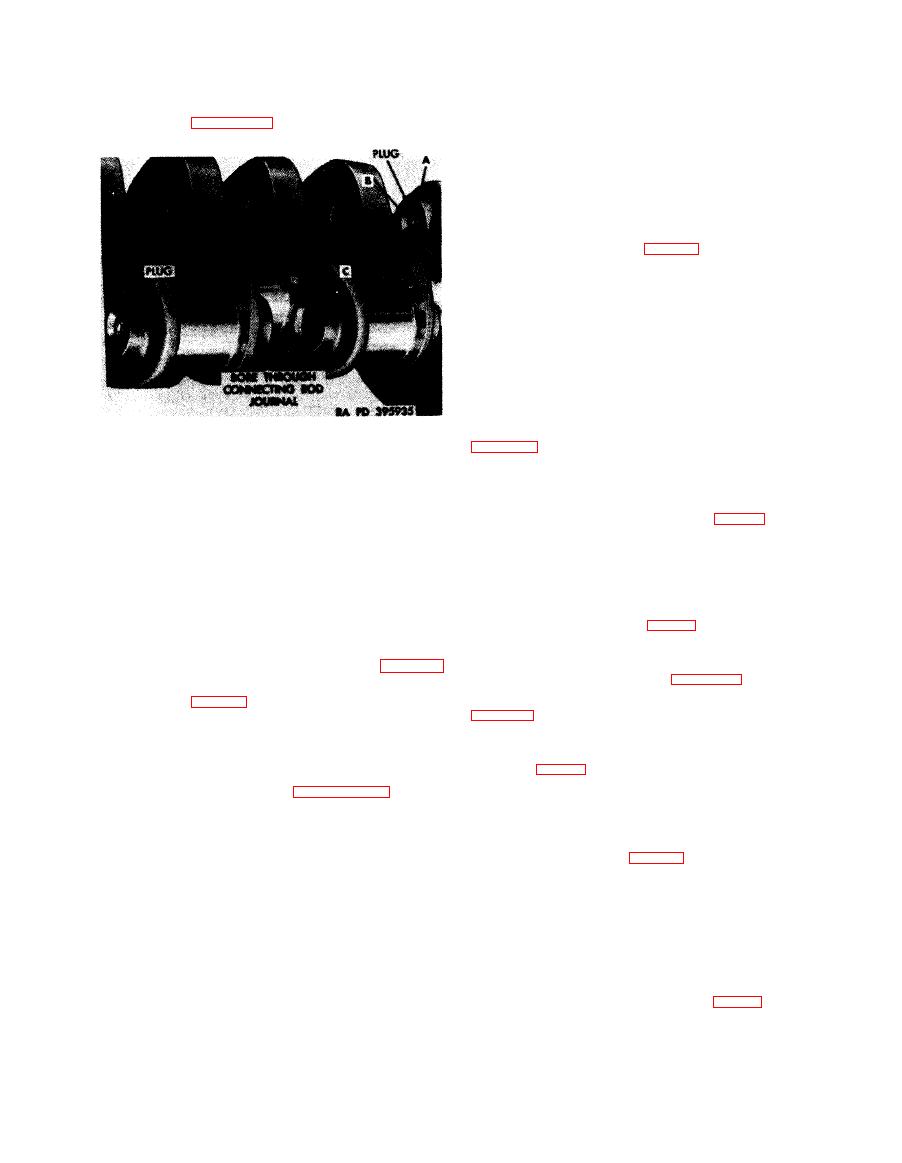
Remove crankshaft oil
dye check method. Pay particular attention to
retaining plugs following instructions which
areas around crankshaft oil holes and fillets
accompany figure 6-33.
adjacent to the crank cheeks.
(2) Inspect connecting rod journal radii of
crankshaft for evidence of specific points of wear
or damages that would indicate a bent or twisted
connecting rod.
(3) Check diameters of main bearing and
connecting rod journals against limits specified
in overhaul standards (table 6-9). Check run-out
of crankshaft by supporting end journals in "V"
blocks and measuring the run-out at the center
journals with a dial indicator. Maximum
allowable run-out is 0.025 inch at No. 4 journal.
(4) Inspect journals for nicks, burs, grooves.
scratches, galling, scuffing, or discoloration.
Mark minor defect areas for future repair.
(5) Check dowel pins and straight pins for
tightness in the crankshaft flanges. Check pins
against limits specified in the overhaul standards
Remove
1. Remove six cotter pins (A).
c.
Inspection
of
Connecting
Rods
and
2. Remove six bolts (B), slotted nuts, and flat washers.
Bearings.
3. Remove 12 retaining plugs (C) from each end of the
(1)
Connecting
rod
bearings. I n s p e c t
bore through the six crankshaft connecting rod jour-
nals.
connecting rod bearing halves (fig. 6-31) in the
Install
same manner as described for main sleeve
1. position 12 retaining plugs (C) in each end of the bore
bearings. Apply a thin coating of Prussian blue,
through the six crankshaft connecting rod journals.
FSN 8010-247-8706, to the backs of the con-
2. Install six bolts (B), slotted nuts, and flat washers
necting r o d b e a r i n g s a n d
install in
their
securing plugs.
3. Install six cotter pins (A) securing slotted nuts.
respective connecting rods and caps according to
the location markings (fig. 6-31). Assemble rod
shaft oil retaining plugs.
and cap, and torque tighten nuts to 950-pound-
inches. Check bearing inside diameter, using a
dial indicator as shown in figure 6-34, against
and straight pins (25) from crankshaft unless
the limits specified in the overhaul standards
inspection (para 6-16) indicates replacement is
necessary.
Dowel
pins
in
flywheel
end
are
blue, FSN 8010-247-8706, transfer in the same
secured
with
setscrews.
manner in which the main sleeve bearings were
checked (para 6-9d). Replace any bearing that
does not make at least 75 percent contact.
(2) C o n n e c t i n g r o d a s s e m b l y .
crankshaft oil passages with compressed air and
(a) Check connecting rod bearing bore with
brass wire probes.
a
dial indicator against limits specified in
Note. Care must be taken not to destroy or
overhaul standards (table 6-9).
rod bearing
remove main and
connecting
(b) Check rods for cracks and for twisted or
location markings.
bent condition. Bent or twisted connecting rods
b. Inspection of Crankshaft.
must be replaced. Under no circumstances
with
(1) Inspect crankshaft for
cracks
should connecting rods be straightened. Destroy
magnetic
particle
inspection equipment or
any rod found damaged to insure it will not be
When
when
available.
similar
equipment
reused in an engine.
magnetic particle inspection equipment is not
(c) Inspect for sharp corners at rod bolt
available use a magnifying glass (five power
counterbore and contour areas (fig. 6-35). Mark
magnification minimum) and a strong light or
rods having sharp corners for repair.
6-36
|
|
Privacy Statement - Press Release - Copyright Information. - Contact Us |
