 |
|||
|
|
|||
|
Page Title:
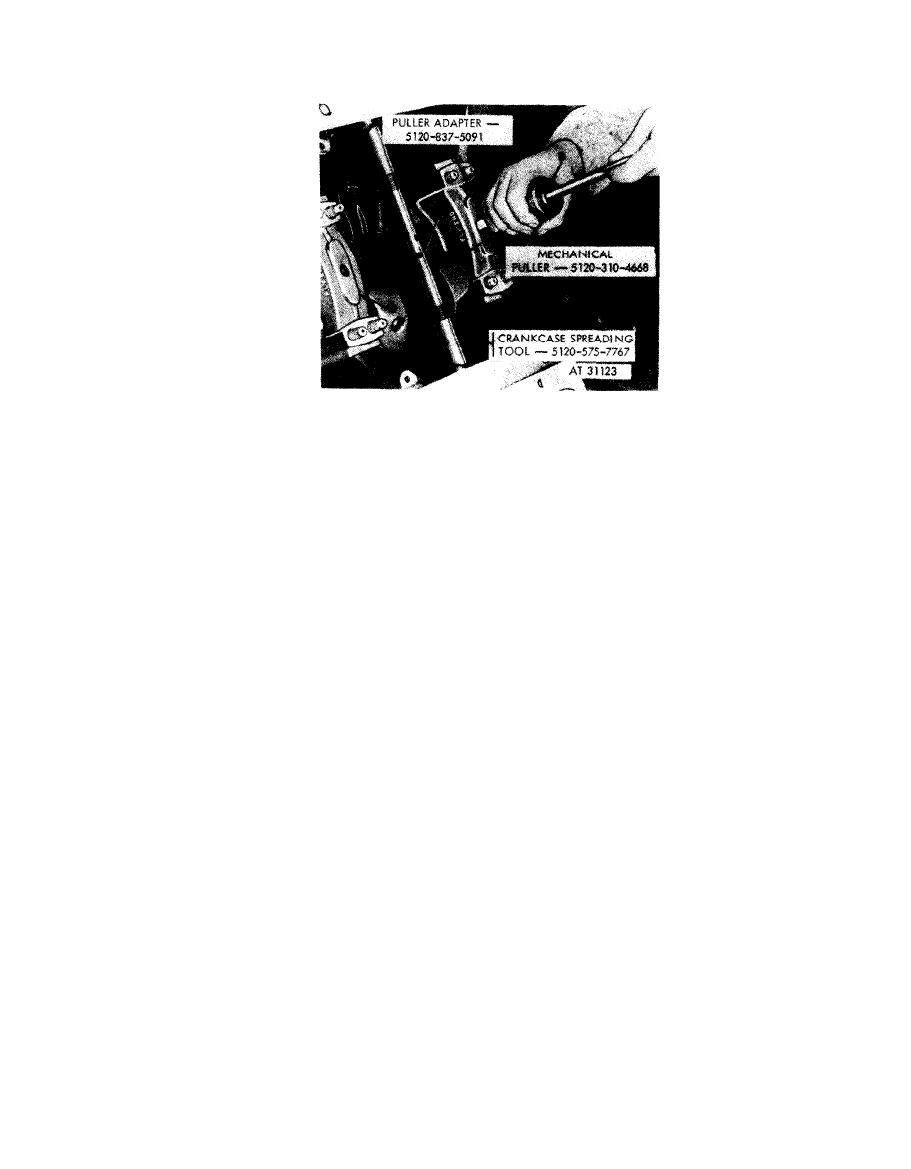
Figure 5-174. Removing main bearing cap using crankcase spreading tool-5120-575-7767 |
|
||
| ||||||||||
|
|
 3. Gently tap the main bearing cap free of the crankcase
Note. Use caution when removing main
using the slide hammer on puller. Remove main bearing
b e a r i n g cap so that lower main sleeve bearing
cap and lower main sleeve bearing half and separate tbe
half does not drop out accidentally. Sleeve
bearing half from the cap. Mark sleeve bearing half
bearing halves can be easily damaged.
with its respective location, using a grease pencil, for
identification; e, g., " 1 cap, " "2 cap, " etc.
1. Install crankcase spreading tool -5120-575-1767 (A)
4. Remove remaining bearing caps (D) (Nos. 2 through
in crankcase assembly midway between two main
7) and tbe lower sleeve bearing halves in similar
bearing caps. Tighten spreading tool just enough to
manner using puller - 5120-310-4668 and positioning
release pressure of crankcase from ends of main bearing
the spreading tool - 5120-575-7767 between bearing
caps.
caps as necessary. Remove sleeve bearings from bearing
2. Install mechanical puller - 5120-310-4668 (B) in
caps.
mechanical adapter - 5120-837-5091. Install puller
adapter into threaded bole provided in No. 1 main
bearing cap (C).
Figure 5-174. Removing main bearing cap using crankcase spreading
t o o l - 5 1 2 0 - 5 7 5 - 7 7 6 7 , mechanical adapter-5120-837-5091, and
mechanical puller-5120-310-4668.
5-101
|
|
Privacy Statement - Press Release - Copyright Information. - Contact Us |
