 |
|||
|
|
|||
|
Page Title:
Figure 4-110. Removing or installing intake manifold tube-cylinder 2L. |
|
||
| ||||||||||
|
|
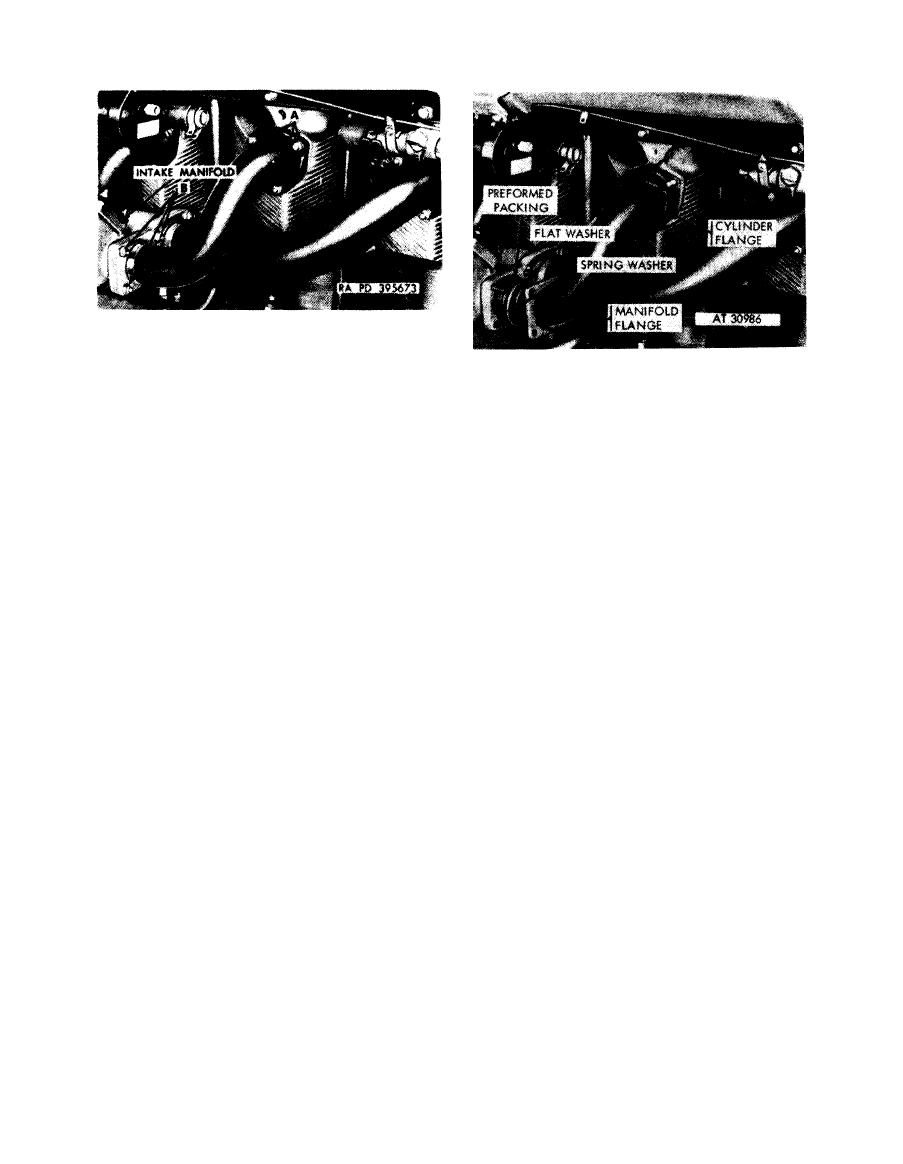 Disconnect
1. Remove three nuts (A) and lock washers attaching
flange of intake manifold tube to cylinder.
Remove
2. Remove four self-locking nuts (B) attaching flange
1. Separate manifold flange, spring washer, flat washer,
which secures tube to intake manifold.
and preformed packing from intake manifold.
Connect
2. Remove intake manifold tube from studs at cylinder.
1. Install four self-locking nuts (B) to attach flange
Remove and discard gasket.
which secures tube to intake manifold.
3. Remove intake manifold tube from intake manifold
2. Install three nuts (A) and lock washers securing flange
and discard preformed packing.
of intake manifold tube to cylinder.
4. Remove flat washer, spring washers, manifold flange,
Figure
4-109.
Disconnecting
or
connecting
and cylinder flange in order listed and reinstall on
replacement tube.
intake manifold tube from intake manifold
and cylinder 2L.
tubes
do
not
include
Note. R e p l a c e m e n t
flanges.
Install
1. With cylinder flange, manifold flange, spring washer,
a n d flat washer installed on intake manifold tube,
install new preformed packing against flat washer.
2. Install new gasket on studs at cylinder.
3 . Install assembled intake manifold tube on intake
manifold and studs at cylinder.
manifold tube-cylinder 2L.
4-54
|
|
Privacy Statement - Press Release - Copyright Information. - Contact Us |
