 |
|||
|
|
|||
|
|
|||
| ||||||||||
|
|
 TM9-2520-270-34
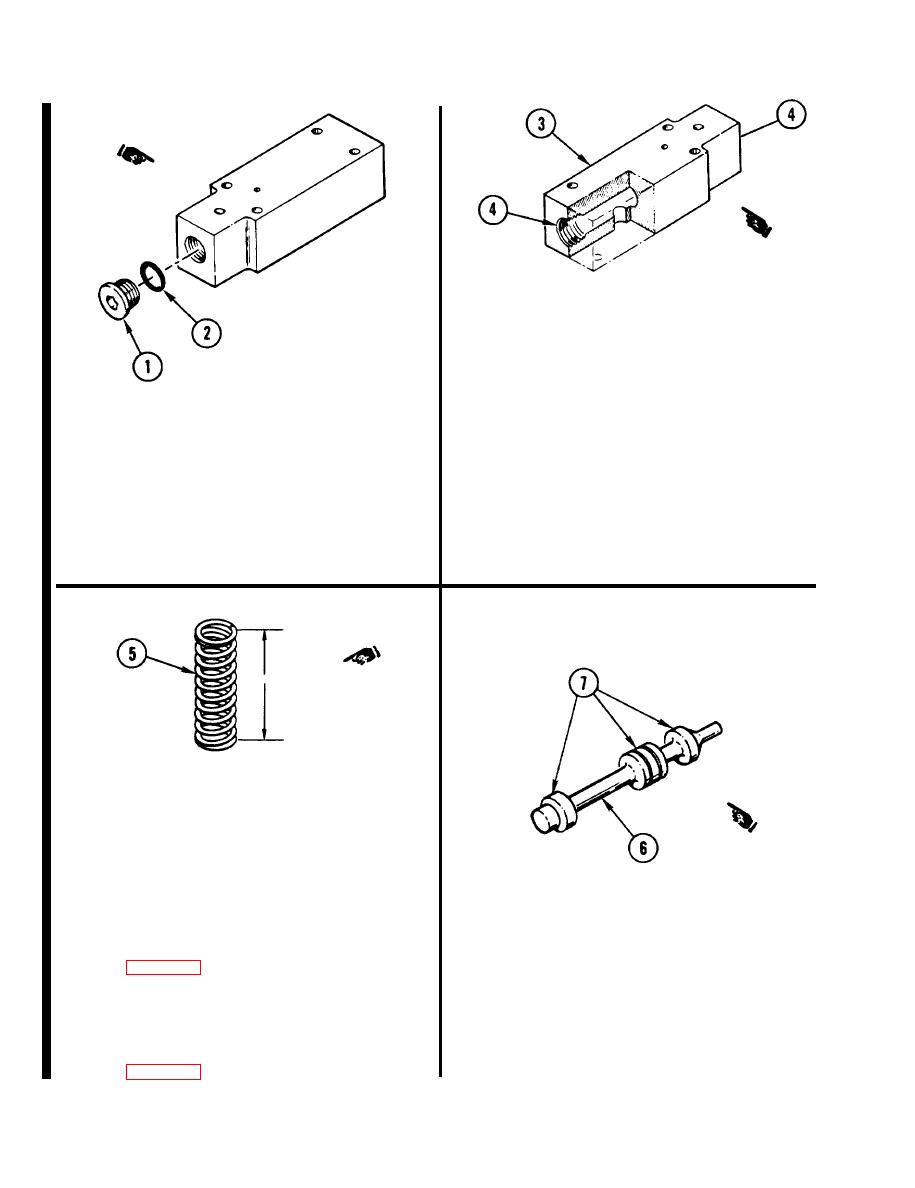
1 4 . 4 CHECK HOUSING (3)
a. Using small hole gage set and
micrometer caliper set, measure
bore (4) in both ends of housing (3).
Do not measure threads.
b. If either measurement of bore (4)
14.3 REMOVE PLUG (1).
is greater than 0.6256 inch
Using 1/2-inch drive ratchet handle
a.
(15.890 mm), replace valve assembly
with adapter and 1/4-inch socket
and go to step 14.5. If not, go to
wrench attachment, carefully remove
step 14.6.
plug (1).
Remove and discard preformed
14.5 EFFORT IS COMPLETE. GO TO
b.
packing (2).
END OF TASK.
14.6 CHECK SPRING (5).
a. Using indicator caliper, measure free
length of spring (5). Replace spring if
free length is less than 1.90 inches
(48.3 mm).
1 4 . 7 CLEAN THIRD RANGE RELAY
VALVE ASSEMBLY.
14.9 CHECK SLIDE (6).
a. Clean assembly and hardware. See
a. Using micrometer caliper set,
measure three diameters (7)
1 4 . 8 INSPECT THIRD RANGE RELAY
b. Replace slide (6) if any meas-
VALVE ASSEMBLY.
urement is less than 0.6241 inch
(15.852 mm).
a. Inspect assembly and hardware. See
c. Go to step 29.
4-508.2
Change 2
|
|
Privacy Statement - Press Release - Copyright Information. - Contact Us |
