 |
|||
|
|
|||
|
|
|||
| ||||||||||
|
|
 TM 9-2520-270-34
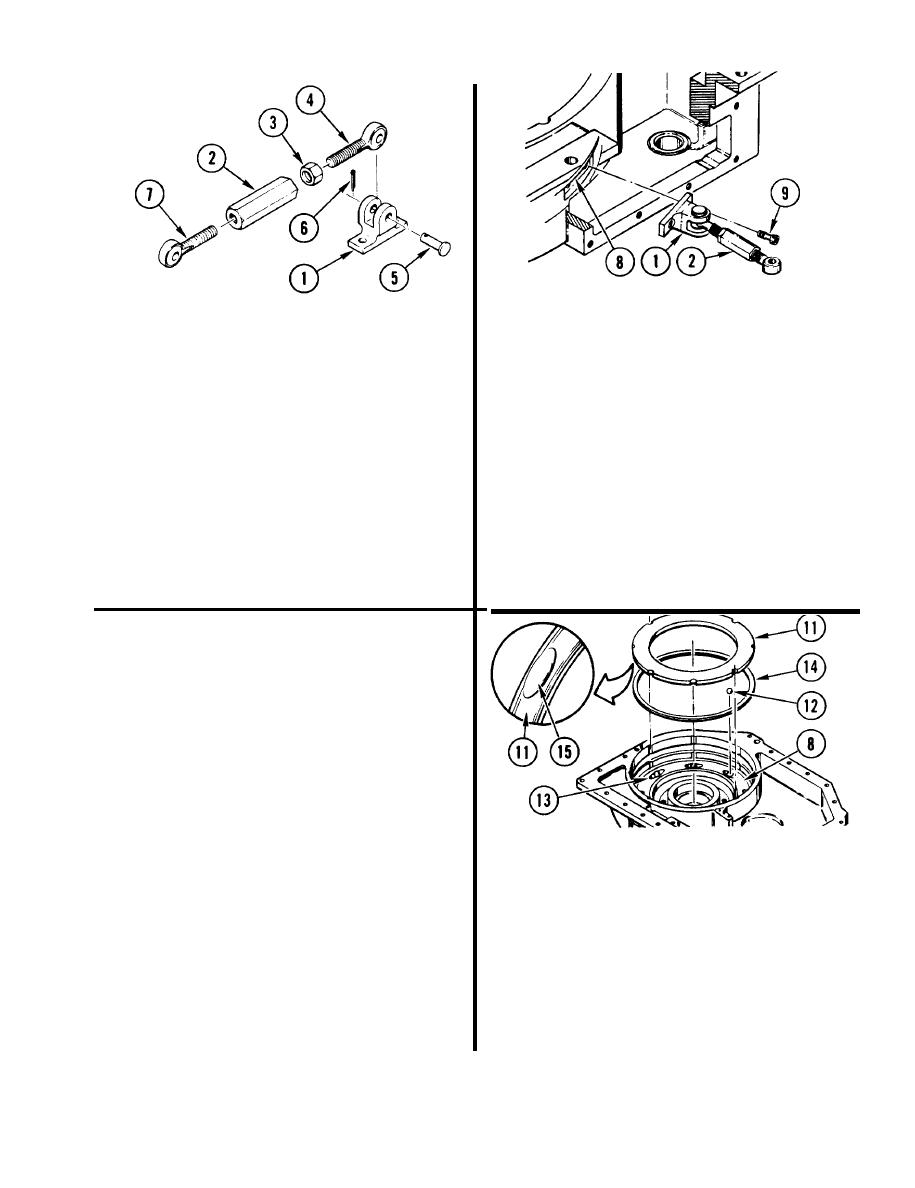
37. INSTALL CLEVIS (1) AND ADJUSTER (2).
NOTE
a. Place clevis (1) and adjuster (2)
Rod end connector (7) has left-hand threads.
on plate (8).
b. Coat threads of two screws (9) with
36. ASSEMBLE ROD END CLEVIS (1)
sealant compound.
AND ADJUSTER (2).
c. Using 3/8-inch drive brace handle and
a. Install nut (3) on rod end
1/4-inch socket wrench attachment,
connector (4).
install two screws (9).
b. Install rod end connector (4) four
turns into adjuster (2).
38. USING 1/2-lNCH DRIVE TORQUE
c. Aline rod end connector (4) with
WRENCH WITH SOCKET WRENCH
clevis (1). Install pin (5) and new
ADAPTER, EXTENSION, AND
cotter pin (6).
1 / 4 - l N C H SOCKET WRENCH ATTACH-
MENT, TORQUE TWO SCREWS (9) TO
d. Install rod end connector (7) four
20-25 ft-lb (3 mkg).
turns into adjuster (2).
40. INSTALL INNER BRAKE ACTUATING
PLATE (11).
a. Install eight bearing balls (12) in
eight recesses (13) on outer plate (8).
b. Coat new special rubber seal (14) with
transmission oil.
c. Install seal (14) on inner plate (11).
d. Install inner plate (11) with
recesses (15) facing balls (12). Be
39. (DELETED)
sure plate is firmly seated on balls.
GO TO NEXT PAGE
4-331
Change 2
|
|
Privacy Statement - Press Release - Copyright Information. - Contact Us |
