 |
|||
|
|
|||
|
Page Title:
REPLACE RIGHT-HAND OUTPUT HOUSING |
|
||
| ||||||||||
|
|
 TM 9-2520-270-34
REPLACE RIGHT-HAND OUTPUT HOUSING
DESCRIPTION
This task covers: Remove (page 4-270). Install (page 4-275).
INITIAL
SETUP
Materials/Parts:
Tools:
Cleaning solvent (Item 1, App B)
C r o w f o o t attachment (Item 20, App C)
Petrolatum (Item 7, App B)
Crowfoot attachment (Item 21, App C)
Wiping rag -- (Item 13, App B)
Fixture removal assembly --
Wood block (2) -- (Item 4, App D)
(Item 29, App C)
Gasket
Flat washer -- (Item 30, App C)
Gasket
General mechanic's tool kit:
Lock washer (10)
automotive -- (Item 33, App C)
Lock washer (28)
Hex-head cap screw (Item 36, App C)
Lever arm (Item 43, App C)
Personnel Required:
Output housing installer --
(Item 57, App C)
Track Veh Rep 63H10
Self locking nut (Item 67, App C)
Helper (H)
Socket wrench adapter --
(Item 75, App C)
Equipment Conditions:
Socket wrench set (Item 89, App C)
Torque wrench -- (Item 99, App C)
Transmission mounted on tip-over stand.
Torque wrench -- (Item 100, App C)
See page 2-144.
Lifting device with lift capability of
at least 3000 Ibs (1361 kg)
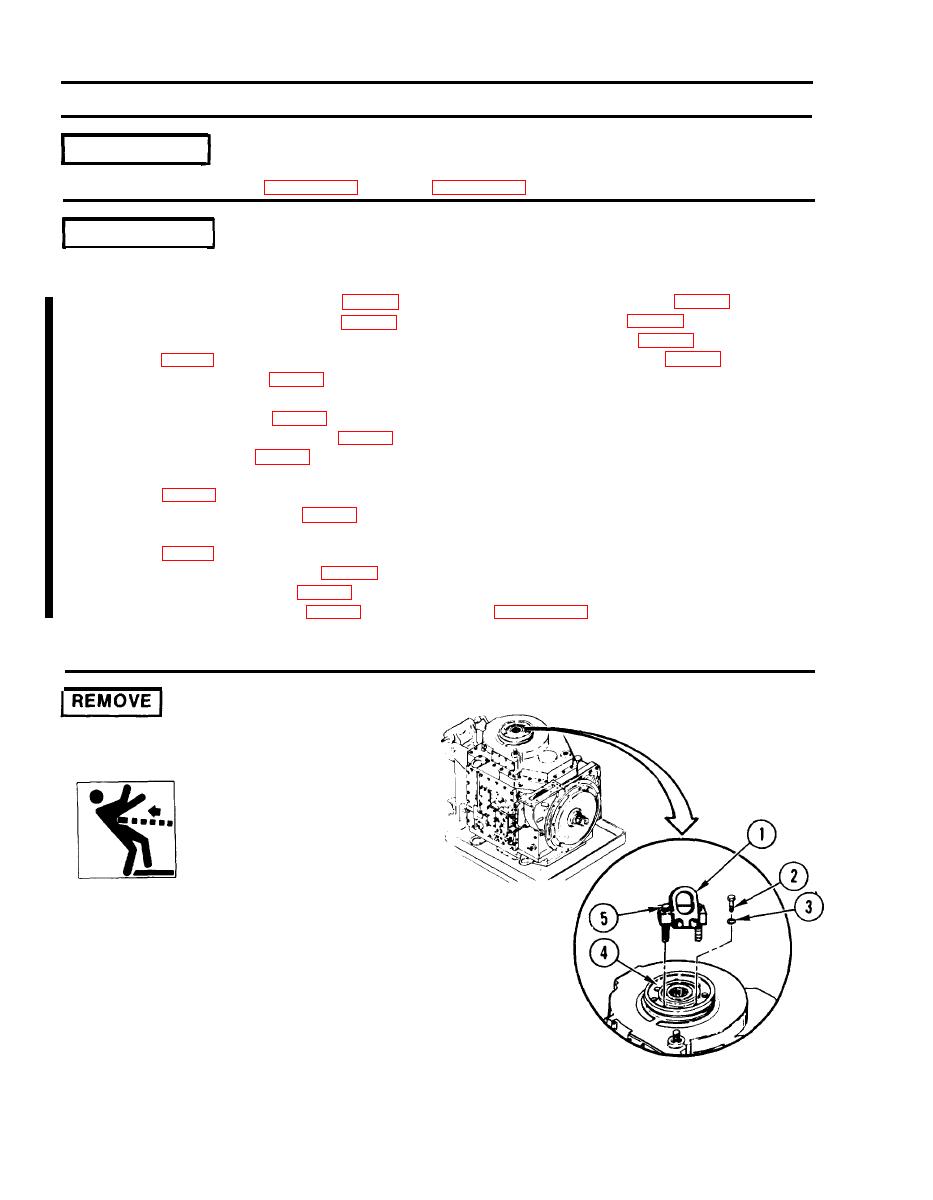
WARNING
Fixture removal assembly must
be installed in position shown.
Output housing is heavy. im-
proper installation of removal
assembly can cause an uneven
lift and injury to personnel.
1.
I N S T A L L FIXTURE REMOVAL
ASSEMBLY (1).
a. Remove two screws (2) and lock
washers (3).
b. Put removal assembly (1) on output
carrier (4).
c. Tighten two screws (5).
4-270
Change 1
|
|
Privacy Statement - Press Release - Copyright Information. - Contact Us |
