 |
|||
|
|
|||
|
|
|||
| ||||||||||
|
|
 TM 9-2520-270-34
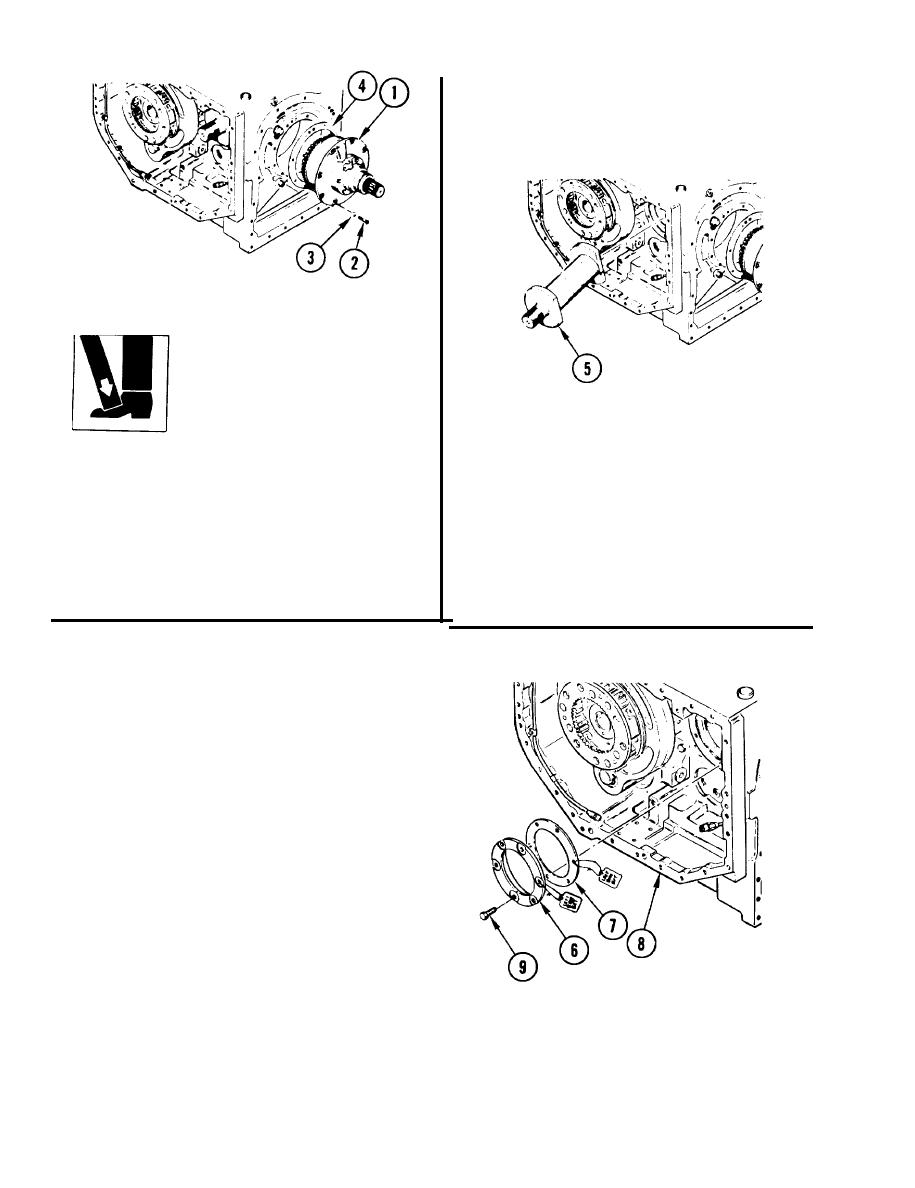
WARNING
Input bevel assembly is heavy
and awkward. Remove slowly
or input bevel assembly can
fall and injure you.
75. REMOVE INPUT BEVEL ASSEMBLY (1).
a.
Remove eight screws (2) and
washers (3).
NOTE
b.
Using both hands, grasp assembly (1)
Fixture must be pulled part way out and tilted
and pull straight out.
to remove. Fixture is exact fit and can easily
stick.
c.
Remove and save shim(s) (4) for
step 84.
76. REMOVE FIXTURE (5).
NOTE
Shim(s) will only goon one way. Nicks and burrs
must be removed from shim(s) before use.
77. INSTALL LEFT SIDE SET RETAINER (6)
AND SHIM(S) (7),
a,
If shim(s) (7) were lost or damaged
during removal, start installation with
.050 inch shim(s).
b,
Remove tags from retainer (6) and
shim(s) (7).
c.
Aline six bolt holes in retainer (6) and
shim(s) (7) with holes in housing (8).
d.
Using plastic-faced hammer, tap
retainer (6) into housing (8).
e.
Install six bolts (9).
78. USING l/2-l NCH DRIVE TORQUE
WRENCH, TORQUE SIX BOLTS (9)
TO 25-30 ft-lb (3-4 mkg).
4-110
|
|
Privacy Statement - Press Release - Copyright Information. - Contact Us |
