 |
|||
|
|
|||
|
|
|||
| ||||||||||
|
|
 TM 9-2520-270-34
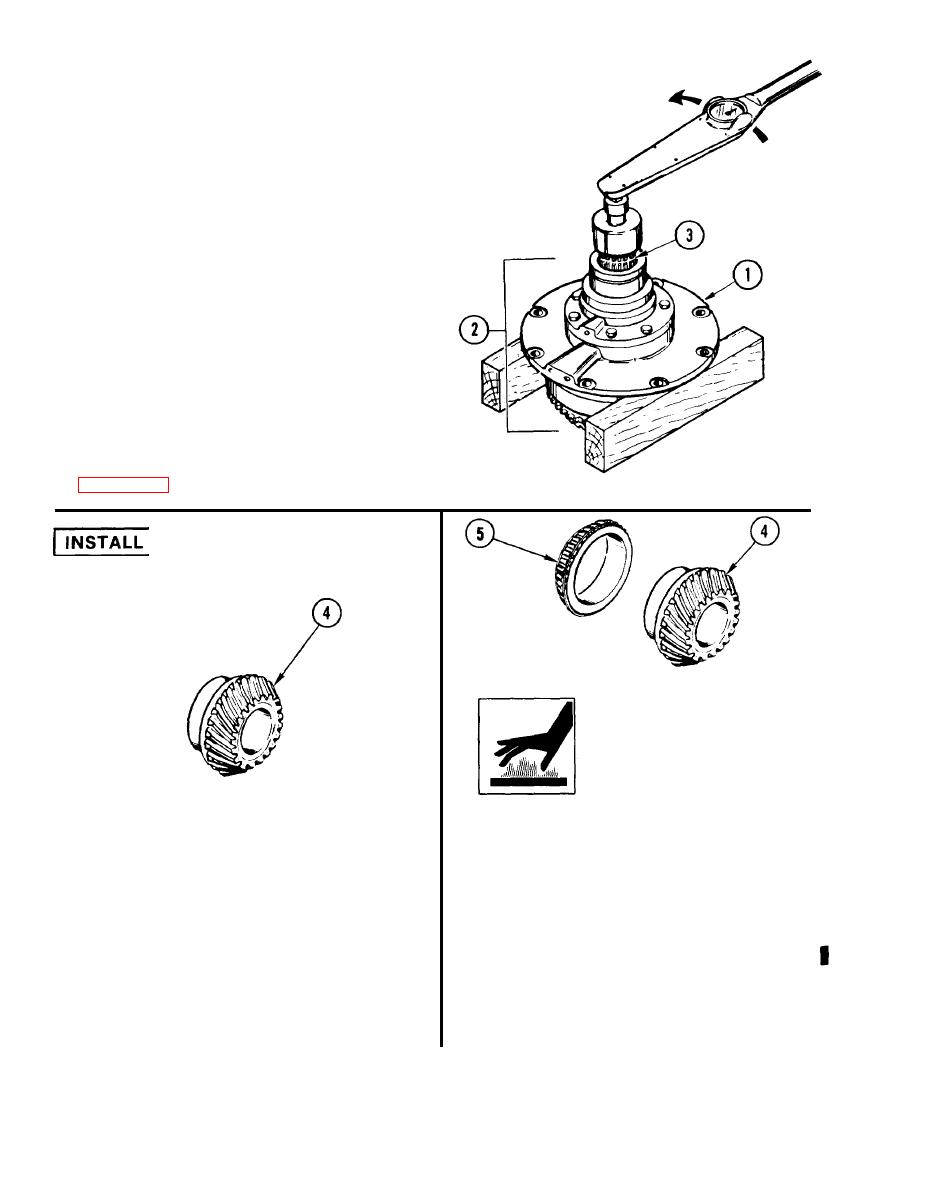
43. PLACE BEARING HOUSING ASSEM-
BLY (1) ON TWO WOOD BLOCKS.
a. Put blocks under outside edge of
housing assembly (1).
44. CHECK TURNING TORQUE OF
INPUT BEVEL ASSEMBLY (2).
a. (H) Hold housing assembly (1).
b. Using 3/8-inch drive torque wrench
with adapter and drag wrench, slowly
and smoothly turn input gearshaft (3)
completely around and measure turning
torque.
c. If turning torque is not 15-20 in-lb
(17-23 cmkg),
go to step 45. If
turning torque is 15-20 in-lb
(17-23 cmkg), go to step 46.
45. REPAIR INPUT BEVEL ASSEMBLY,
WARNING
Do not handle hot or cold
parts without protective
gloves. Personnel can be
injured.
47. INSTALL CONE AND ROLLERS (5)
ON PINION (4).
a.
Using dry ice, cool pinion (4) for
approximately two hours.
NOTE
b.
Using oven, heat cone and rollers (5)
Bevel gear and pinion are a matched set and
to 270 -300 F (132 -149 C) .
must be replaced together. Serial numbers of
Wearing gloves, slide cone and
c.
gear set must match.
rollers (5), wide end first, onto
pinion (4), fully seating cone and
46. INSTALL PINION
(4).
rollers against pinion shoulder.
If pinion (4) was removed, go to
a.
d.
Let parts return to room temperature.
step 47. If not, go to step 48.
Change 1
4-102
|
|
Privacy Statement - Press Release - Copyright Information. - Contact Us |
