 |
|||
|
|
|||
|
Page Title:
CLEAN GASKET MOUNTING SURFACE OF VALVE ASSEMBLY |
|
||
| ||||||||||
|
|
 TM 9-2520-270-34
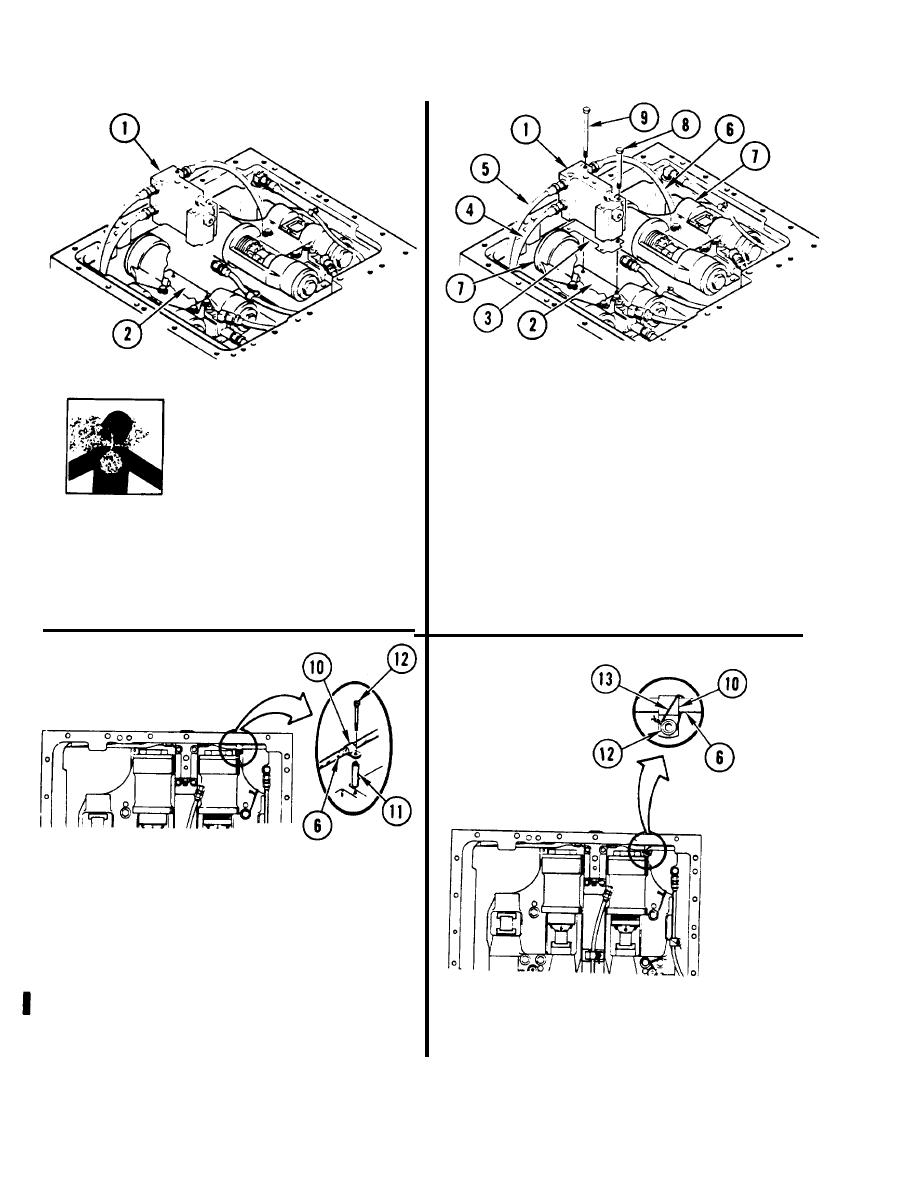
22. INSTALL VALVE ASSEMBLY (1).
a. Position new gasket (3) and valve
WARNING
assembly (1) on housing (2).
Solvent fumes can burn and
could poison you. Read warn-
b. Feed hose assemblies (4), (5), and (6)
ing In the front of this
behind two actuator assemblies (7).
manual.
c. Install two short screws (8) and two
long screws (9).
2 1 . CLEAN GASKET MOUNTING SURFACE
23. U S I N G 3/8-lNCH DRIVE TORQUE
OF VALVE ASSEMBLY (1) AND
W R E N C H AND 7/16-lNCH SOCKET,
H O U S I N G (2).
TORQUE TWO SCREWS (8) AND TWO
a. Use wiping rag dampened with
SCREWS (9) TO 120-145 in-lb
cleaning solvent.
(138-167 cmkg).
24. SECURE HOSE ASSEMBLY (6).
a. Install clamp (10) and spacer (11).
b. Using 3/8-inch drive ratchet handle
and 5/32-inch socket wrench attach-
ment, install new screw (12).
25. USING 3/8-lNCH DRIVE TORQUE
26. INSTALL LOCKWIRE (13).
W R E N C H , 6-INCH EXTENSION, AND
5 / 3 2 - l N C H SOCKET WRENCH
a. Using wire-twister pliers, install lock-
A T T A C H M E N T , TORQUE SCREW (12)
wire (13) through screw (12), around
TO 35-45 in-lb (40-52 cmkg).
hose assembly (6), and clamp (10).
4-22
Change 1
|
|
Privacy Statement - Press Release - Copyright Information. - Contact Us |
