 |
|||
|
|
|||
|
|
|||
| ||||||||||
|
|
 TM 9-2520-270-34
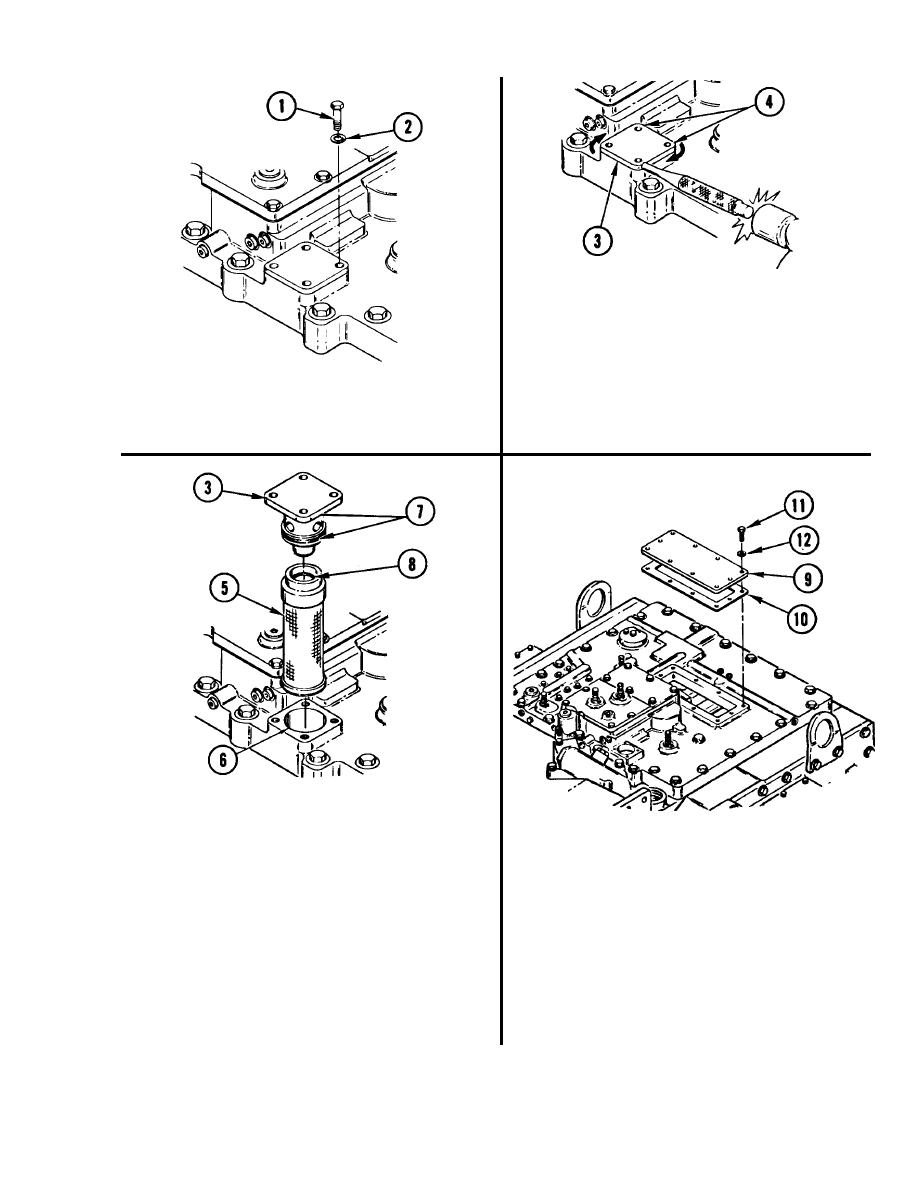
3. REMOVE CAP (3).
a. Using hammer and punch, rotate
cap (3) to the right. Rotate until pry
bar can be placed under a corner (4)
of cap.
2. REMOVE FOUR SCREWS (1) AND
b. Using pry bar under cap (3), pry
LOCK WASHERS (2). DISCARD
up cap and lift off.
LOCK WASHERS.
NOTE
Filter element may be found either on cap or In
CAUTION
hole.
Failure to clean area around access cover can
result in damage to transmission.
4.
REMOVE FLUID FILTER ELEMENT (5).
a. Pull element (5) from cap (3)
6. REMOVE ACCESS COVER (9)
or hole (6).
AND GASKET (10).
b. Cover hole (6) with clean rag.
a. Remove 10 screws (11) and lock
washers (12). Discard lock washers.
5.
REMOVE AND DISCARD TWO
b. Lift off cover (9)
PREFORMED PACKINGS (7)
c. Remove and discard gasket (10).
AND HYDRAULIC O-RING (8).
GO TO NEXT PAGE
3-33
|
|
Privacy Statement - Press Release - Copyright Information. - Contact Us |
