 |
|||
|
|
|||
|
|
|||
| ||||||||||
|
|
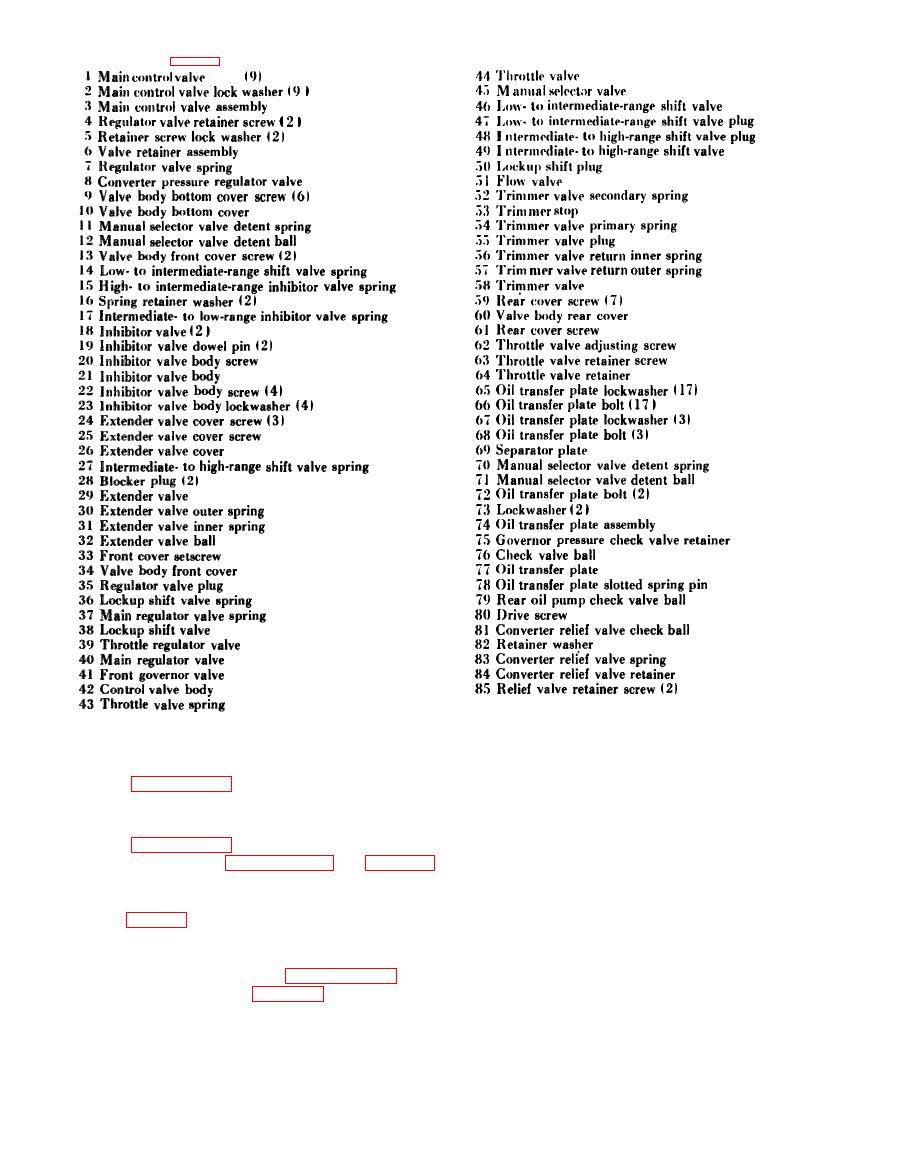 LEGEND
to
bolt
a. Place oil transfer plate (77) on a table, bottom
5-49. Cleaning
side up, and install ball (81), washer (82), spring
Refer to paragraph 5-2 for cleaning recom-
(83), and retainer (84). Install two screws (85) in
mendations.
retainer and plate. Tighten screws to 24 to 36
pound-inches torque.
Refer to paragraph 5-3 for cleaning recom-
b. If drive screw (80) was removed, install new
mendations. Refer to paragraph 6-3 and table 6-3
screw.
for general wear limits information.
c. If slotted spring pin (78) was removed, install
5-51. Assembly
new pin by driving it in place until end projects
0.400 inch from plate surface.
NOTE
d. If retainer (75) and ball (76) were removed,
All items not covered in a through d below
install new parts. Press in until flush, to below
are installed as outlined in paragraph 5-58,
flush, with plate surface.
steps 43 through 48 (fig. 5-126 through 5-
1 3 1 ) . No overhaul (rebuild) of such
components is required or recommended.
|
|
Privacy Statement - Press Release - Copyright Information. - Contact Us |
