 |
|||
|
|
|||
|
|
|||
| ||||||||||
|
|
 NOTE
5-29. Cleaning
Do not stretch seal any more than is
Refer to paragraph 5-2 for cleaning recom-
absolutely necessary.
mendations.
(3) Install seal expander (fig. 5-78) into inner
groove of piston.
Refer to paragraph 5-3 for general inspection and
NOTE
repair recommendations. Repair and overhaul
Both ends of seal expander must be as
(rebuild) points of measurement for fits, clearances,
shown in figure 5-78 when it is coiled. Ends
and wear limits are indicated by small letters in
must curve away from seal ring so that they
will not gouge seal.
for general wear limits information. Do not scuff,
(4) Starting at a point opposite open ends of
cut, tear, or distort Teflon seal ring.
expander, install seal into groove.
(5) Center piston in piston housing, and push
5-31. Assembly
evenly into piston bore. The broader, flat side of
piston goes toward housing bore.
NOTE
(6) Install 12 springs (34) in housing assembly
All items not covered in a and b below or in
(25).
separate rebuild sections, are installed as
b . Low-and Reverse-Range Clutch Piston
outlined in paragraph 5-58, assembly steps
11 through 20 (fig. 5-93 through 5-102).
(1) If necessary to replace any of six anchor
No overhaul (rebuild) of such components
pins (54), press pin(s) into housing (52) until end
is required or recommended.
of pin with hole projects 1.85 inches from flat side
a. Intermdiate-range Clutch Piston Housing
of housing. Hole in end of pin must point ap-
proximately toward center of housing.
(1) Install seal expander (fig. 5-77) into outer
(2) If necessary to replace two anchor pins
groove in piston.
(53), press them in until end of pin(s) projects 0.62
NOTE
inch from flat side of housing.
Both ends of seal expander must be as
(3) Install reverse-range clutch piston hook-
shown in figure 5-77 when it is coiled. Ends
type seal ring (55) and low-range clutch piston
must curve away from seal ring so that they
hook-type seal ring (50).
will not gouge seal.
(4) Install seal expander (2, fig. 5-75) on
(2) Starting at a point opposite open ends of
reverse-range clutch piston (3, fig. 5-75) in same
expander, install seal ring in groove. It will be
manner as instructed in a (1) above.
necessary to stretch outer seals slightly to get them
(5) Install reverse-range clutch piston seal ring
into the groove.
(1 , fig. 5-75) in same manner as instructed in a (2)
above.
(6) Install seal expander (48) on low-range
clutch piston (47) in same manner as instructed in
a (l) above.
(7) Install low-range clutch piston seal ring
(49) in same manner as instructed in a (2) above.
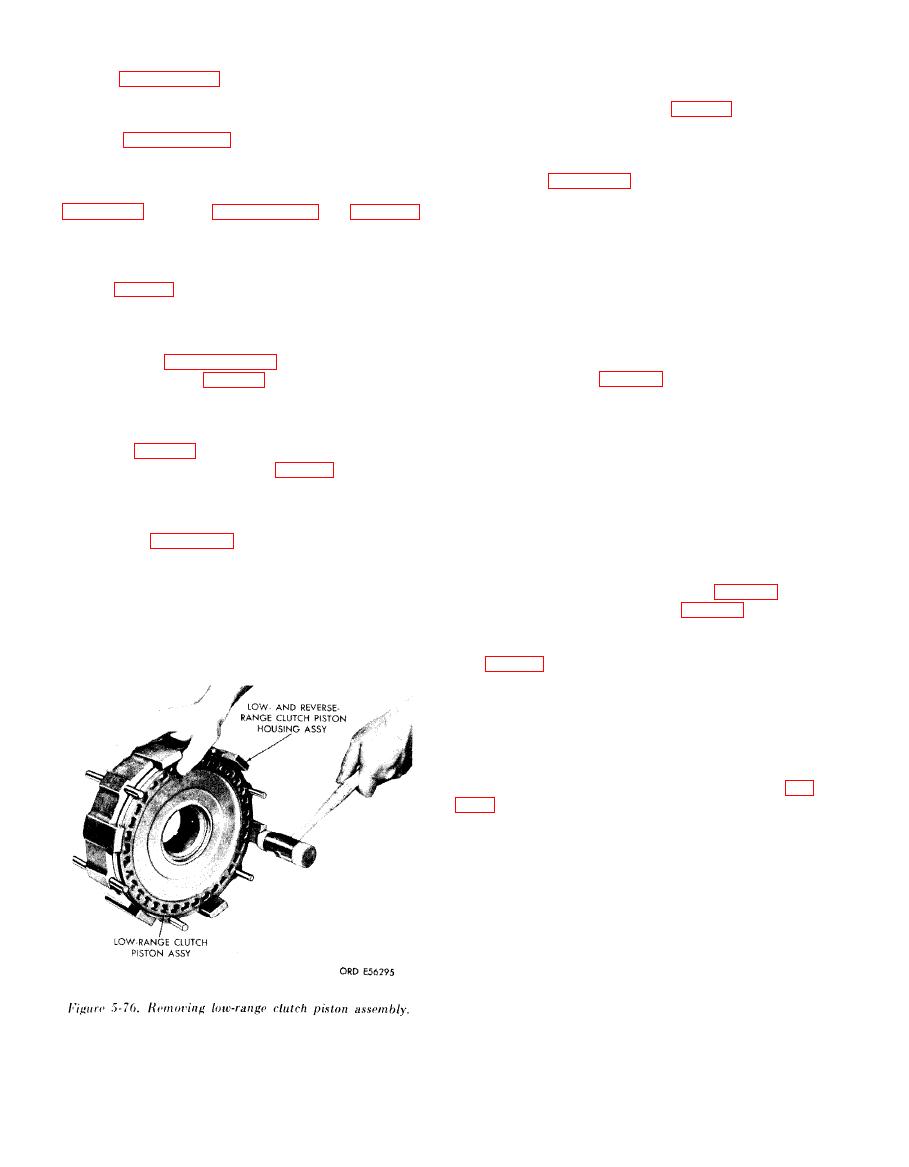
(8) Center reverse-range clutch piston (3, fig.
respective bores in housing (52), and push each
evenly into bores in housing. The broader, flat sides
of pistons go toward housing bores.
|
|
Privacy Statement - Press Release - Copyright Information. - Contact Us |
