 |
|||
|
|
|||
|
|
|||
| ||||||||||
|
|
 TM 9-2520-249-34&P
clutch housing (2).
7-34. Inspection and Repair
b. Remove high-range clutch back plate (11).
Refer to paragraph 5-3 for inspection and repair
c. Remove five internal-splined (10) and five
recommendations.
external-tanged (9) high-range clutch disks.
7-35. Repair Standards
spring retainer (14, (FO-4), compress the spring retainer
repair standards.
and remove retaining ring (15). Refer to figure 7-6.
a. If balls (3) were removed from housing (2),
install new balls. Stake metal in three places at the end
of the hole, to retain the ball, but not to affect its
movement in the hole.
b. Install sealring (8) onto the hub of housing
(2).
c. Install eight high-range clutch anchor pins
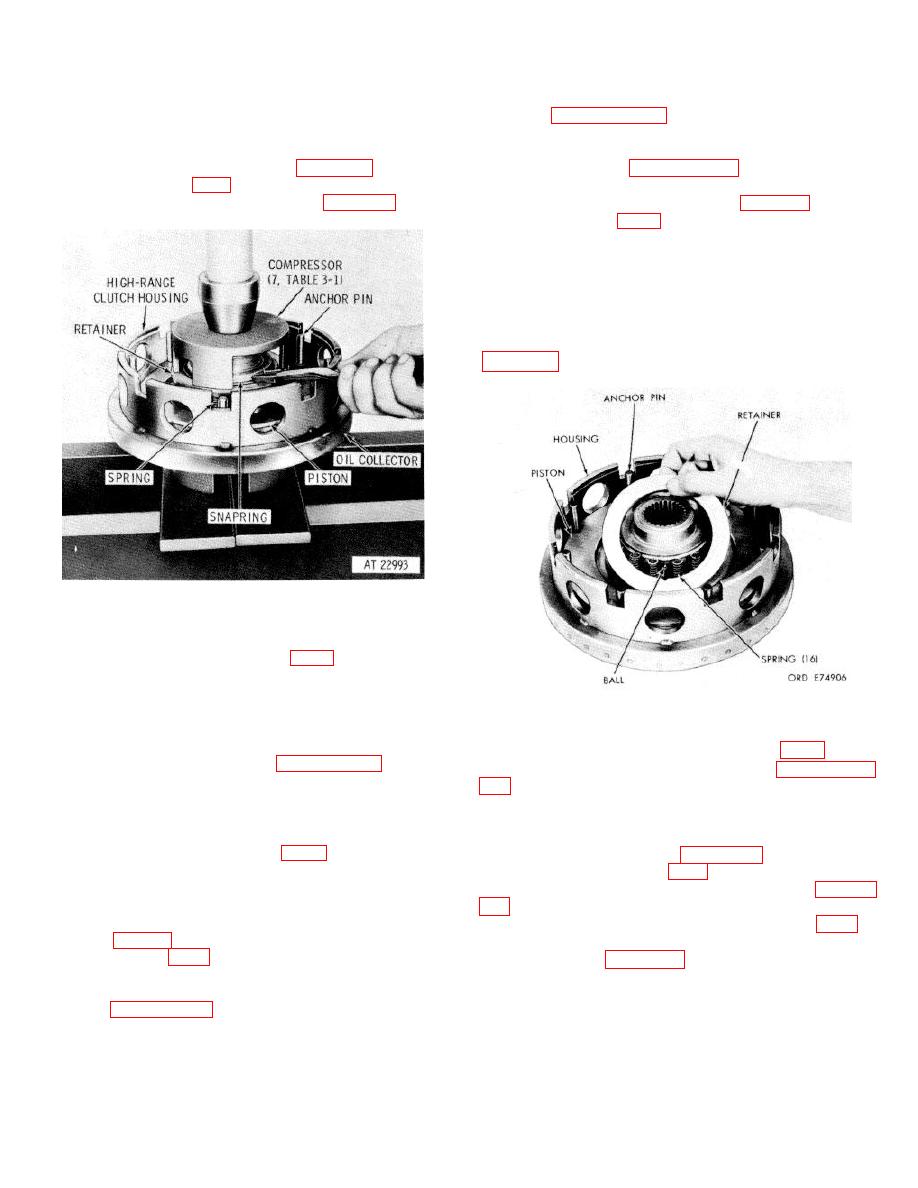
Figure 7-6. Removing (or installing) high-range clutch
piston return spring retainer retaining ring.
springs (12).
f.
Remove spring retainer locating ball (13).
Figure 7-7. Installing high-range clutch piston return
g. Remove eight anchor pins (4).
spring retainer.
h. Remove high-range clutch piston (7).
i.
Remove sealring (5) and expander spring
(6) from piston (7), as outlined in paragraph 7-51.
sealring (5) onto piston (7), as outlined in paragraph 7-
WARNING
55, following.
Do not dispose of Teflon sealrings by
e. Lubricate sealring bores and sealrings with
burning. Toxic gases are produced when
the same oil as used in the power train and carefully
Teflon is burned.
install piston (7) with expander spring (6) and sealring
i.
Remove sealring (8, FO-4) from hub of
(5) into housing (2). Refer to figure 7-7.
housing (2).
f.
Install ball (13, FO-4) into the recess of the
k. Do not remove two balls (3) from housing
housing hub, retaining it with oil-soluble grease (fig. 7-
(2) except for replacement.
l.
Do not remove the oil collector from the
housing (fig. 7-6). If the ring is damaged, the collector
Indexing the retainer (14) with ball (13), install the spring
and housing (2, FO-4) will have to be replaced as an
retainer. Refer to figure 7-7.
assembly.
7-33. Cleaning
Refer to paragraph 5-2 for cleaning recommendations.
7-8
|
|
Privacy Statement - Press Release - Copyright Information. - Contact Us |
