 |
|||
|
|
|||
|
Page Title:
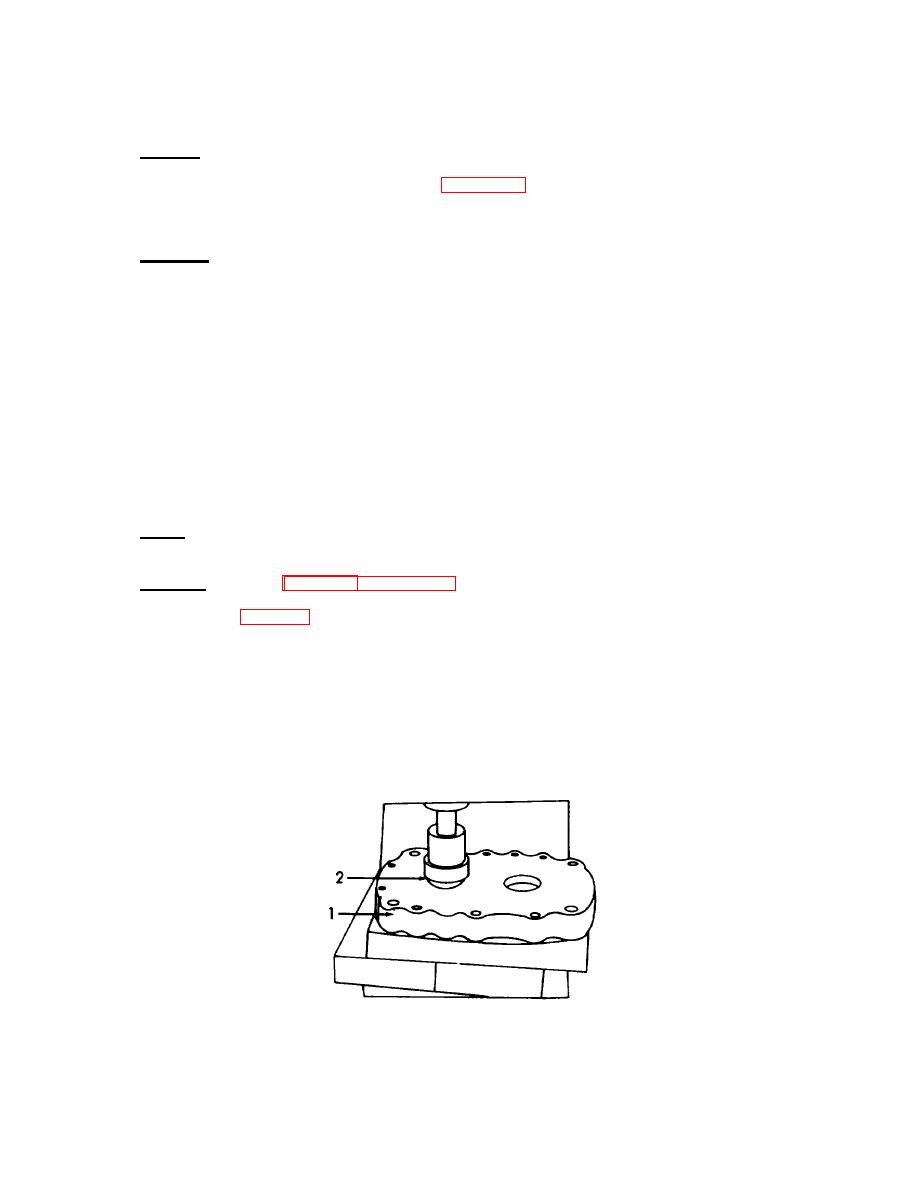
Figure 3-34. Oil Seals, Installation. |
|
||
| ||||||||||
|
|
 TM 55-1930-208-24
3-19
BLOWER- Continued.
c. Cleaning.
(1) Clean all parts in clean fuel oil (item 9, Appendix C).
(2) Wipe off excess oil and dry.
d. Inspection.
(1) Inspect for missing or damaged hardware.
(2) Inspect bearings for signs of corrosion and pitting.
(3) Inspect seals for scoring and lack of pliability.
(4) Inspect rotor lobes for scoring, burrs, and cracks.
(5) Inspect rotor shafts for burrs, wear, peeling, and cracks.
(6) Inspect housing and end plates for burrs, scoring, rust, corrosion, and cracks.
(7) Inspect gears for damage, wear, and chipped teeth.
e. Repair. Repair of blower is limited to the replacement of defective parts and to the removal of small
burrs and light scoring with emery cloth.
f. Assembly. (Refer to figures 3-34 through 3-43).
(1) Refer to figure 3-34 and use wooden blocks to support the end plate (1) finished side up on arbor
press.
(2) Start the oil seal (2) straight into the bore with sealing edge facing down.
(3) Place the short end of oil seal remover and installer into the oil seal (2) and press seal into the
plate.
(4) Repeat steps (1) through (3) for the rest of the oil seals on both plates.
Figure 3-34. Oil Seals, Installation.
3-64
|
|
Privacy Statement - Press Release - Copyright Information. - Contact Us |
