 |
|||
|
|
|||
|
Page Title:
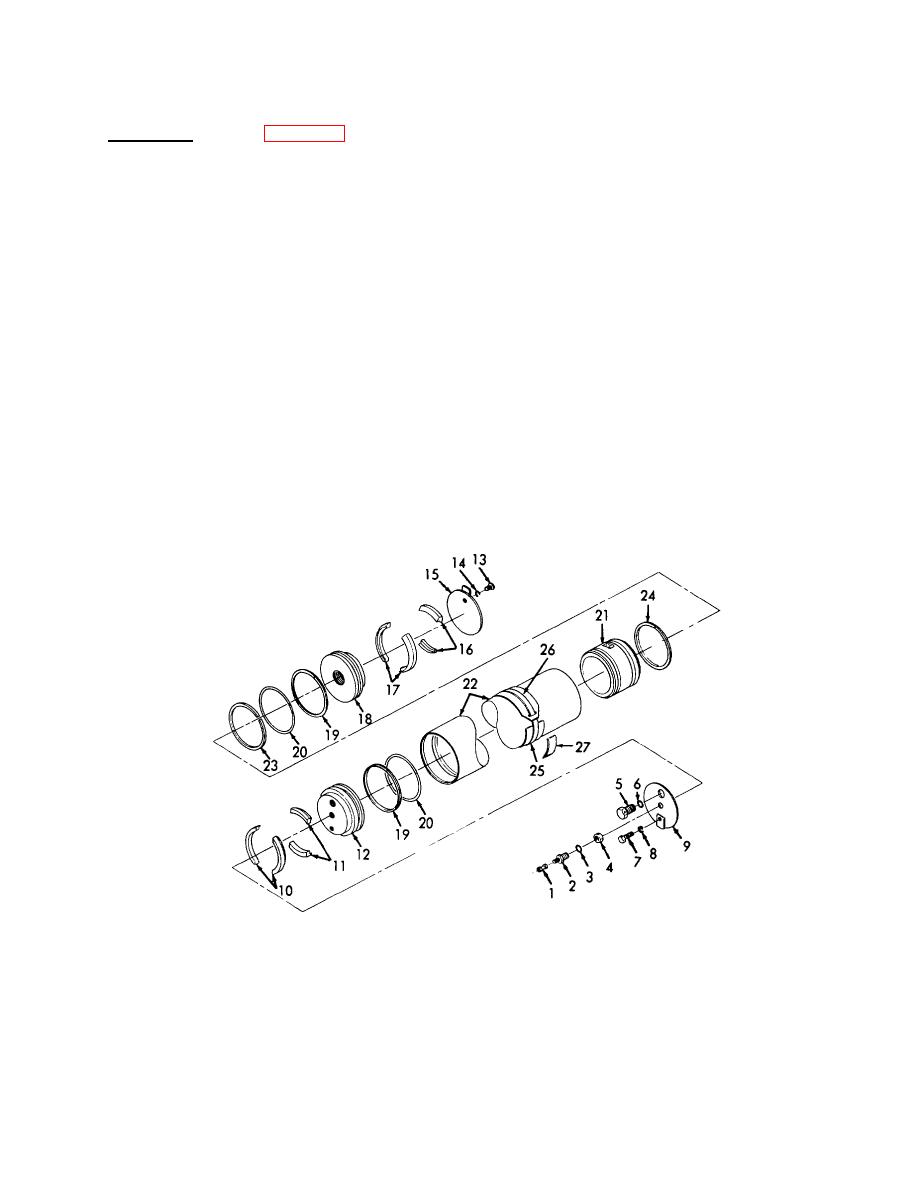
Figure 3-12. Accumulator, Disassembly/Reassembly. |
|
||
| ||||||||||
|
|
 TM 55-1930-208-24
3-13. ACCUMULATOR-Continued.
b. Disassembly. (Refer to figure 3-12).
(1) Remove cap (1), valve assembly (2), gasket (3), and nut (4).
(2) Remove fuse assembly (5) and gasket (6).
(3) Place accumulator in a pipe vise and remove screw (7), lockwasher (8), and plate (9).
(4) Screw -20 screw into air valve port and push end cap (12) away from ring segments (10 and 11).
Remove ring segments (10 and 11) and pull out end cap (12). Leave screw in end cap for reassembly.
(5) Remove screw (13), lockwasher (14), and plate (15).
(6) Screw -20 screw into air valve port and push end cap (18) away from ring segments (16 and 17).
Remove ring segments (10 and 11) and pull out end cap (18).
(7) Remove two packings (19) and two seals (20) from end caps (12 and 18).
(8) Use a wooden dowel and push piston (21) from housing (22).
(9) Remove ring (23) and seal (24).
(10) Remove clip (25), strap (26), and name plate (27).
Figure 3-12. Accumulator, Disassembly/Reassembly.
3-30
|
|
Privacy Statement - Press Release - Copyright Information. - Contact Us |
